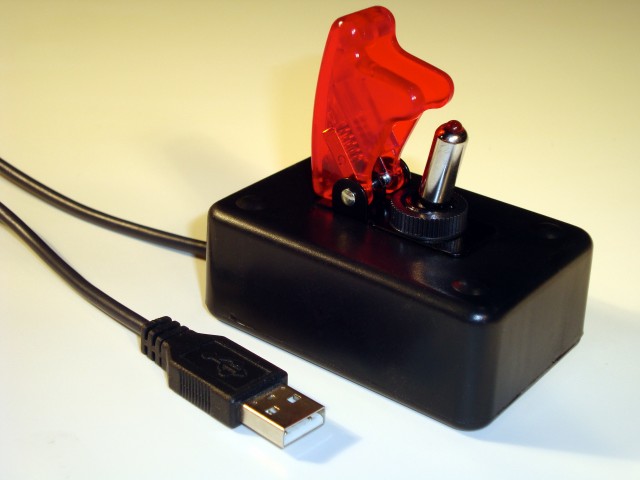
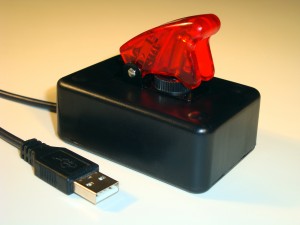
This is “The Critic.” It’s the USB accessory version of a red pen: Once armed by rotating the red safety cover up, the device is activated by simply flipping the toggle switch. When connected to a computer via the convenient USB plug, it will begin to delete text, continually deleting until all the (presumably erroneous) text preceding the curser has vanished. At that point, the safety cover can be lowered, thereby deactivating the device. The Critic is an indispensable tool for use when the document you’re editing is just so full of errors that your fingers begin to ache from holding down the delete key. The Critic measures 3″ by 2″ by 2″ tall, and was designed to fit conveniently within arm’s reach, beside your keyboard or mouse.
 I was inspired by the open source work of Pete at RasterWeb! and his recent effort to bring “The Button” to a wider audience of busy or non-makers. He has freely helped tens of people create their own buttons, but is now able to fulfill requests for preassembled units. Among other applications, these USB buttons can be used as the shutter control of Mac powered Photo booths at public events. These photo booths are powered by Sparkbooth, which can automatically upload the photos to Facebook, Twitter, tumblr or other social media sites. His buttons emulate a keyboard, and contain an Arduino Teensy (only 0.7″ by 1.2″), which is a USB based AVR microcontroller. Despite the Teensy cost of $16, I saw an opportunity for cost savings by opening a standard USB keyboard and spending a few minutes to extract and reverse engineer their compact circuit board. Although this isn’t a solution suitable for even small scale production, it can work for a one-off prototype, like The Critic.
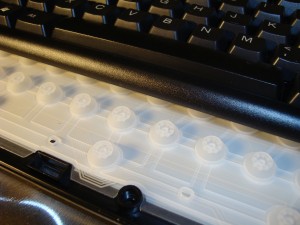
Below are several photos that show the process of opening the keyboard to extract and modify the circuit board. When the top of the keyboard is removed, a sheet of silicone ‘popples’ is revealed. These ‘popples’ are the springs under each of the keys. Under this layer are two sheets of thin plastic, one with conductive ink traces that are (mostly) horizontal, and one with conductive ink traces that are (mostly) vertical. These layers of traces are separated by a small gap. When a key is pressed, a protrusion on the bottom of that key’s popple pushes the two layers of plastic together at this location: connecting one of the vertical traces to one of the horizontal traces. These traces are routed to the circuit board via a row of contacts under the front edge:
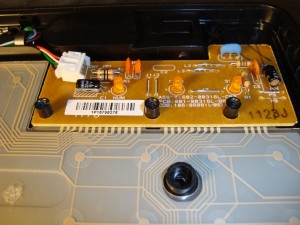
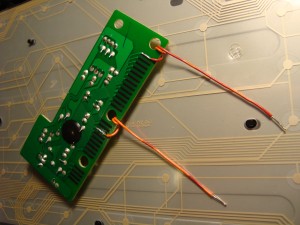
The chip (under the black epoxy potting on the bottom of the board) detects this electrical connection, and outputs the appropriate character over the USB cable. The keyboard, popples and plastic layers can all be replaced by an external switch and wires soldered directly to the circuit board. The photo below shows wires (whose free end is to be connected to the switch) soldered to the pads required to output a space bar character. To output other characters, simply follow the vertical and horizontal traces to the board, and solder wires to those pads instead.
RasterWeb! approves of this message.
cool idea. if you don’t wanna kill a keyboard for the electronics. you can do the same with the teensy easily.
Pete at RasterWeb! explains exactly how a Teensy can emulate a HID. The parts cost for The Critic as built (from a junky old keyboard) is a bargain at under $8. Using a Teensy & separate USB cable would bring the total cost up to $25, which is still a bargain.
I highly recommend the “tear apart a keyboard and find the important bits” if you’ve got the time and skills to do it.
[…] More information about The Critic can be found at: milwaukeemakerspace.org/2012/03/the-critic/ […]