Sometimes solving one problem creates a few new ones! As part of the Laser Cutter Room Reconfiguration, the exhaust system got an upgrade. A new, bigger, more powerful fan meant we needed a new way to control it. The previous system (Version 4.0) was a simple on/off switch. That just wasn’t going to cut it for this industrial grade blower. Tom G., Tony W., myself and others spent the holidays installing this new two-horsepower beast above the ceiling in the Craft Lab. Once it was hung from the roof joists with care, Tom got to work ducting it over to the Laser Cutter Room. Finally, when all the heavy lifting had been done and the motor drive had been wired up, all we needed was an enclosure for the switch.
The request went out on the message board. Pete P., Shane T., and I all expressed interest, but life got in the way and it soon became a matter of whomever got to it first would be the one to make it. I ended up devoting the better part of last weekend to this project (much more time than I anticipated) but I can honestly say I’m pretty happy with the result.
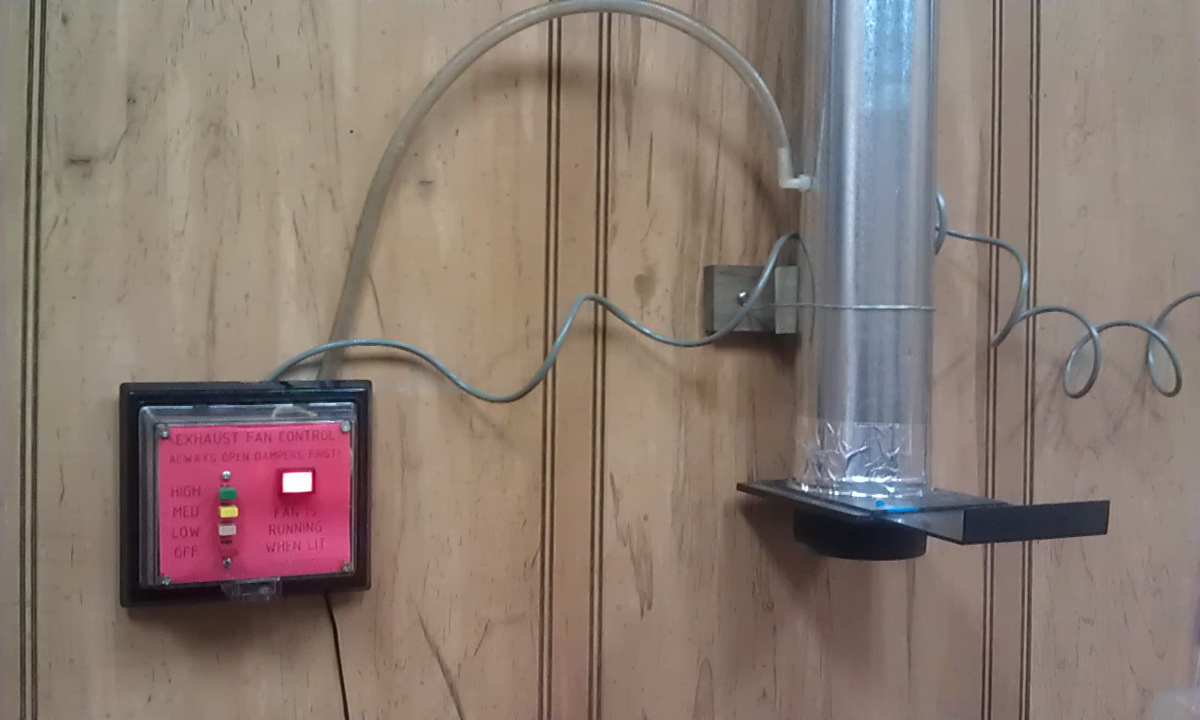
The goal was fairly straight-forward: make an enclosure for the switch Tom had already provided. It was a color-coded, 4-button, mechanical switch that had been wired to provide four settings: OFF, LOW, MEDIUM, and HIGH. The more laser cutters in use, the more air you’d need and the higher the setting you should choose. There’s four duct connections available for the three laser cutters we currently have.
There’s a saying: “Better is the enemy of done.” Truer words have never been spoken in a makerspace.
At first I wanted to build the enclosure out of acrylic. Then I remembered this awesome plastic bending technique that Tony W. and some others told me about. I found a video on the Tested website and got inspired. (If you don’t know about Tested, please go check it out. You’ll thank me later.) Unfortunately, my bends kept breaking and melting through, so after a few hours of tinkering I moved on.
Thankfully, we have a small cache of plastic and metal project enclosures on our our Hack Rack. I managed to find a clear plastic, vandal-proof thermostat guard. It looked workable.
I tried laser cutting it, but the moment I saw the plastic yellow and smoke, I knew there was probably some nasty, toxic stuff in it, so I moved to the CNC router. About an hour later I had my holes cut.
Then came the wiring. Up until this point I had been focused on the control box itself. Now I wanted to add a light!
No, two lights! Yeah!
One light to tell you when everything was off, and another that lit whenever the fan was in use. People could look at the lights from outside the room and instantly know if the fan had been left on. (It should be noted that the new fan, despite being twice as powerful than our last, is actually much quieter. Tom added a homemade muffler to the inlet of the blower and shrouded the whole contraption in 3″ fiberglass batt insulation. The best way to know if the fan is running is to open a slide gate damper and hear air being sucked in.)
OK, I totally got this.
Draw myself a ladder diagram and get out the wire connectors… Remember that I need to isolate the signals from each other so any button doesn’t call for 100% fan… A few more relays… Some testing… and done!
Wait a second… the motor drive doesn’t have a ground for the control signal.
Hmm.
Guess I can’t power it from the drive. I’ll just tie into the drive’s ground. Nope, that didn’t work.
I’ll read the motor drive manual. OK, it has a set of “run status” contacts I can monitor.
….and they’re putting out a steady 0.4 volts DC. That’s enough to light up a single LED! …except, no. It’s not lighting. Doesn’t seem to be any real current.
I’ll just use a transistor! That’s the whole point of a transistor!
….well nothing I tried worked.
I’ll build a voltage multiplier circuit!
….and this isn’t working either.
On Day 3 of this “little project” Ron B. made a comment about using a pressure switch of some kind.
Wait.
We have a Hack Rack full of junk and I know there’s this old bunch of gas furnace parts. It couldn’t be that easy…

Yeah. So, three days (and a few frustrating epiphanies) later, this all came together. Press the beige button, get some air. Press the other buttons, get some more air. Any time there’s suction, the red light comes on. The indicator light is powered by its own 24 volt DC wall pack. The pressure switch has both normally open (N.O.) and normally closed (N.C.) contacts so it would be totally feasible to add another light at some point. The controller could display “OFF” or “SAFE” or whatever as well as “ON” or “FAN IN USE” or whatever. The text is just a red piece of paper with words printed on it, then holes laser-cut out to fit. We can trade it out with different words or graphics if we ever feel the need. I was just glad to have it done, so I called it. Better is the enemy of done, indeed.

You can learn more about the evolution of our laser cutter venting system on our wiki!
Is it wrong that I laughed at “Vandalproof?” Great job to all who contributed!