Filament Spool

CAM00246

Early this year I purchased a Printrbot simple to have a printer I could keep on my desk at home. I didn’t need anything big, just something for printing pretty things and parts to fix stuff around the apartment so it was a perfect option.

While it has been a fantastic printer there was one drawback to it. That is that there is no place for the filament on the base model. There is an upgrade kit for the 2013 model (I am not sure it it works with the 2014 model that I have but I think so) that adds one on top but it was not really what I was looking for since it is only slightly adjustable width wise with some mods. Also I know me and I would knock it over.

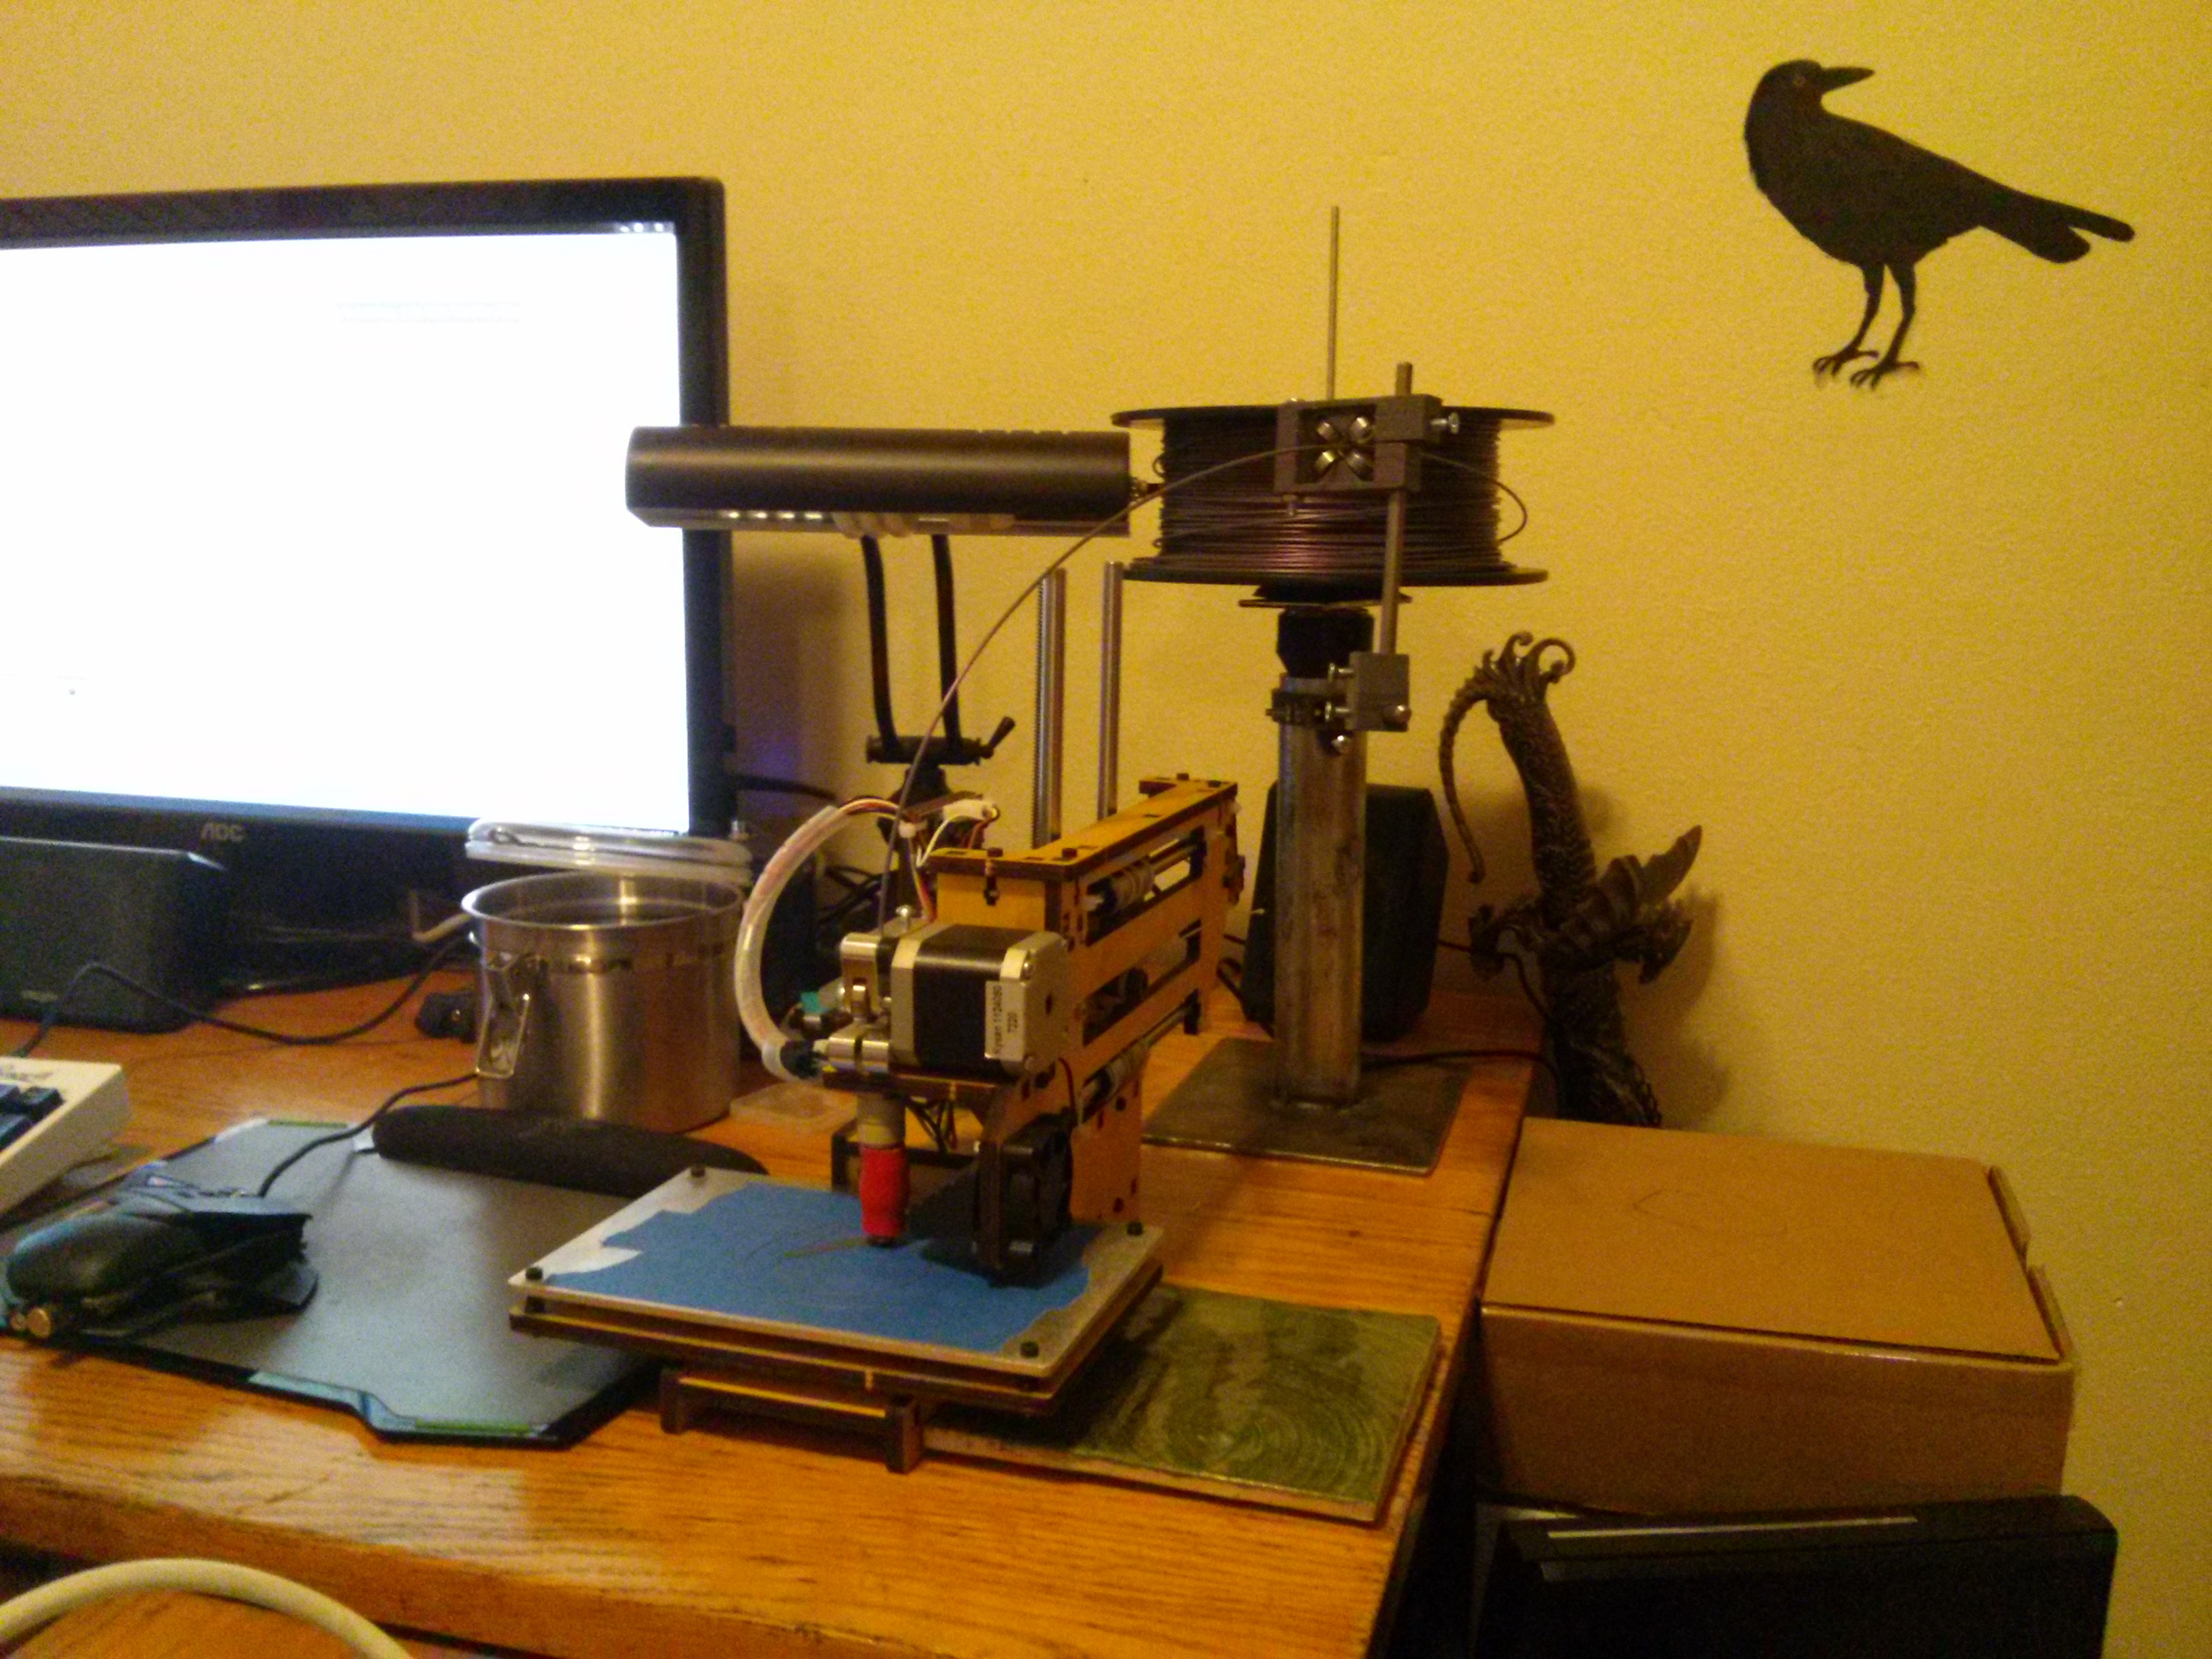
Using some parts and scrap from around the makerspace along with several printed parts (it is always fun printing parts for a printer on the printer you are printing them for) I designed something that will fit just about any filament spool, holds the spool in such a way that the printer barely has to work to un-spool more, and can be used to keep the printer from spinning off my desk when it decides it wants to start shaking and walking while printing.

The parts are now up on thingiverse with all the instructions to make one of your very own. http://www.thingiverse.com/thing:299541

Making a Game’s Box into it’s Board

So apparently I can only go a few months without ending up making a new game box. This time it is for a little card game called Kittens in a Blender. I know, I know. It sounds like I am going to have PETA kicking down the doors of MMS but it is a very enjoyable little card game for 2-8 players where you are trying to get all your kittens to the box and save them whilst getting all of your opponents kittens into the blender and dispatch them. I do not think I made that sound any less sadistic, but it is really a good game. If you ever can find it or get a chance to give it a go at a Con or at a friends I highly recommend it.

Getting back to the design now. In this game, like I said, you are essentially moving kittens around to a number of locations. 3 in play locations and 2 out of play locations. So, when I was thinking that I wanted a box for this game I decided that I should try and go for functionality and make the box, in essence, the board. Since there are 3 in play ‘buckets’ I took what I was doing with other boxes and just expanded it to three slots and increased the size to about 1.25 the size of the card so that they could be easily grabbed during play. And I added some labels on the lid for the two out of play buckets for blended and saved kittens.

Kittens in a Blender Box ClosedKittens In a Blender BoxKittens In a Blender Box Lid


Now this game lent itself really nicely to converting the box into the play area but I am sure there are lots of games that you could do something in the same vein as this for a lot of games. Similar to what I did for Zombie Dice where I made a cup with a locking lid or with Gosu where I added a turn counter and use the box as the draw and discard piles

More Game Boxes

Gloom and Zombie DIce

Gloom and Zombie Dice

I finally finished up the last of my game boxes this past weekend. These ones are for the original Gloom game and Zombie Dice.

Since Zombie Dice is, as you may suspect, a dice game I decided it needed something a bit more secure lid-wise so it could be easily transported without worry of spilling the dice everywhere. This was a bit of a trick since the thing that locked it also needed to be mostly if not entirely contained in the lid since you need to use the cup as part of the game. What I ended up with was putting a slight lip around the top

Zombie Dice Lid

Locking lid for the dice game

and making a bar to bolt to the top that was just long enough to hit the 1/8″ lip when turned one way. It works better than I expected it would. I also added some thin foam to the inside of the container because dice on wood was getting pretty loud when you shook the cup.

Tabletop Game Boxes

With Tabletop Day approaching and my great affinity for complicated rules attached to cardboard (see picture on leftDSCF0722 of what should be my linen closet) I thought it would be the perfect time to work on a few projects to improve some games that I much enjoy. On top of some other, smaller things I decided that the boxes that come with a great majority of card games are kind of worthless. Take for example. Gloom. A fantastic game in which you try to make your family as miserable as possible before killing them off in horrid ways all the time trying to make your opponents family happy so they cannot do the same (I realize I sound crazy but if you come down to the MakerSpace this Saturday I will have it so you should give it a shot. It really is fantastic). While the game is fantastic it came in was one of those that has the bump of cardboard in the middle between the two stacks of cards that is supposedly, in some fantasy universe where cards have different physics than everything else, supposed to keep them separate. This never works and the box usually breaks fairly quickly.

Being utterly fed-up with these boxes I decided to make my own for 3 games. Gloom, Cthulhu Gloom, and GOSU: Tactics. With the first two this also has the added benefit of being able to make the box large enough that I can fit expansions in with the base game and in the case of GOSU it is an opportunity to make a box that better fits sleeved cards and add a 3 turn counter to keep track of the round after the pass (If you have played GOSU you know it can get a little hazy when some people are taking a whole slew of turns per round).

After some playing with Inkscape, cutting out the first one on the laser cutter, realizing I suck at measuring, cutting things again, some gluing, and several layers of shellac later I had a few new boxes.

I had several people ask me how it was that I achieved this look on Baltic birch plywood so I thought I would go over that quickly. TheCGloom Box Open

inner part was just rag stained with some dark Minwax stain (I think it was Red Mahogany) so nothing special there but it adds a nice contrast to the lighter outside I feel. The outside is an amber shellac. I just applied 5-6 coats with a heavy sanding between the first two and a very light sanding between the rest. Nothing too exciting but it really makes this plain wood look pretty decent.


Dishwasher Indicator

DiswasherIndicatorComplete1  I have been meaning to make one of those “Dirty/Clean” signs for my dishwasher for a good while now and I was figuring I would end up printing something cool, slapping a magnet on the back, and calling it a day. But as I was sitting down to work on the design the other day I thought to myself “Why do something good enough that will take 20 minutes when I can spend 3 hours making something completely over the top?” and thus this was born.

DSCF0713

You crank the gear to the far right on the one on the left turns to indicate the current state of your dishwasher. Necessary, no. But it was fun. If you want to make one the design is up on thingiverse.com: http://www.thingiverse.com/thing:63444