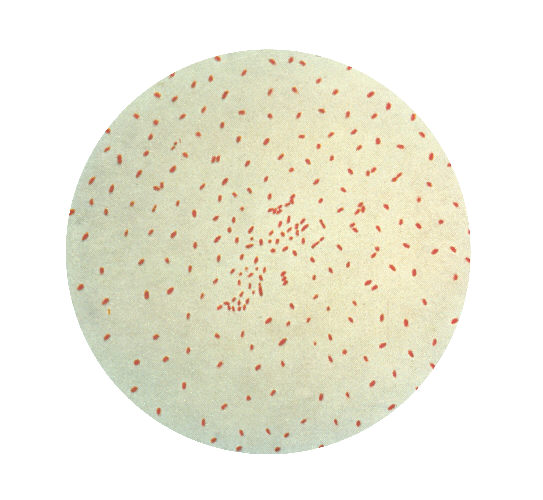
Apparently, this is what happens when the entire makerspace chants, “ph’nglui mglw’nafh Cthulhu R’lyeh wgah’nagl fhtagn” at once….
Be a part of a hacker/builder community where ideas are shared, innovation is fostered and the maker experience is hands-on.
Join us Tour the SpaceOnce we got our occupancy permit, we had to consider how to display it. A simple plastic frame seemed a bit above us, so I was asked to design a laser cut frame instead.
The frame was designed in 4 layers (5, if you count the acrylic) in Illustrator CS5 and cut on our 60watt laser cutter out of one of our favorite materials, 3mm thick Baltic birch plywood. If you’re wondering why the permit doesn’t fit perfectly, some unnamed culprit gave me the wrong measurements, but I still think it looks great.
Since I firmly believe that makerspaces enhance and contribute greatly to the world we live in, I came up with the corny, soon to be lampooned phrase, “Official Permit for the Milwaukee Makerspace to Make the World a Better Place”.
And that is what we intend to do.
I’ve been toying with the idea of room dividers for a while now. I don’t exactly have use for one, but I think they look neat and it’s basically a blank canvas. Drawing inspiration from my Clockwork Boxes, I decided that a gear motif would best suit the makerspace, thus giving me a new use for the piece: as a backdrop at events we participate in such as Art Jamboree and the various Maker Faires.
The actual screens were cut out with a large-scale CNC router, while the frame was ripped from 2×4′s, with a dado groove down the center for the screen to slip into. Thanks, Jason H.!!
Assembly went well, although there were a few hiccups. The drill bit wasn’t long enough, so some minor splitting occurred at a couple of spots. The frame was slightly warped and so needed to be clamped and glued before being screwed together.
After allowing the paint to dry overnight, myself, Matt W., and Jason H. assembled this thing just prior to heading to the Art Jamboree at the Hilton in Milwaukee.
EDIT: I’ve just entered this into the Furniture Contest that Instructables is running. Click the link. Vote. Be thanked. :)

It occurred to me that I haven’t posted about my latest laser-etched wall-hanging yet. This piece was inspired by a trip out to a couple of Milwaukee cemeteries. I’m slowly learning what to look for when preparing photographs for laser etching.
Total time to etch and cut was about 3 hours. Both the front and back pieces were treated with teak oil, lightly sanded, then rubbed with a clean cloth to bring out a little sheen.
This piece is the sister to one I had posted about here. Put side by side, the tree on the right merges with the tree on the other piece to create a unifying effect. There are two other pieces that I’ll be doing for this series which will have the tops of the branches visible to unite all four.
This is my newest piece, cut and etched on our 60 watt laser cutter. Both images are from pictures that I took out at a couple of graveyards. I inverted the image in the background so that the sky was nice and dark and the trees were bright. Unfortunately, this washed out a lot of the tombstones in front, so I’m going to try re-etching this piece before I offer it up for sale.
The back piece took approximately 1 hour, 20 minutes to etch as a 11.5″ square. Additionally, I found that the margins are a bit off on the cutter. The left margin has shifted around 1/8″-1/4″ to the right, so the piece wasn’t perfectly centered.
When Raster mentioned the event, “Red, White, & Black: 100 Square Feet of Art“, I thought I’d take part. The general idea is for artists to pick up a 12×12″ piece of wood and “art” it somehow, transforming it into a mini-masterpiece for an auction to support pets in need. The auction takes place on December 7th, so be sure to stop in. They’re featuring live music and food along with a raffle and the auction.
Taking a cue from some Art Boxes I’d been working on, I decided to use a similar vine motif with an orchid etched in the center. After studying it for a while, I thought it needed depth, so I laser etched a photograph that I took out at Boerner Botanical Gardens for the backdrop.
Still not content, I wanted the darker shadows of the vines to play along with the lighter picture behind, so I cut several half-inch blocks to raise the top piece above the back piece.
The back has been treated with teak oil while the front was stained with Bombay mahogany satin stain. The blocks are put specifically in each corner in order to maximize the amount of light that hits the back piece. I may add a few extra spacers for support in the coming days.
Well, this all started as a small experiment which I didn’t expect to work. Originally, I had conceived of the “Vine” box on the lower left as something to etch onto a series of rather banal boxes that I’m making. In a sudden fit of “Oh, what the hell,” I decided to put our 60 watt laser-cutter to the test and actually cut out the shapes, rather than etch them.
The first Vine Box didn’t turn out so well, but the idea was there and I went home to further tweak the image so that it would cut out properly. Once I achieved success, images, questions, and potential swam around my head. What else could I cut? How fine could I get it? Does Ashton Kutcher really think that “Dude, Where’s My Car?” is a good movie?
More experimenting followed and the results of said experiments are pictured above.
Ultimately, I will be making these and other Art Boxes for sale to the general public on Etsy, but in the mean time, I’m testing out further designs so that I’ll have a full product line up when it comes time to open the store.
I modeled the pumpkin in Blender, then cut out the profile in 1″ wide sections of standard insulating foam using the makerspace’s CNC router. The pieces were then hand-finished and a couple of coats of Durham’s Rock Hard Water Putty were applied to strengthen it and seal the foam (because foam melts in a really cool way when you apply spray-paint to it). ![]()
Jason H., the maker who approached me with the project, helped in the finishing, painting, and decorating aspects.
Join our public mailing list to talk with Milwaukee Makers about projects, techniques and more.
Check out some behind the scenes info on our wiki.
Check out our photos on Flickr.
Check out our videos on YouTube.