Fun With Fractals

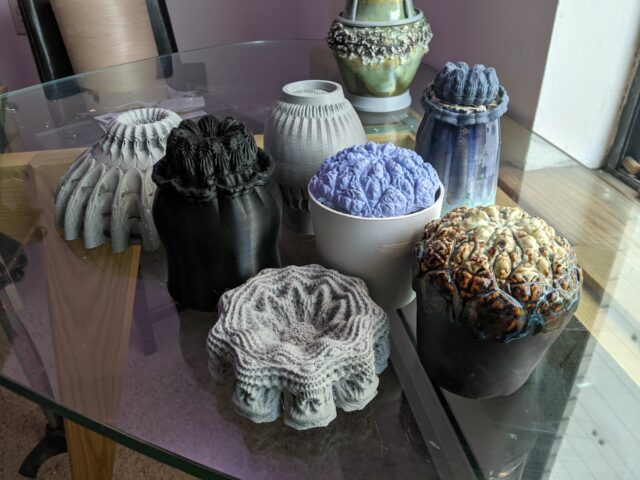
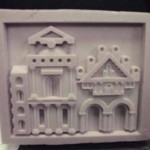
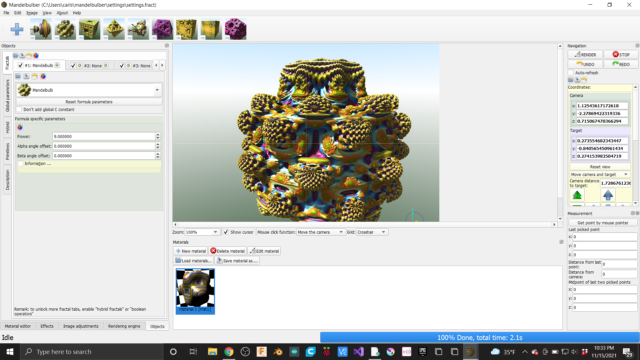
Over the past few months I have been playing with 3D fractals to create slip cast pottery.  I found a free program called Mandelbulber 3D and you know me, If it’s free I’ll take 3.  It’s shocking to me the availability of free software like this.  Right now I am just scraping the surface on what the software can do but I have a few examples of shapes made in the software posted on Thingiverse.

https://www.thingiverse.com/thing:5138435

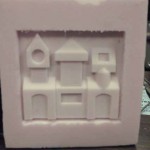
Creating the fractals with the Mandelbulber is fairly straight forward.  Just experiment with varying a few values and click render.  The hard part is getting the shape to be cast-able with out having to make a 27 part mold.  A few weeks ago I pulled the first cast from my first successful mold.  This is part fractal and part Fusion.  The foot of the cup is part of the fractal pattern and the body of the cup is a shape designed in Fusion 360.  Although the final product warped in the kiln I think it was a good proof of concept.

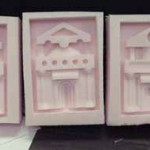
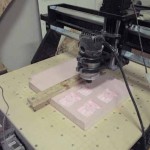
After the shape is created digitally you have to make it physical.  My go to method is usually my 3D printer.  The constraints that make a part easy to 3d print without supports are similar to the  constraints that make a part easy to remove from a mold.  To make the slip cast mold I don’t print the cup but a plastic mold of the cup, there are two reasons for this.  First if you are going to make lots of slip casts you are going to need more than one mold.  Because of the time it takes to cast each cup you will need to pour several mold each day.  Second with a hard plastic mold you can make a soft silicone part.  This saves me from making a large silicone Mother Mold of my 3D printed mold.  My Mother Mold is half of the 3D printed mold with the full silicone cast part inside.  It’s worth noting that there is 15-18 percent of shrinkage from pour to final firing so you will need to scale up your prints to an almost comical size. 

(photo coming soon)…

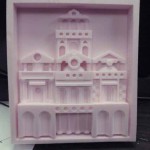
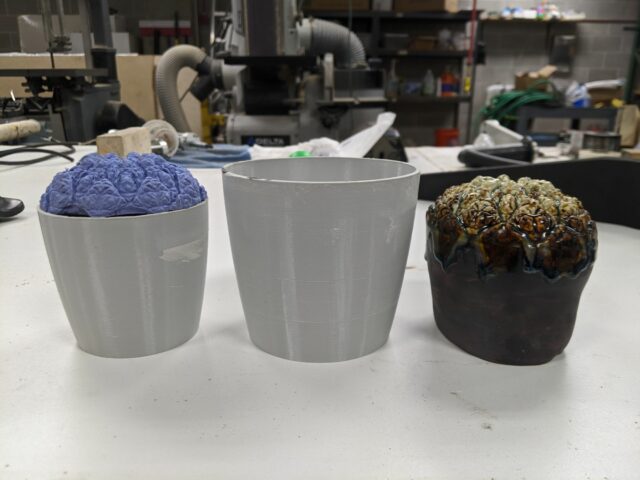
On a side note I did some experimenting is soaking silicone parts in IPA to expand them.  This is a fun exercise if you have never done it.  To expand a part just place it in a container of IPA for several hours.  I let one part sit over night and go about the amount of growth I was looking for to but the part shrinks down slowly when removed from the IPA and the growth amount is not very predictable.  Below you can see an example of how much larger the part grew and the final fired piece from this process.

I am in the process of printing my molds right now so tonight at the open meeting I might have printed molds to show.  I also have other shapes to pass around.


Raspberry Pi Project Ended

I’ve really struggled with the Raspberry Pi Project. As I posted earlier, the Raspberry Pi kept killing the file system on the SD card. Pete traded me for a different Pi, which behaved much better, making the card last at least long enough to get the operating system and other software installed. Yet the Raspberry Pi continued to corrupt the file system if left running for longer periods. The latest time it totally killed the SD card; I couldn’t even reformat it on my computer.

If I include the Pi in the traveling mascot, I’m convinced it will not survive the inevitable rough treatment. The only other use I can think of for a Raspberry Pi in a travelling mascot is as a home base server for the mascot, publishing the travelogues. Yet it’s too unstable for even that task.

I still like the idea of a traveling mascot that can track it’s own travels, but I’m convinced that building it around a Raspberry Pi is not the proper foundation. I really like the little GPS unit that came in this kit, and will try to build a scaled down version of the traveling mascot with a USB interface to hook up with any computer for collecting data.

Thanks again Adafruit Industries, we really appreciate the kit, and we’ll continue to work with the parts on other projects. Like vultures, some other members have already picked off some pieces of the kit for their projects.

Raspberry Pi Challenge Update

Eric

Previously on The Raspberry Pi Challenge

Just a quick update on the “Milwaukee Makerspace Traveling Mascot” project as I caught Eric doing a bit of Raspberry Pi + GPS hacking last night.

Raspberry PI + GPS

I’m excited to see how this project progresses. I’ve not had a chance to get hands-on with the Adafruit Ultimate GPS Breakout yet, but there’s a great tutorial on using it with a Raspberry Pi and one that covers Arduino usage as well.

The Raspberry Pi Challenge!

Raspberry Pi Challenge

Thanks to our friends at Adafruit Industries, we’ve got an awesome Raspberry Pi Starter Pack (and a few other goodies) and we decided that rather than fight over who gets to play with it, we’d issue a challenge to our members: Tell us what you’d build with the kit.

The results are in, and we’ve got a bunch of entries to look at before we decided who will be chosen take on the challenge. Hopefully in the next week or so we can reveal what the winning entry is.

But don’t worry, we’re going to share a bunch of the ideas right here on the blog. We may not get to build them all, but we’ll do our best to highlight some of the ideas that our members have come up with.

(If you’re looking to get into using the Raspberry Pi in your projects, you’d do well to check out the Adafruit Learning System’s category on the topic.)

I am the Cult of “Foamy”

Hello all:

I have been a member here at the Milwaukee Makerspace for about 15 months now.  One of my favorite things to do here is machine architectural reliefs from foam.  I studied architectural history extensively at UWM, so I have a lot of influences to draw from.

The first piece I did was 3/8″ deep, since that’s the bit we had at MMS.  I first tried a piece with all flat surfaces.  It turned out very well, so I tried another piece that has slanted roof surfaces; again, success, so then I did some searching and found a 1/2″ deep milling bit.  I did several pieces “on a theme”, taking the first one and making slight modifications. All of these designs are my own creations, I just daydream and think them up.

I have found that I can get 1/64″ details on these pieces.  I have recently started using 1″ deep bits, and the results are fantastic!  The best part is that the foam is really cheep-cheep-cheep, $25 for a big sheet at Home Depot!

My process is:

1) design in Solidworks (CAD)

2) Export to .STL file format

3) Import into Cut3D, where I generate G-Code

4) Load into Mach 3, the software that controls the CNC router.

5) Let the foam fly!

I started out on the MMS router, which uses leadscrews; my newer Zenbot machine uses belts, and is blazing fast.  I can now machine 8 times faster!  The largest piece shown here went from about 19 hours down to 2.5 hours.

My next challenge is to get small lines onto my pieces that will represent bricks/mortar, etc.  I’ll have to generate different code for that; the milling code runs in 3d, but the “bricklines” will need to be in 2d, so I’m looking forward to that challenge.  I’ll be using Vectric’s “Aspire” software for that.  More to come!

-MattN