Making a Plunger for a Chocolate Syringe

My latest project is a 3D printer that will produce chocolate objects.  Like many other chocolate printers, it will include a syringe to dispense the chocolate.  Unlike those other printers, the syringe in my printer will have 3.5 liter capacity to enable printing large objects.

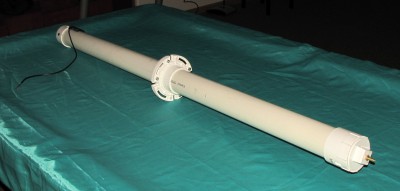
The syringe is made from PVC pipe using mostly standard fittings.  One piece that wasn’t standard was the plunger that fits inside the syringe tube and pushes on the chocolate contained therein.  I had to design and fabricate the plunger.  PVC pipe isn’t perfectly smooth or perfectly round inside, so I needed something compliant enough to ride out the pipe’s bumps and constrictions while maintaining a seal.  The seal needed to be tough, yet safe for use with food because it will be in contact with the chocolate inside the syringe.  I found some food-grade silicone casting material and ordered it.

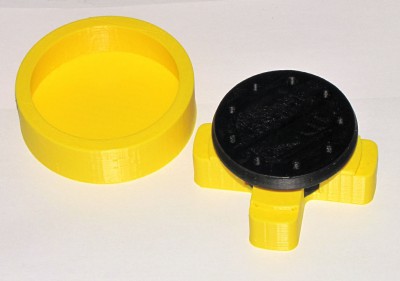
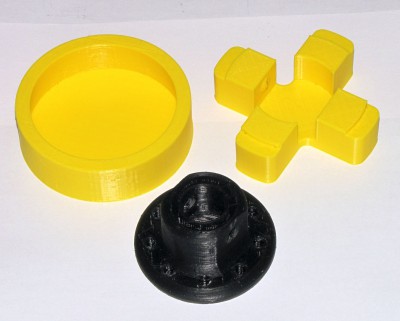
While waiting for the silicone to arrive, I designed a 3D printable core for the plunger and a mold and jig.  The core fits on the end of a linear actuator that will provide the push.  The jig centered the core a few mm above the bottom of the mold.  The mold was tapered and the widest part -the bottom- was a few mm larger diameter than the pipe, and several mm larger diameter than the core.  The silicone envelops the core and is locked in place by holes that connect top and bottom side of the core.  The plunger squeeze-fits into the pipe to maintain the seal against the uneven inner surface of the pipe.

Mold, jig, and core for syringe plunger

Mold, jig, and core for syringe plunger

Mold, jig, and core for syringe showing core inserted into jig.

Mold, jig, and core for syringe showing core inserted into jig.


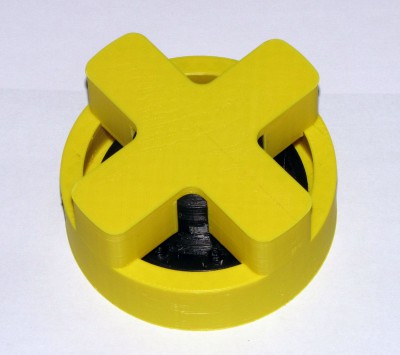
Mold, jig, and core assembled for silicone over-molding.

Mold, jig, and core assembled for silicone over-molding.

I measured and mixed the silicone, coated the core with it and then set the core and jig in/on the mold and let it cure for 24 hours.  Then I removed the jig and broke the now silicone covered core out of the mold.  Result: a perfect, tight fit inside the syringe tube.
Core in mold with silicone.

Core in mold with silicone.


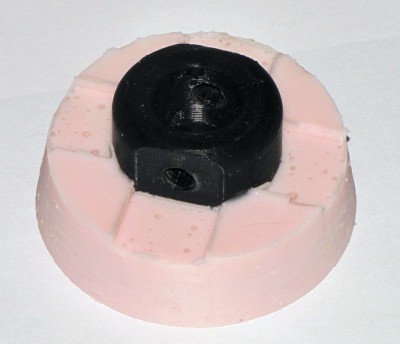
Finished plunger removed from the mold.

Finished plunger removed from the mold.  The mold had to be broken off by design.


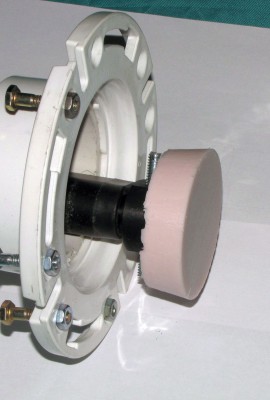
Plunger mounted on linear actuator.

Plunger mounted on linear actuator.


The assembled syringe.

The assembled syringe.

Experiments in optics and image processing

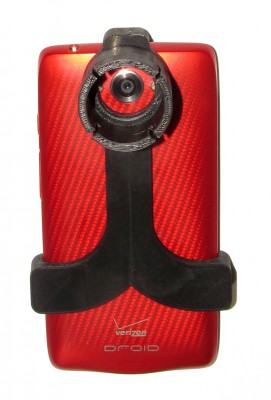
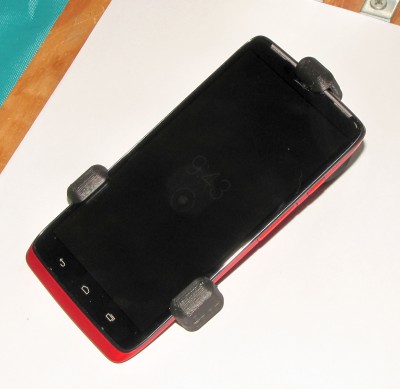
After successfully mating a web cam with my microscopes (http://www.thingiverse.com/thing:216821) and telescope (https://www.youmagine.com/designs/web-cam-adapter-for-meade-telescope-eyepiece), I decided to design and print adapters to mount my Droid Turbo phone on the same scopes (https://www.youmagine.com/designs/microscope-adapter-for-droid-turbo-phone and https://www.youmagine.com/designs/droid-turbo-phone-to-telescope-adapter) so I could shoot higher resolution stills (21 Mp) and 1080p (and even 4k) video.   The telescope adapter fits over a Meade 32mm focal length Super Plössl eyepiece and provides about 47X magnification with the telescope.  I printed a similar adapter for my surgical microscope.

IMG_0995_crop


The telescope adapter firmly grips the phone and the eyepiece.


IMG_0993_crop


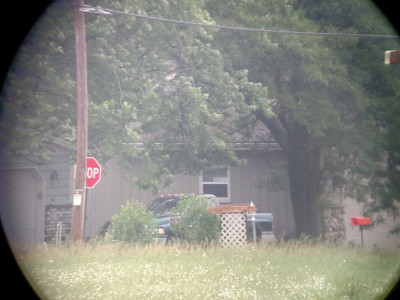
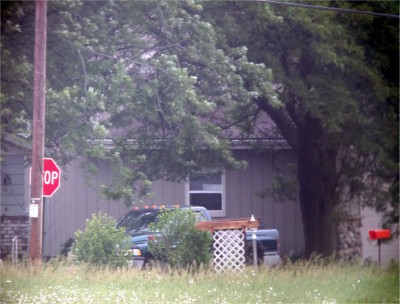
Initial tests were a little disappointing.  The combination of the phone’s camera and the telescope’s optics has significant pincushion distortion.  The image has only been mirrored L-R and scaled down (original is 21 Mp).  Note the lack of contrast (looking through 1/2 mile of humid air) and the curves in the power line and pole, and even the grass line:

pinch test original


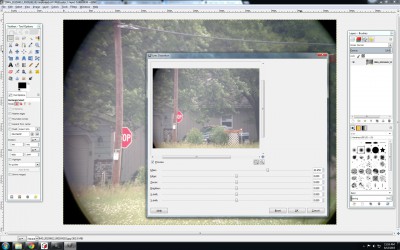
A quick search found that the Gimp has built in transform tools to correct (or create) lens distortion.


gimp


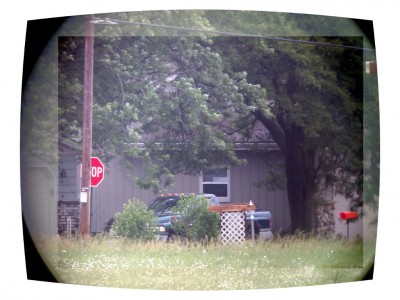
It only took a couple minutes of messing around to get acceptable results.  Here’s the same image with the pincushion distortion corrected (whole image), contrast stretched and white balance corrected (rectangular area).  The pole, power line, and even the grass line now look straight.

pinch test corrected


And here’s the final image with all corrections and cropping applied:

final


Next step: photograph known square grids through the microscope and telescope and then create and save some preset corrections to apply with Gimp.

I wonder if something like this exists for video.  Hmmmmm…


Son of MegaMax Enters Instructables 3D Printing Contest

Many 3D printers being given away as prizes!  If I win one I’ll be donating it to my son’s school or other school or library that would like a machine and doesn’t already have one.  To do that I need your votes!

Son of MegaMax

Son of MegaMax

Please see my Instructable here:  http://www.instructables.com/id/An-Almost-Reliable-High-Precision-3D-Printer-Son-o/and vote for me by clicking the little red “vote” ribbon in the upper right corner of the start page.

Thanks!

http://www.instructables.com/id/An-Almost-Reliable-High-Precision-3D-Printer-Son-o/

Sunday Morning Project – A 3D Printed WebCam Mount for a Telescope

I recently acquired a new eyepiece to replace the damaged one that came with the Meade ETX-90 telescope I bought at a swap meet last year.  I decided it needed to have a web-cam mount so I designed and printed one that is a variation of a previous design for a microscope.  It took about 20 minutes to recreate the CAD file in DesignSpark Mechanical, and about 90 minutes to print on Son of MegaMax.

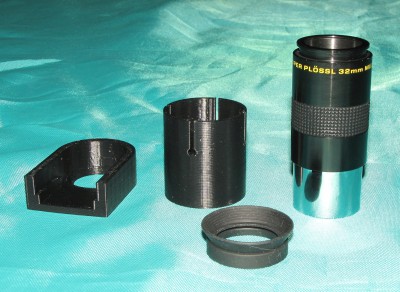
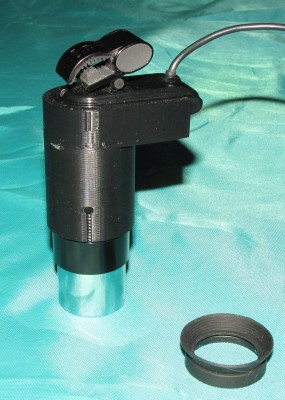
This thing has an odd shape to accommodate the odd shape of the camera.  I designed the adapter in two pieces so it could be printed without any support material.  After printing the two pieces were glued together with a little super glue.

Unassembled 3D printed WebCam adapter and eyepiece.

Unassembled 3D printed WebCam adapter and eyepiece.


Assembled adapter on the eyepiece.

Assembled adapter on the eyepiece.


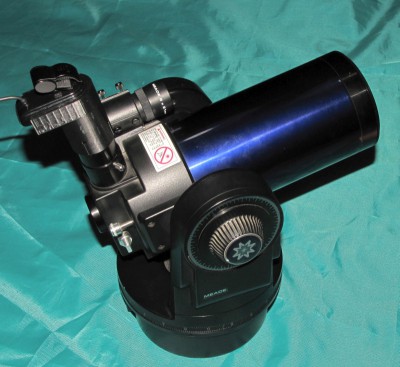
Telescope with WebCam mounted.

The adapter fits over the barrel of the 32mm fl eyepiece and stays put.


I shot a short video to test it and it works perfectly!  The cars driving by are about 1/2 mile away.


If we ever get a clear night I’ll try shooting Jupiter or Saturn and then run Registax to enhance the images.

Files are here:  https://www.youmagine.com/designs/web-cam-adapter-for-meade-telescope-eyepiece

Son of MegaMax Lives!

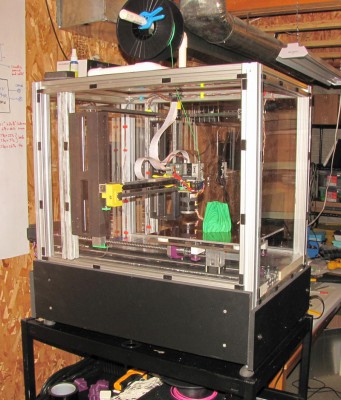
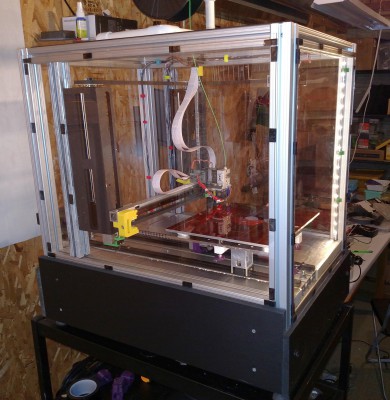
MegaMax was a great 3D printer, but it was time for some changes.  He was difficult to transport because the electronics were in a separate housing with many cables to disconnect and reconnect, barely fit through doorways, and required a positively gargantuan enclosure to keep the temperature up to control ABS delamination.  Though it hurt to do it, I tore him apart and did a complete redesign/build into a form that is more like what I would have done had I known anything at all about 3D printing when I started building MegaMax.

I reused what I could including a lot of the 8020 extrusions in the frame, the Z axis screw assemblies and drive belt, and the X and Z axis motors.

Changes include:

  • ball screw drive Y axis with high torque motor- precise but noisy
  • linear guides in X and Y axes instead of 1/2″ round guide rails and linear bearings
  • SmoothieBoard controller instead of Arduino/RAMPS
  • BullDog XL extruder and E3D v6 hot end
  • RepRapDiscount graphic LCD control panel
  • narrower frame design without giving up print volume- easier fit through doorways!
  • polycarbonate panels to enclose the print area yet provide a clear view of the print
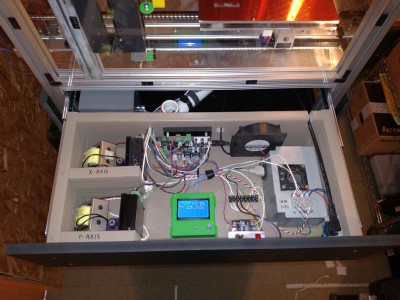
  • electronics in a drawer for easy service and transport and neater appearance
  • DSP motor drivers and 32V power supplies for X and Y axes
  • Liberal use of screw terminals to make servicing easier
  • Modular X and Y axes that can be removed for service and replaced in minutes.

SoM will be making his public debut at the Milwaukee Makerspace very soon…

Son of MegaMax electronics drawer

Son of MegaMax electronics drawer

Side view of Son of MegaMax

Side view of Son of MegaMax