Giant Laser Cut Map of Milwaukee

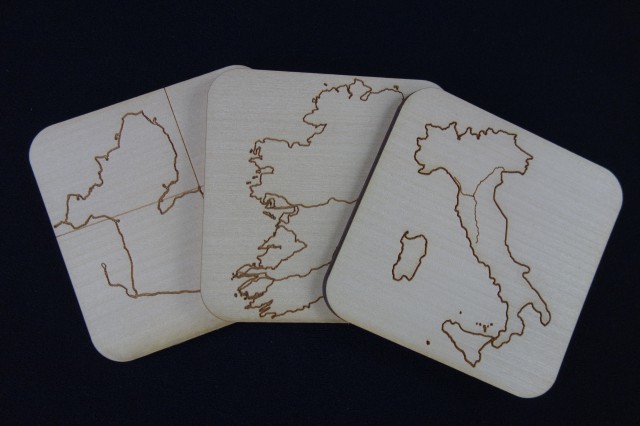
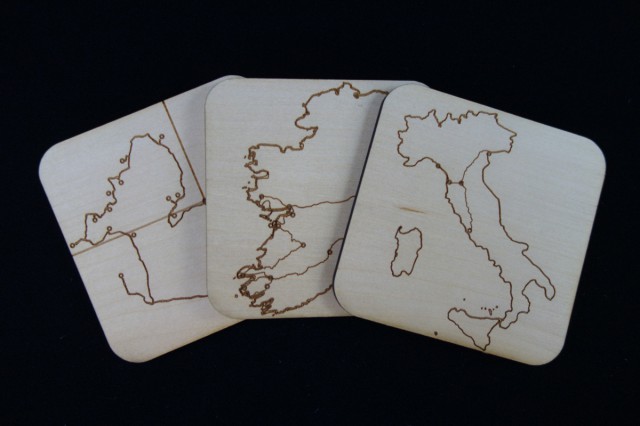
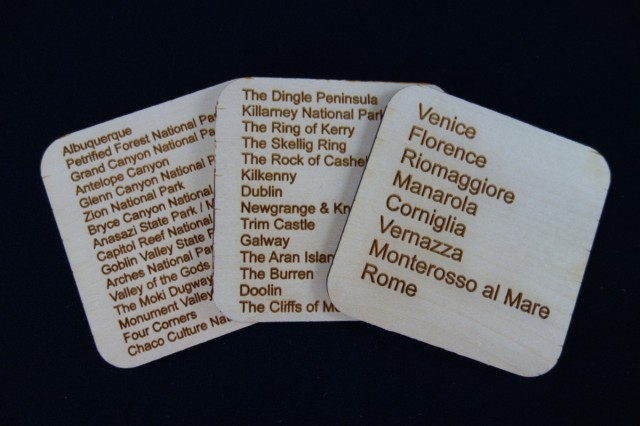
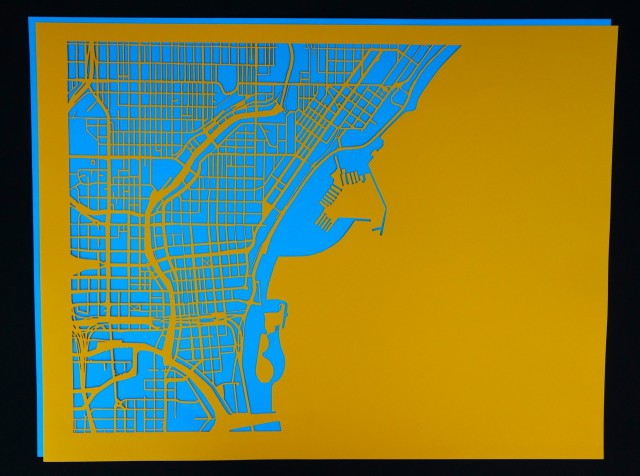
I’ve been on a laser cutting kick lately.  In the last two weeks, I made 9 travel coasters, two of which feature neighborhood maps of places I’ve lived.  Though I could have just raster cut these very small coasters, generating the vector version allowed me to create this big map of Milwaukee, Wisconsin!  This wall hanging map is the maximum size of our largest laser cutter: 24″ by 18″!  Boom!

Big_MKE

This map was inspired by a project made by my friend NJStacie a while back.  While she has both the infinite patience and the limitless awesome that allowed her to use an X-acto knife to cut out all the city blocks of Boston from an actual map, I used a laser cutter and software. To create images for my roadtrip coasters, I simply took screen captures of google maps, and processed them into vector files using GIMP and Inkscape.  There are so many extraneous details in google maps (lines for buildings, the text labeling street names, etc), that it was clear I needed an alternate approach for making this map.

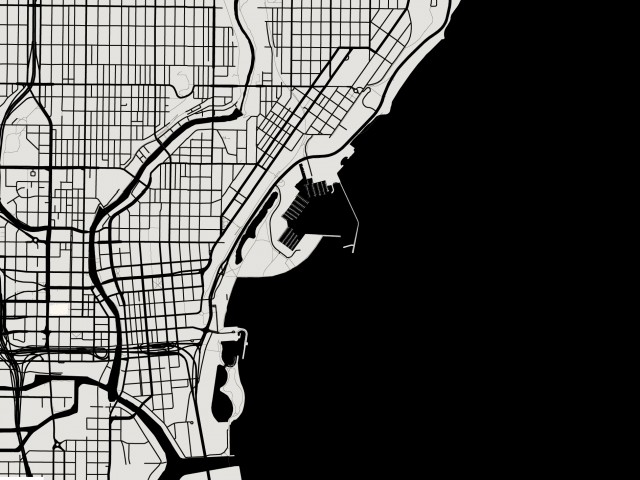
Its easy to get a small google map without text labels, check out the url of this page.  My first approach to get more than 512×512 pixels was to use the Google Maps API, which is a toolset to imbed an interactive google map into webpages using Java.  The great thing about it is that the rendering style is completely configurable. Even better, there is a GUI to quickly configure your desired style, and automatically generate the JSON object to pass to the style property of the MapOptions on your webpage.  Instead of investing 10 or 15 minutes reading about how to integrate all these steps, I just created the style, and took a few .png screen captures.  I opened them as layers in GIMP and combined them to create the following grey and black image:

milwaukee_whole

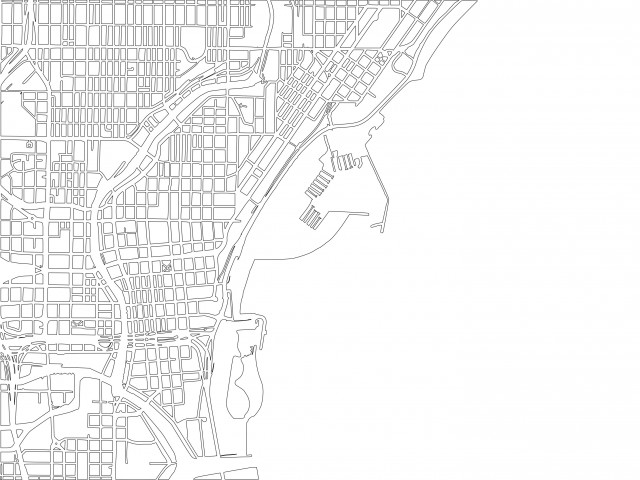
I saved it as a .png, and imported it into Inkscape, selecting Embed Upon Import. I created vector data from this raster image by first selecting Path -> Trace Bitmap, opening a dialog box with many choices.  I really only experimented with the top two import choices, Edge Detect and Brightness Cutoff.  I found that Edge Detect gives two outlines, one of the streets and one of the city blocks.  For this reason, Edge Detect seems to be the best choice to create the widest streets, and therefore the strongest paper cutout.  It required some cleanup though, so I selected Path -> Break Apart, adjusted the Fill and Stroke, and then just deleted all the street outlines (thereby widening the spaces between buildings, which is effectively the streets).  As some of the streets were to narrow to really form one continuous outline, they formed a lot of smaller street segments that I deleted in five or ten minutes of fast and furious clicking.  After all those steps, a vector version of the following image was produced:

vector_lines_of_milwaukee

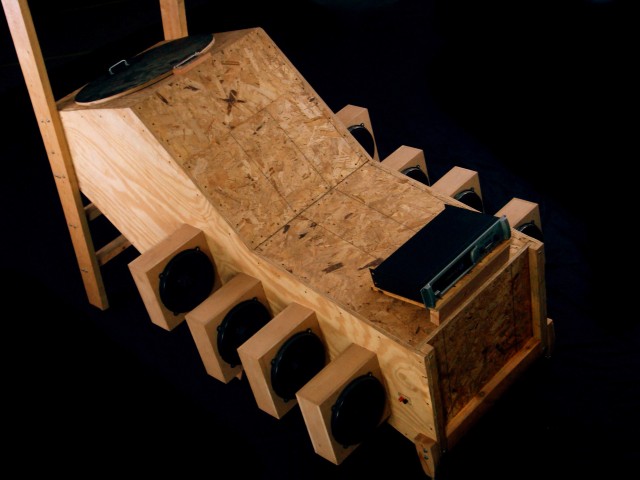
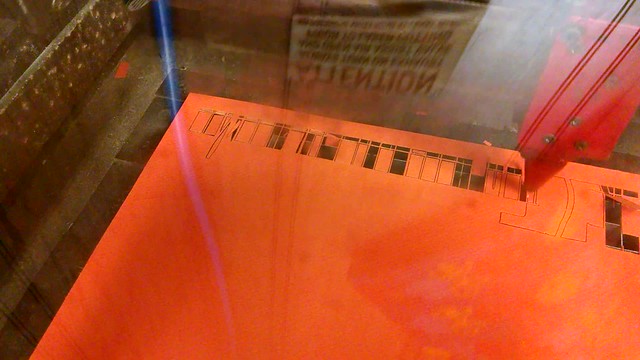
I did a few test cuts to find a power/speed that cut all the way though some colorful, 98lb, 25″ by 19″ acid-free archival paper I picked up.  The goal is to use enough power to cut though, without using too much power, which widens the kerf (laser cut width), thereby undesirably narrowing the streets.  This ended up being 100% power, with 52% speed. Check out the laser cutter in this real-time (not sped up) video.  Note that one typical problem of having both air assist and super-power fume-removal suction while cutting is that the laser cut bits tend to flip over into the cutting path, potentially resulting in an incomplete cut.  That meant when the laser cutting was complete, I had to carefully punch out the 15 or 20 stubborn city blocks that weren’t completely cut though.

GIANT Laser Cut Milwaukee Map!

I also cut this design into a coaster, and made one with my old Massachusetts neighborhood too.  Naturally this was a lot of data on a small surface, but the results are pretty good despite the vector cutting time approaching that of the raster cutting time! I cut these at 100% power, 100% speed, like the other coasters.

Map_Coasters_Improved

After I completed all these steps, I learned about a way to access vector map data directly.  The Open Street Map site allows export of .svg vector data just by clicking the share button on the right side of the page!  Even better, one can zoom in to Milwaukee, and press the big green Export button on the upper left to export an .osm database of the visible section of the map.  This OpenStreetMap archive can be opened in Maperative! and a style can be applied to the rendered map.  Maperative has several styles built-in, and I simply edited the google maps-like style to omit all the buildings, and draw all roads, highways, on-ramps, etc in a black with no border.  Maperative can export .svg files, but I found the content of these files are a bit of a wreck.  For example, each different road type is a separate vector path, meaning that there are many separate paths in the file.  Ultimately I found I’d taken the wrong approach, as I should have rendered all the city blocks as black vector outlines, and omitted the roads – as that is what I really need to laser cut.  With a bit more work, using Maperative would likely be a quite quick path from map to laser cutter. However, I abandoned this approach as I’d already created a somewhat reasonable workflow.

Laser Cut Road Trip Coasters: Improved!

I used the Makerspace 60 Watt laser cutter to make coasters that show the path of some road trips I’ve taken.  That way I can enjoy the sweet irony of sitting on my couch enjoying a tasty beverage while having thoughts of travel!  This project was somewhat inspired by mmassie’s OpenPaths Zurich vacation keep sake project.

As I don’t use OpenPaths, I used Google maps to plot the course of past road trips, and simply took screen captures.  I wanted to create vector images with hairline width (0.001″) lines so the laser cutter can make each coaster in 45 seconds instead of 20 minutes. There are many ways to generate vector data using these raster .png images. I chose to semi-manually edit out unnecessary parts of the images using GIMP, and then used Inkscape to extract vector data from the resulting simplified images.  If you’re new to these tools, just search for “Inkscape raster to vector” tutorial videos.  An alternate approach is to just import the raster image into Inkscape, and use the Bézier line tool to trace the important paths.  Yes it is manual, but this alternate method also only takes 5 minutes to complete.

The coasters are cut from 3/16″ 4″ x 24″ solid basswood using fairly standard settings of 100% power, with 100% speed for etching, and 3.5% speed for cutting.

trio_s

I made quite a few coasters, and above is a photo of three of them. The coaster on top is a rail trip through Italy, the second is a 1000 km, 12 day (right hand) drive through Ireland, and the last is a much longer than 12 day road trip through the southwest – note the vertical and horizontal lines are the state borders of NV/NM/CO/UT.

A few days later, after polishing my vector editing skills in Inkscape, I made an improved version of the above three coasters.  I added circles to more clearly highlight each stop, and I etched the names of each stop on the reverse side of each coaster.  One group of raster to vector settings I used in Inkscape resulted in the creation of two sets of (closely spaced) hairlines for the outline of Italy, as shown in the coaster above.  I really liked how distinct the outline of Italy is relative to the path of the trip.  I chose to intentionally create two offset hairlines for the other country or border outlines, using Inkscape’s linked-offset path command.

Check out the new and improved design of the front, with dual country/border outlines and circles to denote the stops:

Three_Coasters_Front_Improved

Check out the reverse sides of these coasters shown below, with names of each stop etched on them. Albuquerque.

Three_Coasters_Back_Improved

Weekend Project: End Table

This weekend I made an end table for my living room.  Its in the style of two night stands I made, this one for the tool at hand contest, and this second one! The legs of this series of small tables are getting increasingly eccentric.  To build it, I started with three pieces of 2×12 lumber, and a 1/2″ diameter dowel rod.  I avoided using metal fasteners, and instead used only wood glue and 8 3″ long dowel pegs to attach the legs to ensure that sculpting the table with my chainsaw-blade-equipped angle grinder would be safe(r).  To save some labor with the grinder, I actually cut some of the zig-zag legs with a band saw first.  Even with the pre-cutting, I ended up making 1.5 cubic feet of wood chips and saw dust.

EndTable

2014 RPM Challenge: Accepted!

Today is the first day the 2014 RPM Challenge, which is the National Novel Writing Month of music!  The goal of the RPM challenge is to compose and record an entire album during the month of February! I accepted the challenge by dusting off my Cacophonator and Mohogonator, and got to work making music after dinner today. As today also marks the 50th anniversary of the Beatles invasion, this project drew inspiration from the Beatles’ back catalog!

RPM_Challenge

I used the dynamic duo of Cacophonator and Mohogonator with Auditionator (i.e. Adobe Audition) to record a session for about 12 minutes at a blazing fast 192kHz sample rate.  After chopping the recording into individual tracks, I digitally slowed them down to the customary rate of 44.1kHz, thereby expanding the work to its final ~45 minute length.  For inspiration while I was recording, I listened to Beatles songs sped up to 435% (which is 192/44.1) of their customary speed.  My tracks needed a bit of post-processing: on some of them I chose to bump the pitch back up an octave or two and add “Beatle Fades” to the beginning and end.  Anyway, within twenty minutes after the recording was made, I had edited the songs and uploaded them.  You’ve read that correctly, in less time than it takes to listen to the pieces, they were composed, recorded, processed, mastered, named and uploaded.

Today is also the 50th anniversary of the first Beatles song hitting #1 on the US pop charts: “I Wanna Hold Your Hand.” This whole project was inspired by this apparent coincidence in timing, and each track was directly inspired by listening to the sped-up Beatles original.  I hope you enjoy each of the 11 tracks I created!

While My Cacophonator Gently Weeps
Got To Get You Into My Cacophonator
All You Need Is Cacophony
With A Little Help From My Cacophonator
Sgt. Cacophonator’s Lonely Hearts Club Band
Cacophonator Came In Through The Bathroom Window
Lucy In The Cacophonator With Diamonds
Got To Get Cacophonator Into My Life
A Hard Day’s Cacophonation
You’ve Got To Hide Your Cacophonator Away
Cacophonator Wants to Hold Your Hand

It may be more convenient to listen to the entire album: “Cacophonator 2: Electric Boogaloo; A Love Tragedy in 11 Parts” on the RPM Challenge site’s Cacophonator page. Just scroll down to “My Player.”  There is plenty of February left: I encourage everyone to participate!

The Milwaukee Makerspace Theater

BIG_HMMMMMM2

Around 25 members have hopped in the new Milwaukee Makerspace Theater after the last two Tuesday meetings.  Its up and running in a “no hearing protection required” way!  The bass still goes way down to subsonic tones, but its being powered by a small & sensible surround sound amp.   Its a very immersive audio experience, and likely sounds much better than any 5.1 system you’ve heard because there’s only one seat!  The sound has been optimized for the single theater-goer: You!  The theater is hooked up to a DVD player, and is available 24/7  for any member to watch a movie in: no check-out required.   Note that any video source you have can be hooked up via the HDMI cable.  Alternately, you can follow the lead of JasonH, who used the theater with a portable audio player to rock out while he worked on his own project near by. See the photos below for the simple instructions on how you can start up the theater, and feel free to take a break from making by using the theater!

123456789