Come Learn Something


Screen Printing

Tuesday meetings often turn into training night at the Makerspace.  So many members come the the weekly meeting that it can be easy to find something new to learn.  Last week was no exception when Pete gave an intro to screen printing.

_I9H3009

It seemed like a straight forward process and I would encourage people who want to try making a t-shirt to email Pete to get checked out on the machine.

pete printing small

After walking the class through the basics of preparing the silk with the design. Pete set up an example print and let his small class of makers give it a try.

_I9H3031

Leafing with the Mogul

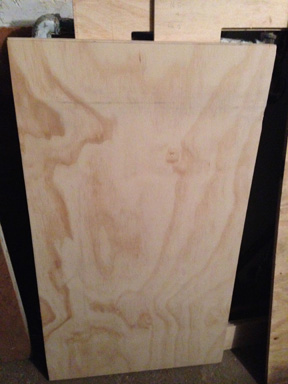
Before #1: Your basic 3/8″ plywood

before01

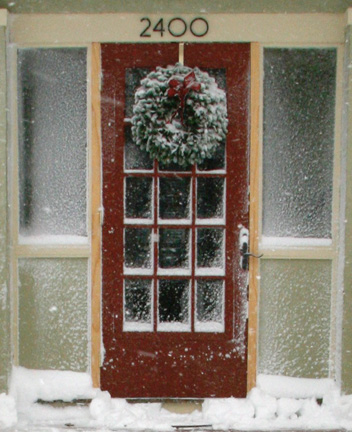
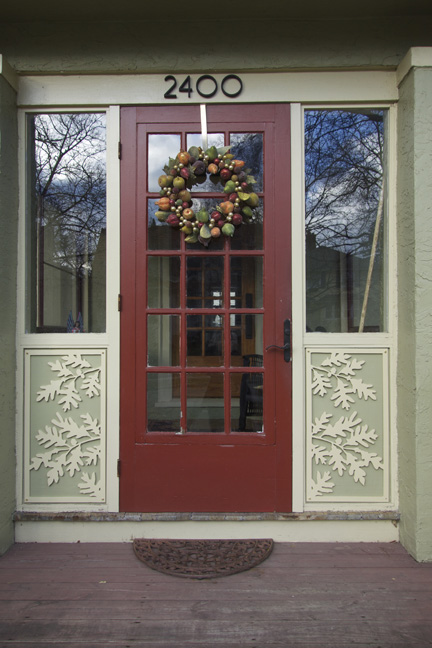
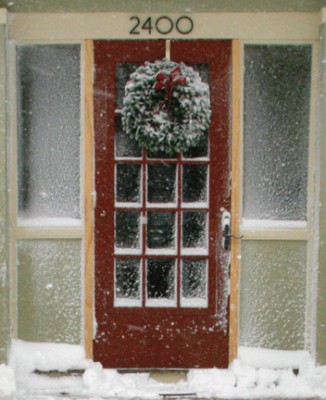
Before #2: My front door, in need of paint, some aesthetic happiness, a fixed doorhandle, and summer. My desire to add a little decoration to the door is, in part, what led me to the Makerspace. I had an idea for panels to go on either side of the door, but no equipment for making what was in my head. When I saw that the Makerspace had cnc routers…

before02


IN THE MIDDLE

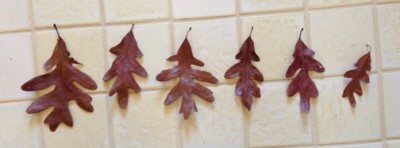
I took photos of leaves from the oak tree in our yard:

leaf photo

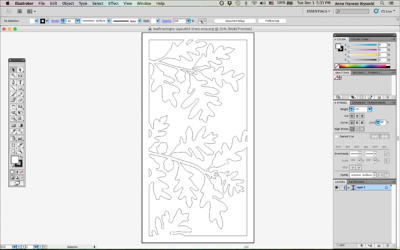
I traced the leaves in Illustrator, and — by looking at the structure of the tree — made my initial design. I exported the file into svg (with hints from Shane), and Ed helped me use Cambam to convert the svg file into the gcode that the Mogul desires.

Screen Shot 2015-12-01 at 5.33.10 PM

After generating the gcode, we cut the first panel. For me, watching the cutting was like Christmas: exciting — while for Ed, stepping me through the process, this must have been like a long slooooooooow Christmas, watching the design appear through the three passes the router bit made to cut each (complicated) path. (In truth, Ed’s patience and help were the real Christmas present for me.)

first cut

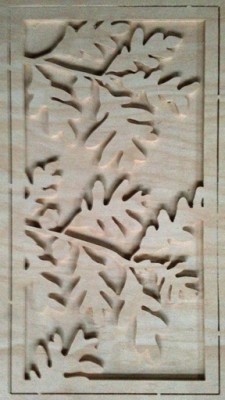
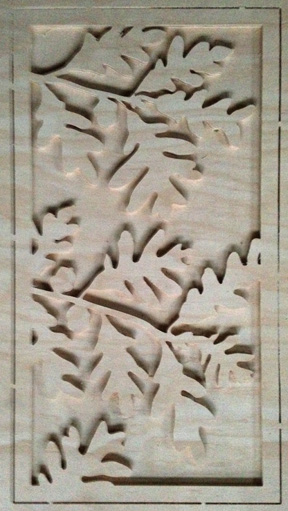
This panel was an experiment for me, to learn about how thin and delicate the connecting pieces could be in such cutting. And I learned: what you cannot see in the picture above is how two of the leaves broke off quickly.

In the next Illustrator file I made (which I then cut on the Mogul with Steve Pilon’s also very generous and patient help), the leaves overlap and made their stems thicker. You might be able to see this in the final picture below, which shows the panels painted and mounted. Merry Christmas!


THE END

thepanels

Our woodshop has a Router table!

The woodshop now has a Rockler router table! Thanks to Bill M for donating the table and James for adapting the plate to an existing Craftsman router we can now use this fantastic router table. The table has a convenient switch(visible in the picture with a large safety STOP button), an adjustable fence, anti-kickback finger, slots for jigs, and is conveniently placed on wheels so the whole unit can be wheeled to where ever it is needed. If your wondering “what the heck is a router table, or a router for that matter” then check out the links below to get started.

Some great information on using a router table from Rockler is available here:

A great video for absolute router beginners, Steve Ramsey also has a bunch of other great woodworking videos:

How to make a picture frame using a router table, another Steve Ramsey YouTube video:

An overall pic of the router table.

An overall pic of the router table.

A tight picture of the top of the router table showing slots for clamping  jigs, fence, and anti-kickback devices.

A tight picture of the top of the router table showing slots for clamping jigs, fence, and anti-kickback devices.


A close up shot of a craftsman router mounter under the router table

A close up shot of a craftsman router mounter under the router table.

MARRIED TO A MAKERSPACE GEEK

logo


I’ve known since I met my Makerspace Geek husband that he could fix ANYTHING. It didn’t always look pretty but it would work. I’m reminded DAILY just how talented he is. Unfortunately, over the years, being somewhat of a minimalist, I ran out of things to put on his Honey-Do List. I would find myself, at times, racking my brain trying to think of something he could fix or make. Because after completing a task and joyfully erasing it from the fix-it/make-it board, he was happy, contented and fulfilled. Lo and Behold he discovered Makerspace. I should celebrate the day as one would a major holiday. It has transformed my little geek into a big geek. He LOVES Makerspace and I love that he has a place to go where he can share, with other like-minded individuals, all the geeky thoughts spinning in his head. He still shares some of that with me but I know that oftentimes my head kind of goes on blank mode and I find myself just looking at him, trying not to nod off and listen. After his joining and I got over his starting every sentence with something about Makerspace, or his approaching total strangers and handing out a Makerspace card, or striking up conversations with family and friends and droning on for, what seemed like hours, about Makerspace, I surrendered. Why??? Because it makes him darn happy, that’s why. And who doesn’t want to see someone they love being happy??


So now when we’re eating dinner and I see him chomping at the bit because he wants to be at the club, I wish him well on his merry way and sit back to a quiet evening. If I’m awake when he gets home I get to hear all about the goings-on. I admit to crashing, often before he gets home because when he does he’s often so jazzed that I then have trouble falling to sleep .
Thanks, Makerspace, for making a space for him

Successful CT scan processing into 3D printable file

Today was spent researching all the manipulations involved in getting a CT scan into printable form and I managed to get a print out of it.  The process starts with DeVide where the dicom data from the CT scan is processed using a dual threshold, decimation filter, and stl writer.  The stl file contains a lot of unwanted stuff, in this case, soft tissues inside my head that add triangles but won’t be seen in the print, so those are removed by applying ambient occlusion followed by selecting and deleting vertices by “quality” (which will be very low values for vertices on the interior of the object).  This process invariably blows small holes in the desired surface, so you apply a “close holes” filter to fix that (which closed up the nostrils very nicely).  Next you open the stl file in netfabb and rotate and clip unwanted external stuff and apply repairs as necessary.  Finally, drag it into slicer and scale it. slice and print.

First successful ego print!

First successful ego print!