Electric Ice Scooter

DSC_0424

When I recently was at the thrift store and saw a pair of ice skates next to a kick-scooter, it got my mind going. “What would a scooter look like with skates in place of wheels!?”

The next time I was at the Makerspace, I saw my old electric scooter over on the Hack Rack. This was a scooter I originally rescued from a dumpster. Although it didn’t have batteries, just adding power and a little tinkering got it up and running again. A few of the EV Club and PowerWheels Racing guys played around with the scooter a bit, but eventually the controller got toasted, and who knows what happened to the front wheel.

Oh well, I’d be replacing that front wheel with an ice skate anyways.

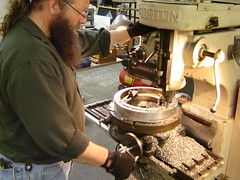
Turns out that the heel of an ice skate is actually sturdy enough to drill right through and use as a mounting point. I simply  drilled through the skate, inserted a spacer, and then ran a 3/8″ bolt through the skate and the front fork of the scooter. I finished it off with a couple of washers and a nut.

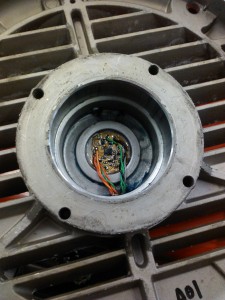
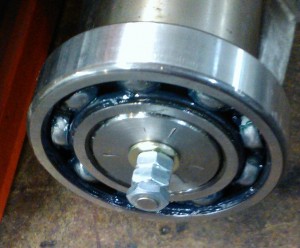
Then next thing to fix was to get the  motor going again. Turns out that it’s a brushless motor. While I have a fair amount of experience now with BRUSHED motors, this was my first experience with brushless. I did a little research, and then ordered a 24V, 250 watt generic brushless controller from a mail-order scooter parts company. Unfortunately, it used a different style of throttle than what was already on the scooter, so I had to order a throttle to match.

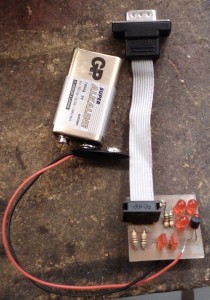
Connecting the controller was pretty easy, three wires to the motor and the black and red one to power. I first bench-tested it with an old printer power supply, and once everything was working right, bit the bullet and bought a brand new pair of 12ah SLA batteries. The two batteries are wired in series, along with a 20 amp fuse, and then go to the controller.

I still needed a deck for the scooter. I dug through some scrap materials and found a pair of cabinet doors that were about the right size. I cut them down just a bit and bolted them to the scooter. I even re-mounted a cabinet door handle to have as an attachment point for towing a sled.

With that, I was ready to go for a test ride, so it was off to the lake. Once I was on the ice, I turned on the scooter and gave it a go! What fun! It really zipped along, but it was almost impossible to steer, as the back tire would slip right out from under me! Time for more traction!

I decided to make a spiked tire. I removed the rear wheel, then disassembled the two-part rim and removed the tire and inner tube. I stuck 1/2″ self-tapping, pan-head, sheet-metal screws through the tire from the inside, so that their points stuck out.DSC_0394 I evenly spaced out 24 screws and alternated them to be slightly off-center side to side. Next, I put some old scrap bicycle inner tube over them as a liner to protect the scooter tire inner-tube. After that, it was just a matter of reassembling everything.

Now for test #2 out  on the ice. Remembering how much it hurt to fall on the ice, I was prepared this time by wearing my motorcycle jacket (which has padding built-in) and my helmet. Good thing too, as I would learn while steering with one hand and holding a GoPro camera in the other…. (Note to self, keep both hands on handlebars at all times.)

Overall, the Ice Scooter works great! I still have a few little things to do on it. For example, the motor is running “sensor less”, and I’d like to learn about how brushless motors use the sensor system. I’d also like to get a small 24V dedicated charger. As it is right now, I have to remove the deck and manually charge with a little 12V charger.

From thrift store idea, to hack rack, to life on the ice, it’s always fun to see what you can do with just a little ingenuity. I hope you like this project. If you want to see more on it, please check out the write-up I did on Instructables. It’s even in a few contests there, and I’d love your vote!

Keep on Making,

-Ben

Rotary Encoder – built into motor for Electric Car

My electric Dodge neon uses an AC motor and an industrial motor controller.  I upgraded from m 1984 motor controller to one less than 25 years old (actually less than 5.)

The new controller does much more than the old one and has the ability to do some fancy tricks.  At the moment I am running it in “sense vector” mode.  The controller senses the position of the armature by monitoring the current in the field coils.  This works great…   as long as the motor is spinning.  From a stop it tends to get out of sync, but there is a cure!

The controller can use a quaderature encoder so the encoder can read the position of the armature at any speed.

To add an encoder to the motor I decided to try a chip amde by Austrial Microsystem AS5040.  This chip senses a magnet near the chip and calculates the position of the magnet and can generate multiple output:  PWM, binary via I2C, and quadurature!

I bought a few of the chips and built a surface mount board to hold the chip and a few LEDs to display the output.  The first two version had a few problems but the 3rd time was the charm.


Thanks to Royce for working out the process for surface mount PCBs.


The final version had to be small enough to fit in a depression in the end of the motor cap.  The sensor centered and the whole board insulated (clear enamel)  since this is a grease pocket

for the rear motor bearing.


The magnet is mounted to a bolt that is threaded into a tapped hole in the back end of the armature.  It took a while to the position right (it needs to be within a few millimeters of the sensor) hence the nuts and washers.


The cable is brought out of the motor through a small threaded hole (it was an alternate location for the grease fitting.)  The hole is filled with epoxy and the wires go to a DB9 connector.   I built a small test board that shows the quadurature signals (4 round LEDs) and the status outputs from the chip (the two rectangular LEDs)


The motor controller puts out 15V to power an encoder and wants A and B as well as inverted A and B signals.  The circuit includes some NPN transistors along with a voltage regulator and a few capacitors to tie it all together.  I put the schematic for both the sensor and test board on one schematic so I could make both boards at the same time.

I installed it in the car today, but still need to put a few more parts together to run it.


DOH!

It doesn’t work!

Ok, so the electronics work fine, it talks to the controller.

But it tops out at 256 pulses per revolution and the controller needs 1024.  It was a minor confusion between terminology.  The sensor detects 1024 positions, but to generate quaderature it uses 4 positions per pulse output.

Back to the drawing board.


I picked up a commercial shaft encoder on ebay for 50 that outputs 1024 PPR but it only works at 5V, so I’ll need a level shifter board and connector adapter.

Oh, yea, and I need to put the motor again, take out the old encoder, bring a shaft extension through the back grease pocket, add a grease seal and couple it to the encoder.


December 6th Meeting Minutes

A total of 26 people attended the meeting; 2 via Google Hangout and 5 guests.

At least one of the guests had seen our poster at MSOE and others had found us through our website, the Make website, or Instructables.

The group discussed the progress of venting of the laser cutter.

There will be an Entrepreneur Meeting scheduled for this Sunday at 1 PM, hosted by David B to discuss business opportunities and ideas at the space.

The Electric Car Club will also be meeting Sunday.

Call for people’s projects to get added to the wiki: Projects


September 27th Meeting Minutes

A total of 14 members and 1 guest attended the meeting.

BarCampMilwaukee6 is this weekend!

If you haven’t yet, go visit their website at http://barcampmilwaukee.org/

Membership Promotion

Jason proposed that we actively engage the public and recruit new members.  He volunteered to lead a small group and make contact with people at area schools and colleges.  More to come shortly.

Jumpstart Sponsorships

Rich presented an idea to sponsor people who regularly attend meetings and help out at the space, but lack the disposable income necessary for membership.  Candidates would be eligible for two or more months of part-time or student level membership.  A fund has already been set up using donations from other members.

Jason noted that PS:One and other groups offer incentives to bring in materials, clean the space, teach classes, etc. and earn points which can be redeemed for merchandise, discounted dues, and more.  More details to come.

Doorbell Project

It was noted that Shane, a regular at the space but not quite a member, was left waiting outside in the rain last Friday without anyone to let him in.  People were in the space, but did not know he was out there.  The group discussed the need for a doorbell to alert occupants to the presence of guests waiting outside.  Ross volunteered to help build a system with a bell and lights and began working shortly after the meeting.

Electric Car Club Meeting October 9th

As usual, the Electric Car Club will be meeting on the second Sunday of the month.  Tom asked for a few volunteers to come to the space and help direct any guests that attend the meeting.  People will hang out between 10:00 AM and 4:00 PM with the meeting somewhere in the middle.  Tom noted that Ben is working to make the group an official chapter of the Electric Automobile Association.