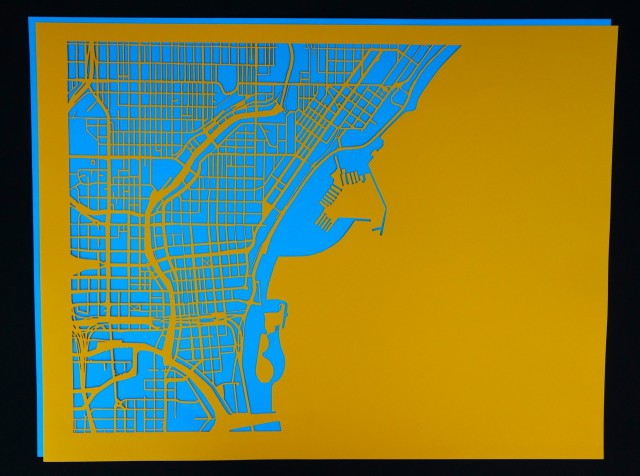
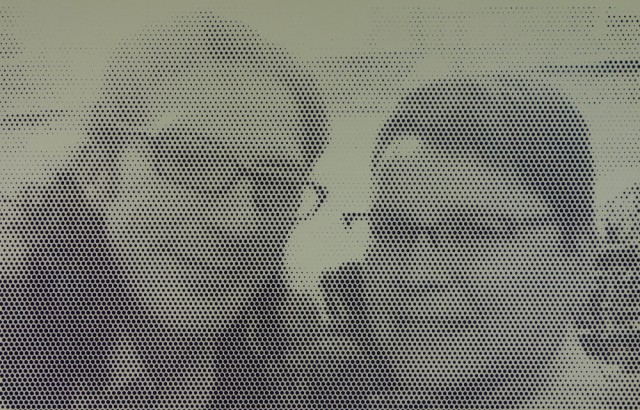
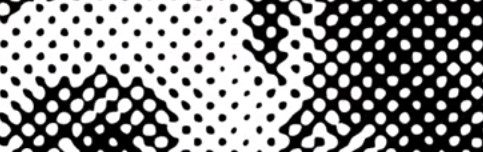
Wanting to up the ante a bit after having the Makerspace laser cutter chop out hundreds of city blocks to form a big map of MKE, I decided to laser cut a 24” by 18” halftone image! As it required the laser cutter to carve 10368 circles out of an off-yellow piece of 98 Lb paper, the cutting took 1.3 hours and produced quite a bit of confetti. I’ll display this with a purple (rather than black) paper behind the off-yellow laser cut paper. In person there is an interesting transition from an abstract purple/yellow shape into a black and white image as one moves further away from the image. You may even want to sit back from your monitor to improve the “image quality.”
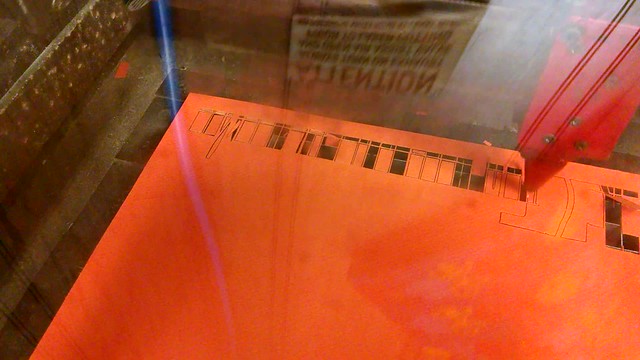
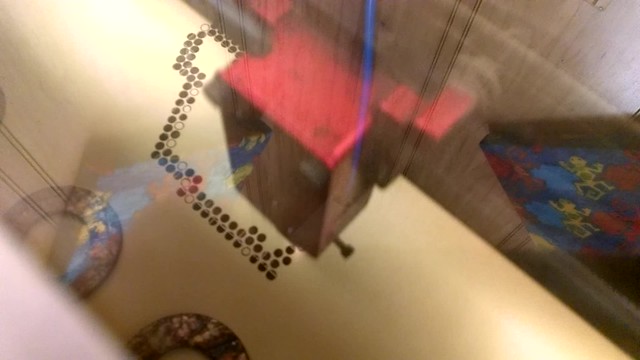
Check out this video of the laser cutter in the middle of cutting 10000 circles! Note the mysterious logic employed by the laser cutter to determine the order of its cuts.
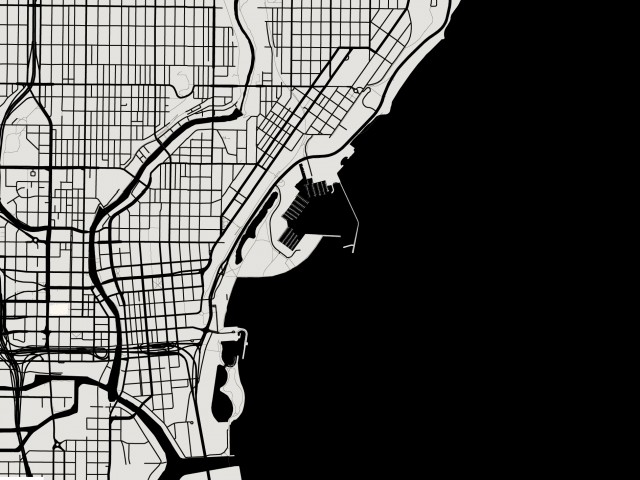
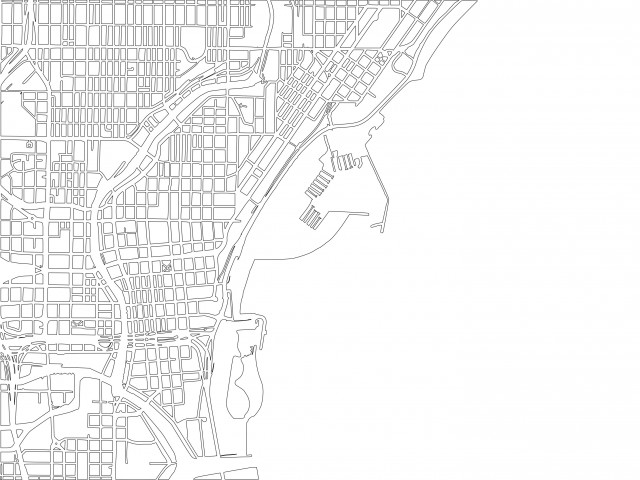
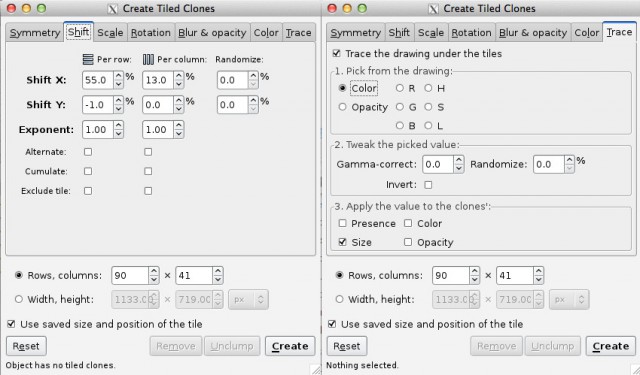
I imported a photo into GIMP, and desaturated it to produce a black and white image. After bumping up the contrast and darkening it slightly to nearly saturate the darkest areas (and avoid any totally white areas), I brought it into Inkscape. Inkscape can create halftones in a two step, manual process. The first step is to draw an 8 pixel by 8 pixel circle in the upper left corner of the 1133×720 pixel image, and select Edit->Clone-> Create Tiled Clones. To create a rectangular grid of halftone dots whose sizes are set by the color of the image below, use these settings:
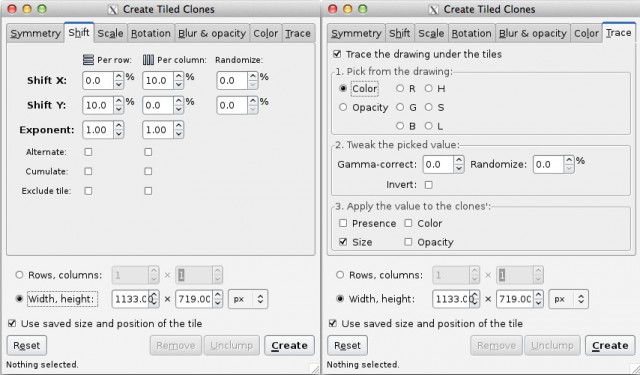
From a quick test cut of a particularly dark area, I found that I needed to add an offset between each row and each column to account for the kerf of the laser. I.e. the laser beam has a cutting width that is wider than that of the line, and so in the darkest areas of the photo the halftone dots overlapped, causing a large section of the paper to fully detach. That led me to make this test strip with 11 shades of grayscale, evenly spaced between pure black and white. I laser cut this test strip with various offset distances between the rows and columns in order to arrive at the optimal 10% extra offset between adjacent rows and columns shown in the above settings. Note also that the smallest size circles may not even be exported from Inkscape due to their infinitesimal dimensions (i.e. if you export as a .pdf). The minimum gap between circles with 42% speed and 100% power on an 1133 pixel wide image blown up to 24″ is 0.79 pixels, which is 0.017″.
 Applying these same settings to the image created a 128 by 81 array of circles, for a grand total of 10368 vector objects. In my first trial run last weekend, I found that sending this much data to our 60 Watt Universal Laser takes 5 minutes and results in a print error I noticed only after hitting start! After 1.3 hours of vector cutting, I found that a few of the rows and columns were shifted a bit from their intended location. It’s not clear whether this had to do with the print error, or if the paper moved slightly during the cutting process.
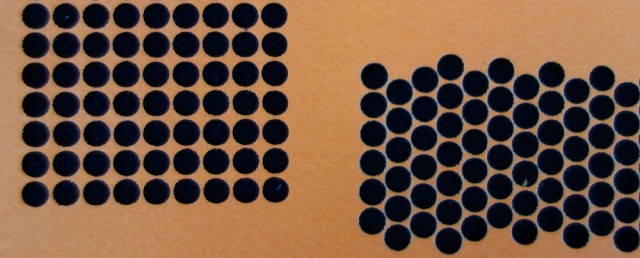
In order to improve the second version (shown at top), I chose to move away from the rectangular grid of halftone dots – recall that Kays and London teach that hexagonal close packing is for champions. The reason to abandon the rectangular spacing is to improve the dynamic range (i.e. to make the blacks blacker). For example, rectangular grids of circles pack at an “efficiency” of Pi/4, which is 79%, whereas hexagonal close packing results in a pi/6*sqrt(3) packing, or 91%. That means that the darkest sections of the image will be darker, as more of the light colored “front” piece of paper can be cut away. See the image below, and note that the hexagonal pattern does indeed appear darker.
It turns out that Inkscape doesn’t easily permit this. I ended up spending an hour or two fiddling with the column and row offset settings using my 11 black/white tone test strip to find settings that gave the hexagonal offset with the closest, even hexagonal spacing between adjacent circles. The following settings worked great for an 8 by 8 dot on the darkest square of the test strip:
 I test cut this yesterday, sending ¼ of the data at a time to the laser to avoid printing errors. However, part way through the cutting, cut-out paper circles stuck to the long air assist nozzle of the laser head (ironically) hit a washer I was using to weigh down the paper to prevent movement while cutting. The paper shifted by about 1mm, which was enough to make some adjacent halftone dots overlap and cause others to have a visibly wider spacing.
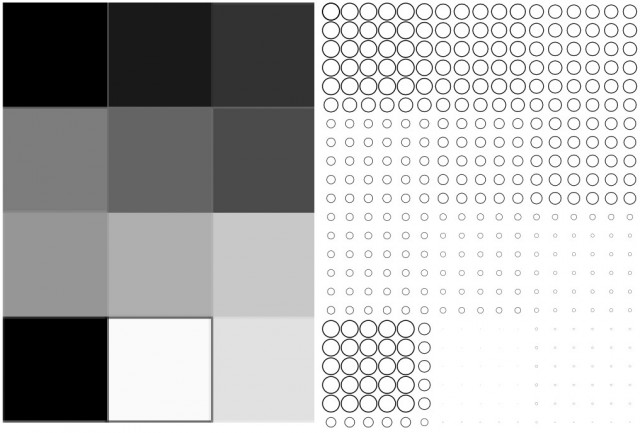
In the process of cutting that photo, Shane happened by and mentioned that vector cutting 10368 objects may be just as fast as the typically-very-slow raster cutting time. With three clicks, I turned off the vector outline of the halftone dots, and selected a fill color. After test cutting a row, I found that he was right. Check out the difference between raster (100% speed, 100% power) and vector (42% speed, 100% power) in the darkest section of the image – the area with the closest spaced circles:
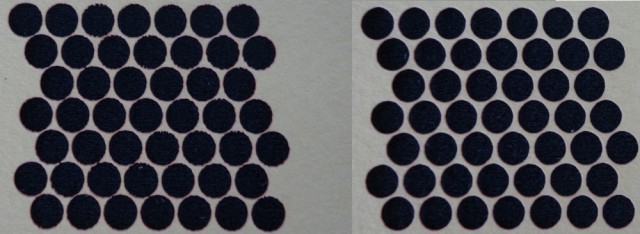
The vector halftone dots are perfectly circular, though the edges are a bit rough. Some of them have a very small border and so are a bit fragile. The raster halftone dots are not very circular, but the edges are very smooth and the boarders are slightly wider. I chose to raster cut the 24″ x 18″ image, and found that the raster cutting time of 1.4 hours was nearly equal to the 1.3 hour vector cutting time.
Note that many programs can create halftones, though often the results will not be suitable for laser cutter use:
The next step is to laser cut this image into wood. Also, Inkscape will let you draw any shape to create tiled clones from – so please do share photos of any halftone images you create with star shapes!