Be careful what you ask for!

Zamboni 6 photo

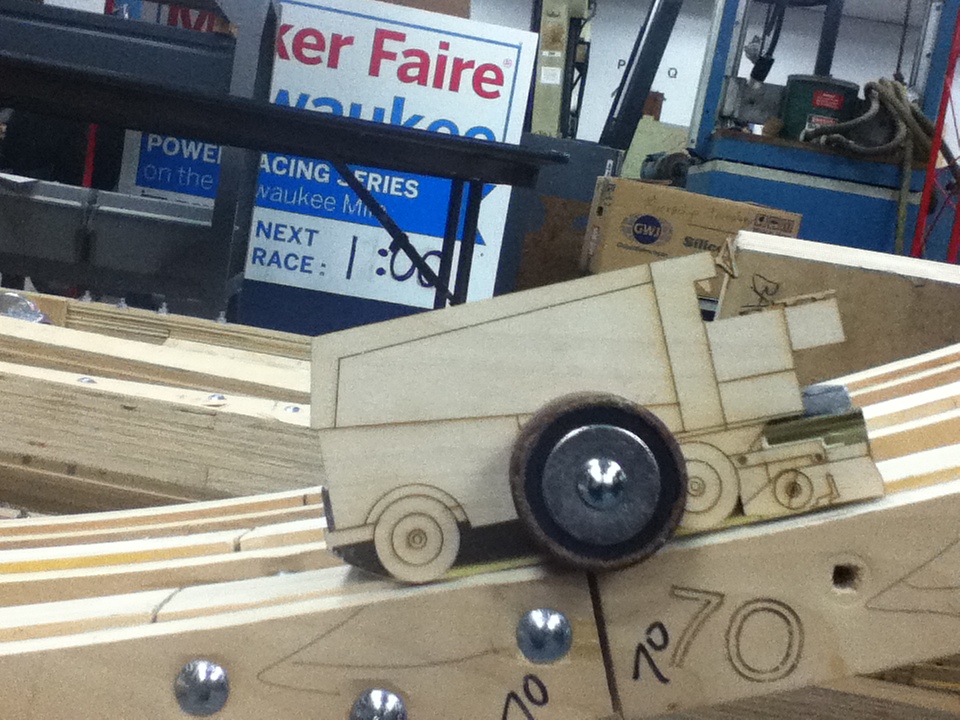
Several months ago, a humorous request went out for a Zamboni that could be used on the Nerdy Derby track.

Last year the Milwaukee Makerspace held a Maker Fest and a Nerdy Derby track was made for the occasion. The design allowed the track to be disassembled in 4 foot long sections.

When the track was reassembled, earlier this year, for the South Side Chicago Maker Faire, it was found that the joints did not match up as well as when it was first put together. Small ledges, that went up and down, would cause the cars to bounce off the track or hit the bottom of the car. Both of these scenarios prevented the cars from traveling freely down the track.

As many of you know, we just had a GREAT Maker Faire here in Milwaukee last month and the Nerdy Derby track was needed again!

We produced, and ran, over 1000 Nerdy Derby cars over the 2 day event. Wow!

Zamboni 10 photo

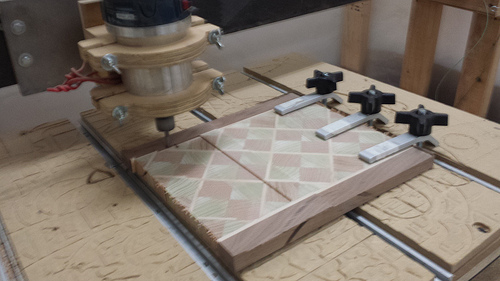
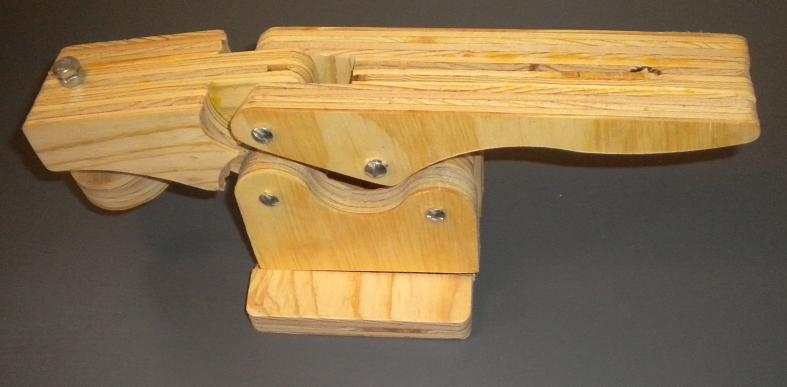
A month or so before the event I started working on an idea for a Zamboni type of device. My first thought was of a custom contoured planer that could be used at each joint to smooth them out. This idea seemed like too much work so I proceeded forward with my second design. This consisted of a simple sled hat used a drum sander, which smoothed out the high spots. Wood putty was then used to fill in any low spots.


Laser Cut Road Trip Coasters: Improved!

I used the Makerspace 60 Watt laser cutter to make coasters that show the path of some road trips I’ve taken.  That way I can enjoy the sweet irony of sitting on my couch enjoying a tasty beverage while having thoughts of travel!  This project was somewhat inspired by mmassie’s OpenPaths Zurich vacation keep sake project.

As I don’t use OpenPaths, I used Google maps to plot the course of past road trips, and simply took screen captures.  I wanted to create vector images with hairline width (0.001″) lines so the laser cutter can make each coaster in 45 seconds instead of 20 minutes. There are many ways to generate vector data using these raster .png images. I chose to semi-manually edit out unnecessary parts of the images using GIMP, and then used Inkscape to extract vector data from the resulting simplified images.  If you’re new to these tools, just search for “Inkscape raster to vector” tutorial videos.  An alternate approach is to just import the raster image into Inkscape, and use the Bézier line tool to trace the important paths.  Yes it is manual, but this alternate method also only takes 5 minutes to complete.

The coasters are cut from 3/16″ 4″ x 24″ solid basswood using fairly standard settings of 100% power, with 100% speed for etching, and 3.5% speed for cutting.

trio_s

I made quite a few coasters, and above is a photo of three of them. The coaster on top is a rail trip through Italy, the second is a 1000 km, 12 day (right hand) drive through Ireland, and the last is a much longer than 12 day road trip through the southwest – note the vertical and horizontal lines are the state borders of NV/NM/CO/UT.

A few days later, after polishing my vector editing skills in Inkscape, I made an improved version of the above three coasters.  I added circles to more clearly highlight each stop, and I etched the names of each stop on the reverse side of each coaster.  One group of raster to vector settings I used in Inkscape resulted in the creation of two sets of (closely spaced) hairlines for the outline of Italy, as shown in the coaster above.  I really liked how distinct the outline of Italy is relative to the path of the trip.  I chose to intentionally create two offset hairlines for the other country or border outlines, using Inkscape’s linked-offset path command.

Check out the new and improved design of the front, with dual country/border outlines and circles to denote the stops:

Three_Coasters_Front_Improved

Check out the reverse sides of these coasters shown below, with names of each stop etched on them. Albuquerque.

Three_Coasters_Back_Improved

Weekend Project: End Table

This weekend I made an end table for my living room.  Its in the style of two night stands I made, this one for the tool at hand contest, and this second one! The legs of this series of small tables are getting increasingly eccentric.  To build it, I started with three pieces of 2×12 lumber, and a 1/2″ diameter dowel rod.  I avoided using metal fasteners, and instead used only wood glue and 8 3″ long dowel pegs to attach the legs to ensure that sculpting the table with my chainsaw-blade-equipped angle grinder would be safe(r).  To save some labor with the grinder, I actually cut some of the zig-zag legs with a band saw first.  Even with the pre-cutting, I ended up making 1.5 cubic feet of wood chips and saw dust.

EndTable

Argyle Pattern Cutting Board

My latest cutting board is a based on a design I saw online.  It’s built around an argyle pattern that is often found on sweaters.

The first step is to glue a 1.5″ x 1.5″ pieces of poplar and red oak together in a 2 x 2 grid pattern. Additionally, one(1) red oak and two(2) poplar pieces are glues in a “L” shape. Each assembly is about 10″ long. Then, each assembly is sliced into 3/4″ pieces on the table saw or the chop saw. We need eight(8) of the 2×2 pieces and ten “L” shaped ones. The picture below shows the final intended layout.

11333941746_c7f285dcf9

In the next step, the hard maple borders are added. The following picture shows some of the earliest glue-ups.

11333924056_aa42343066

Then, the edges are trimmed and walnut is added to the outside. I chose to use a CNC router to flatten the cutting board surface.

11520122183_4211243a3a

I soaked the  board in mineral oil for 24 hours and finished with some butcher block conditioner and voila!

11520002395_08f7b29f08_b