The Finished Product (so you keep reading)

So I moved into a new place and need furniture (which you might tell from the background of some of these photos). But, I kept looking at big box store stuff and it was expensive and poorly made. So I figured I could build something myself for cheaper and it would last longer! Plus I get to build something, which is half the fun.
Step 1: Find Inspiration

Chadhaus Furniture ($6,400)

- From Etsy
Step 2: Design Your Own
I drew out a bunch of hand sketches to figure out dimensions and proportions. I actually wandered through a couple furniture stores and checked their measurements for a 6 person table… I also measured the room its going in to make sure I had space to get around it.
Then I pulled out my middle school drafting skills and an engineer’s scale to see if everything would work and kind of went from there.
Step 3: Buy Material

This was something like 45 board feet of 6/4 cherry that I had roughly planed. By this point in the project I didn’t really know if I wanted rough cut lumber or if I was going to plane/sand/joint the whole top together as one solid piece.
First part of the bill, $200 for all this wood.
Step 4: Rough Layout

I bought most of this material before I actually had a scale drawing I liked and before I had final measurements that I was going to build to. So I rough cut these to 66/68 inches long as I knew I would end up losing a bit of length during glue up.
Step 5: Build the Legs
Substep 5.1: Miter the steel for the legs.
The legs were 1×3 inch steel tube. 24 inch for the width and 36 inch stock cut to 29 inches long. So that plus the ~1.5 inch table top would be right about 30 inches high. (which seems about standard)

You can also see one of the dimensional sketches I carried around for reference.
Something like $120 for all the steel.
Substep 5.2: Learn to Weld
(Something something, draw an owl.)
My uncle taught me how to weld a year or so ago to build a similar looking entry way table so I had some experience welding before this. Plus I can soldier, which is nearly the same thing.
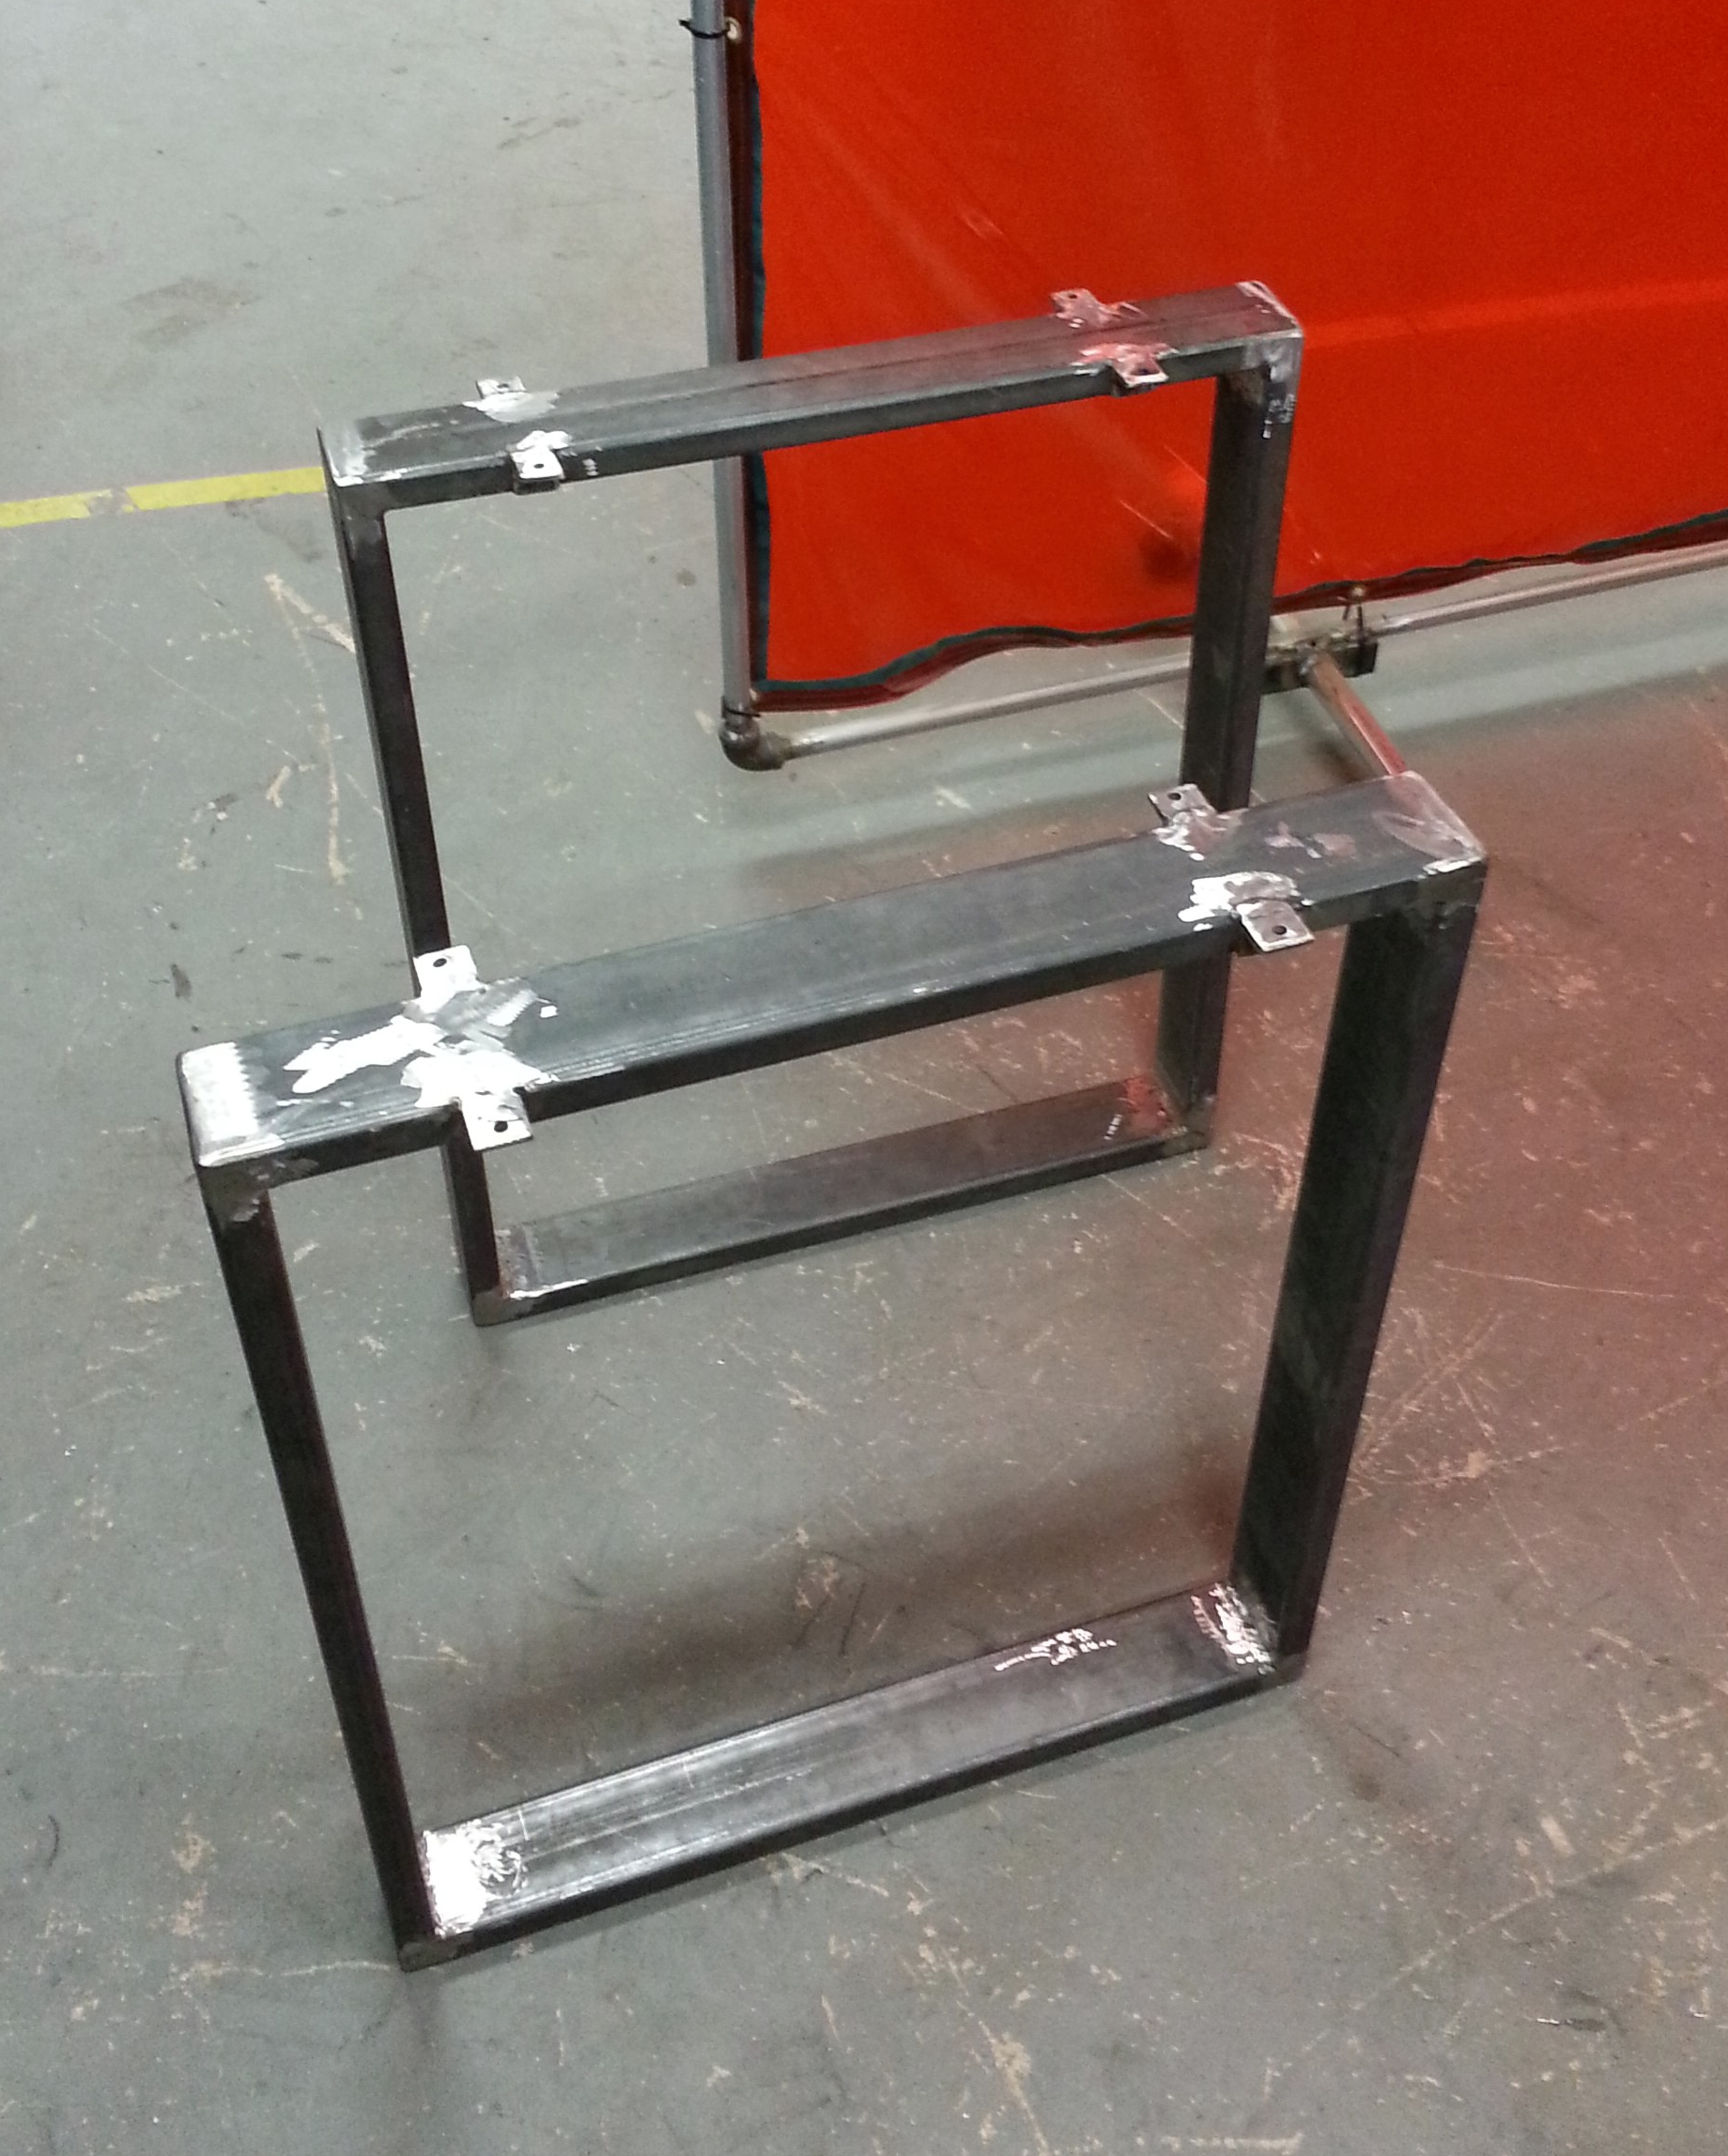
This was my first attempt at welding the whole set of legs into a square structure.

This was the second set of legs. This set went a lot smoother as I figured out the process a bit and got into a groove for welding.
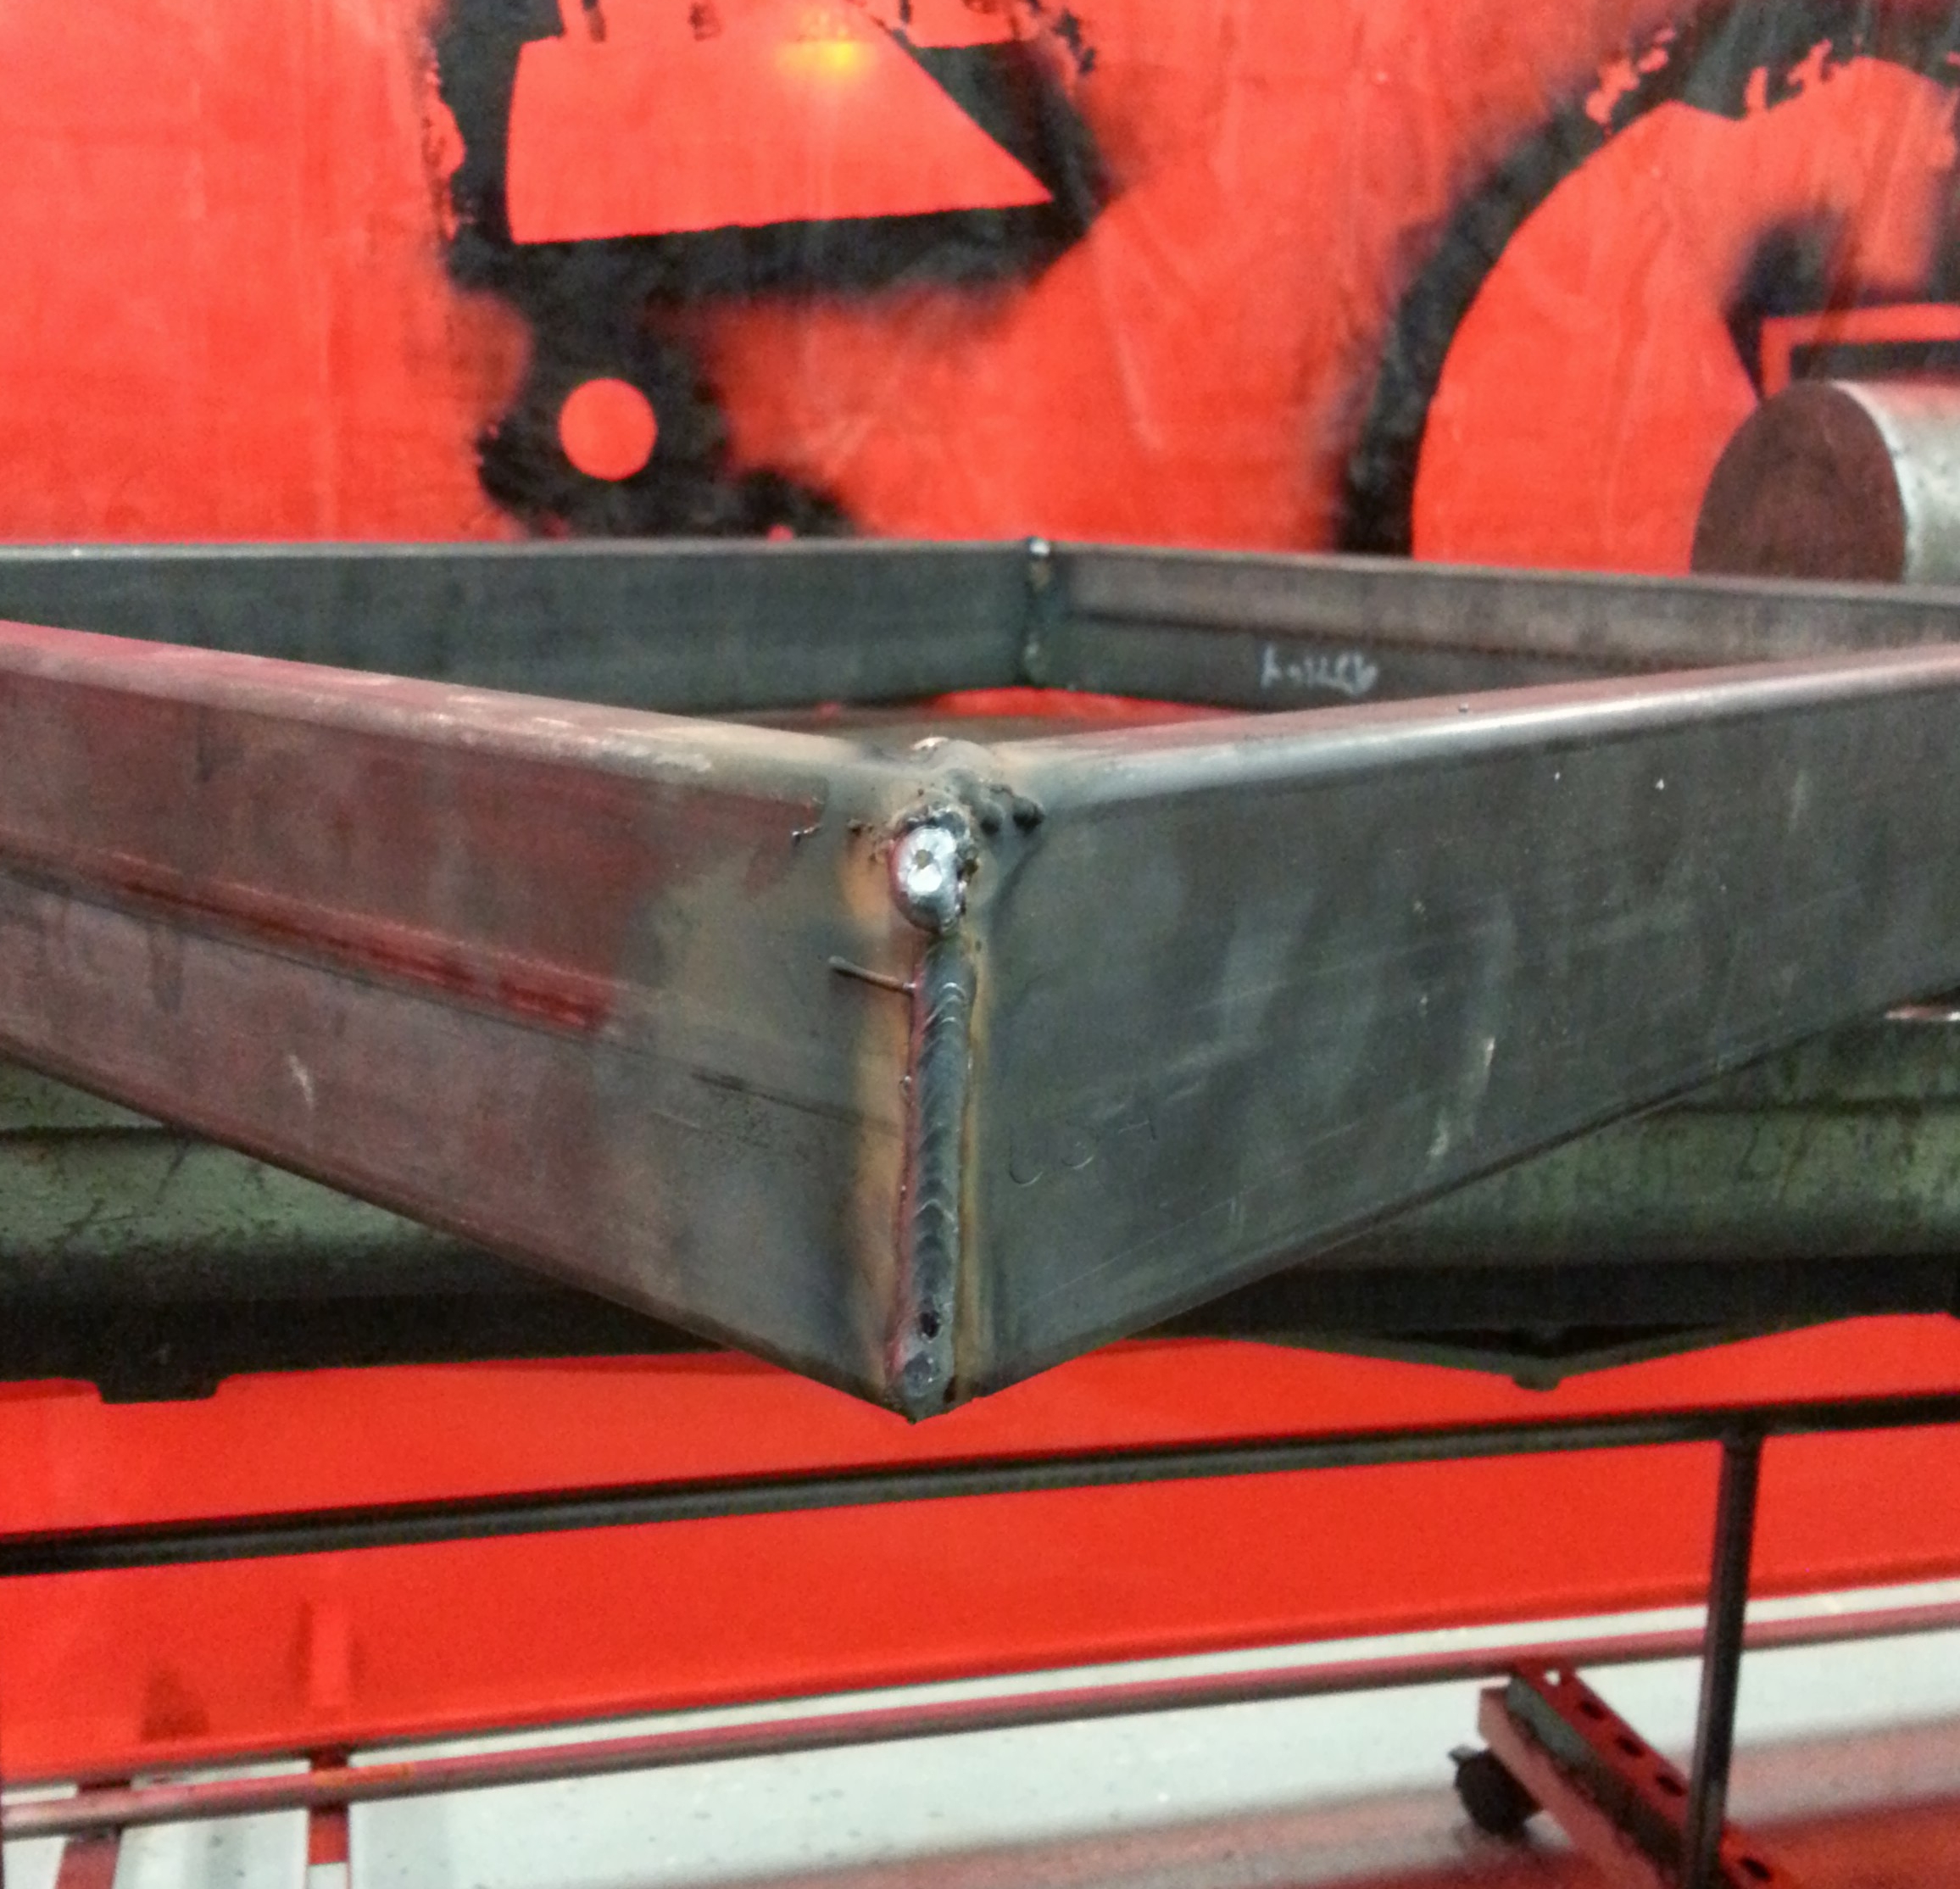
I also welded on the little tabs which I drilled out for 1/4 inch lag bolts.
Substep 5.3: Grind.
Lots of grinding. Also I ground my name into the underside of one leg to sign my piece. I also finished these with a clear matte finish so that they wouldn’t rust.
Step 6: Assemble the Table Top
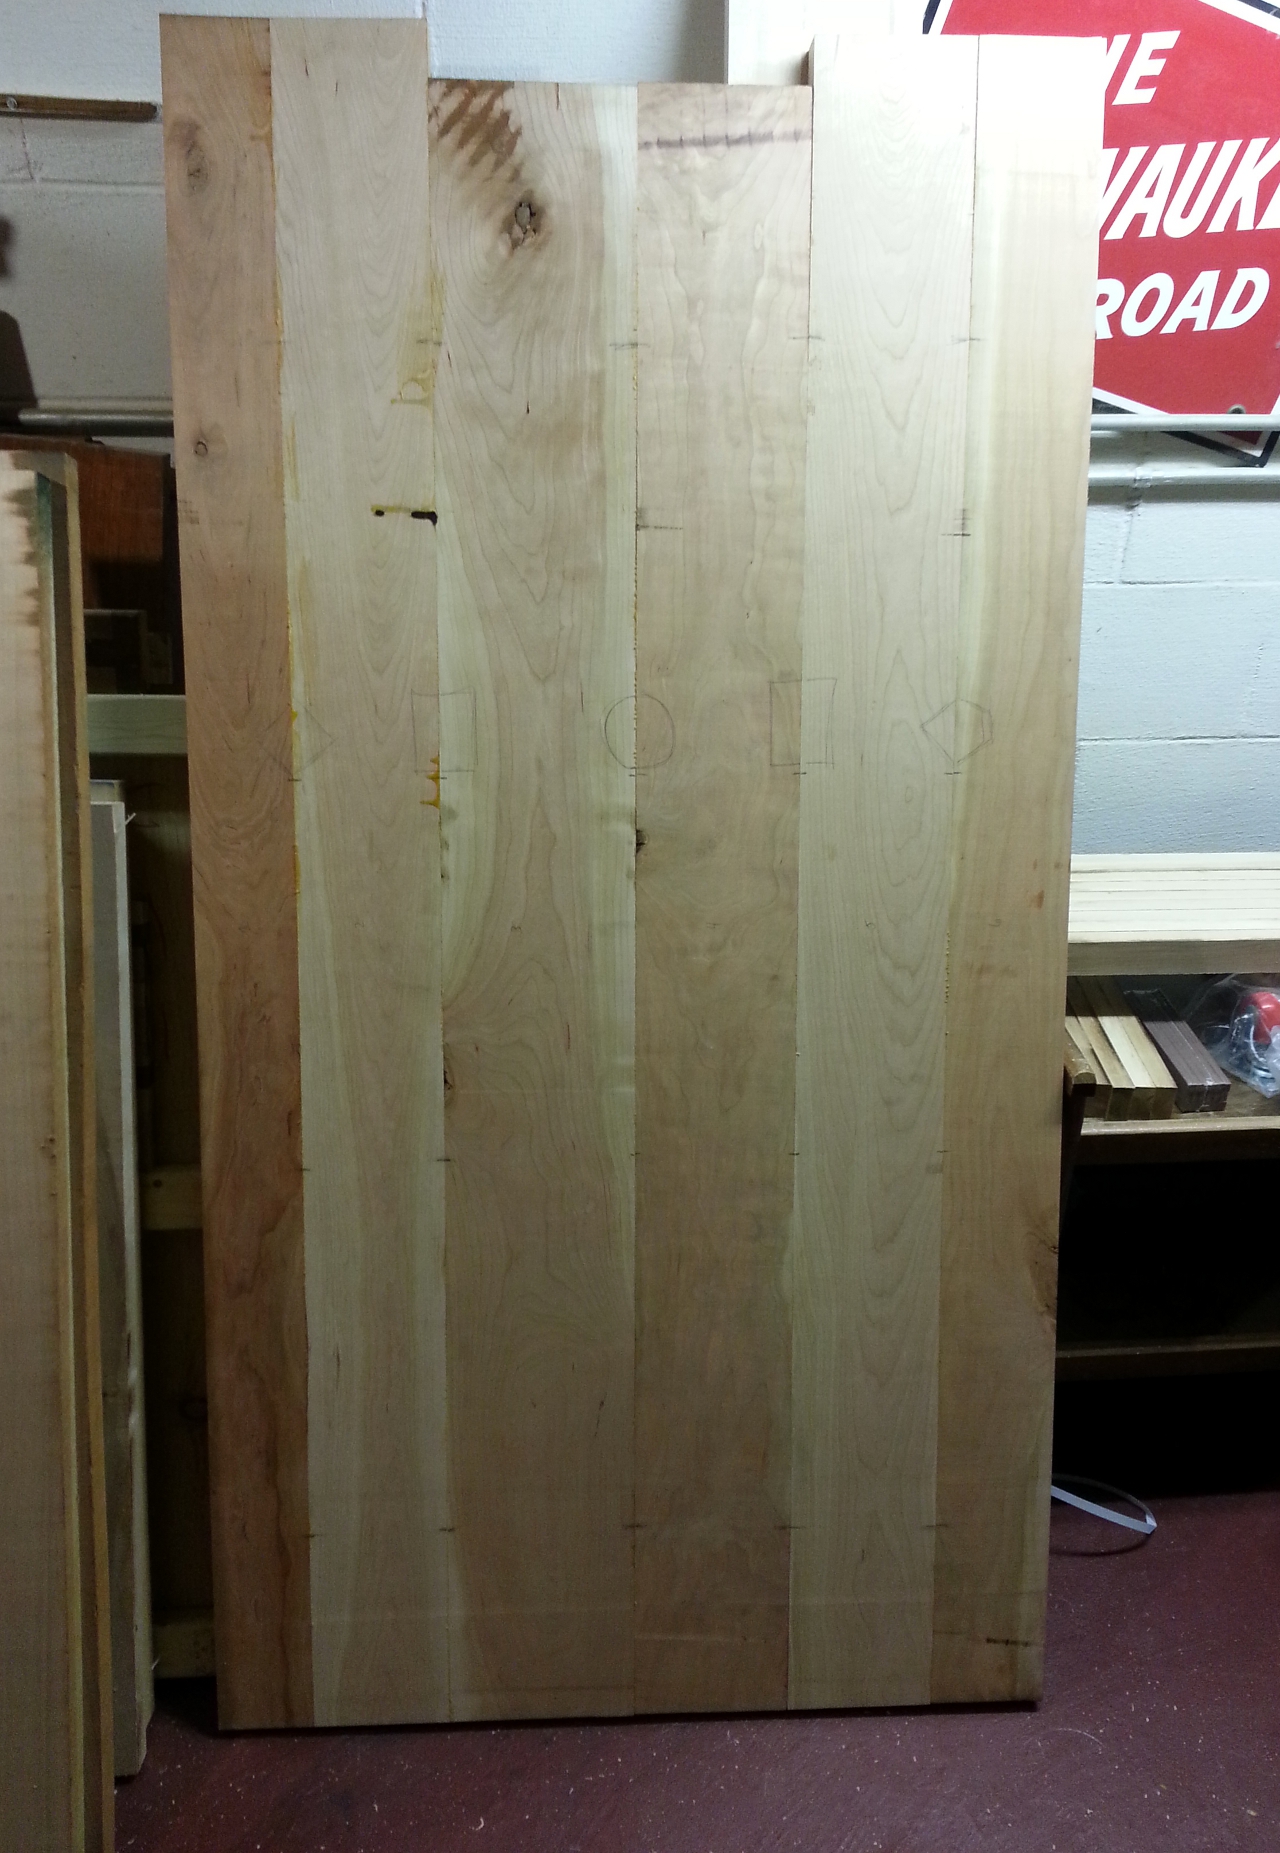
At this point I decided that I wanted to edge joint everything together and I wanted the top smooth so I didn’t get little crap in the gaps. So I took it back to Kettle Moraine Hardwoods and had them plane the rough lumber down to 1 3/8 inch and straight edge both sides. Then I put everything together once more for a rough layout.

Substep 6.1: Biscuits and Glue
A hearty breakfast?
Because the boards were still kind of rough as I didn’t plane them down enough to get all the warp out of them, I decided to use biscuits to help the glue up and keep the top aligned and flat so that once I had to finish it I didn’t loose any more thickness. Also I tried to match up colors a bit differently than when I had rough boards.
(Side note, remember to alternate grain on each board to help prevent cupping)

Substep 6.2 Sanding
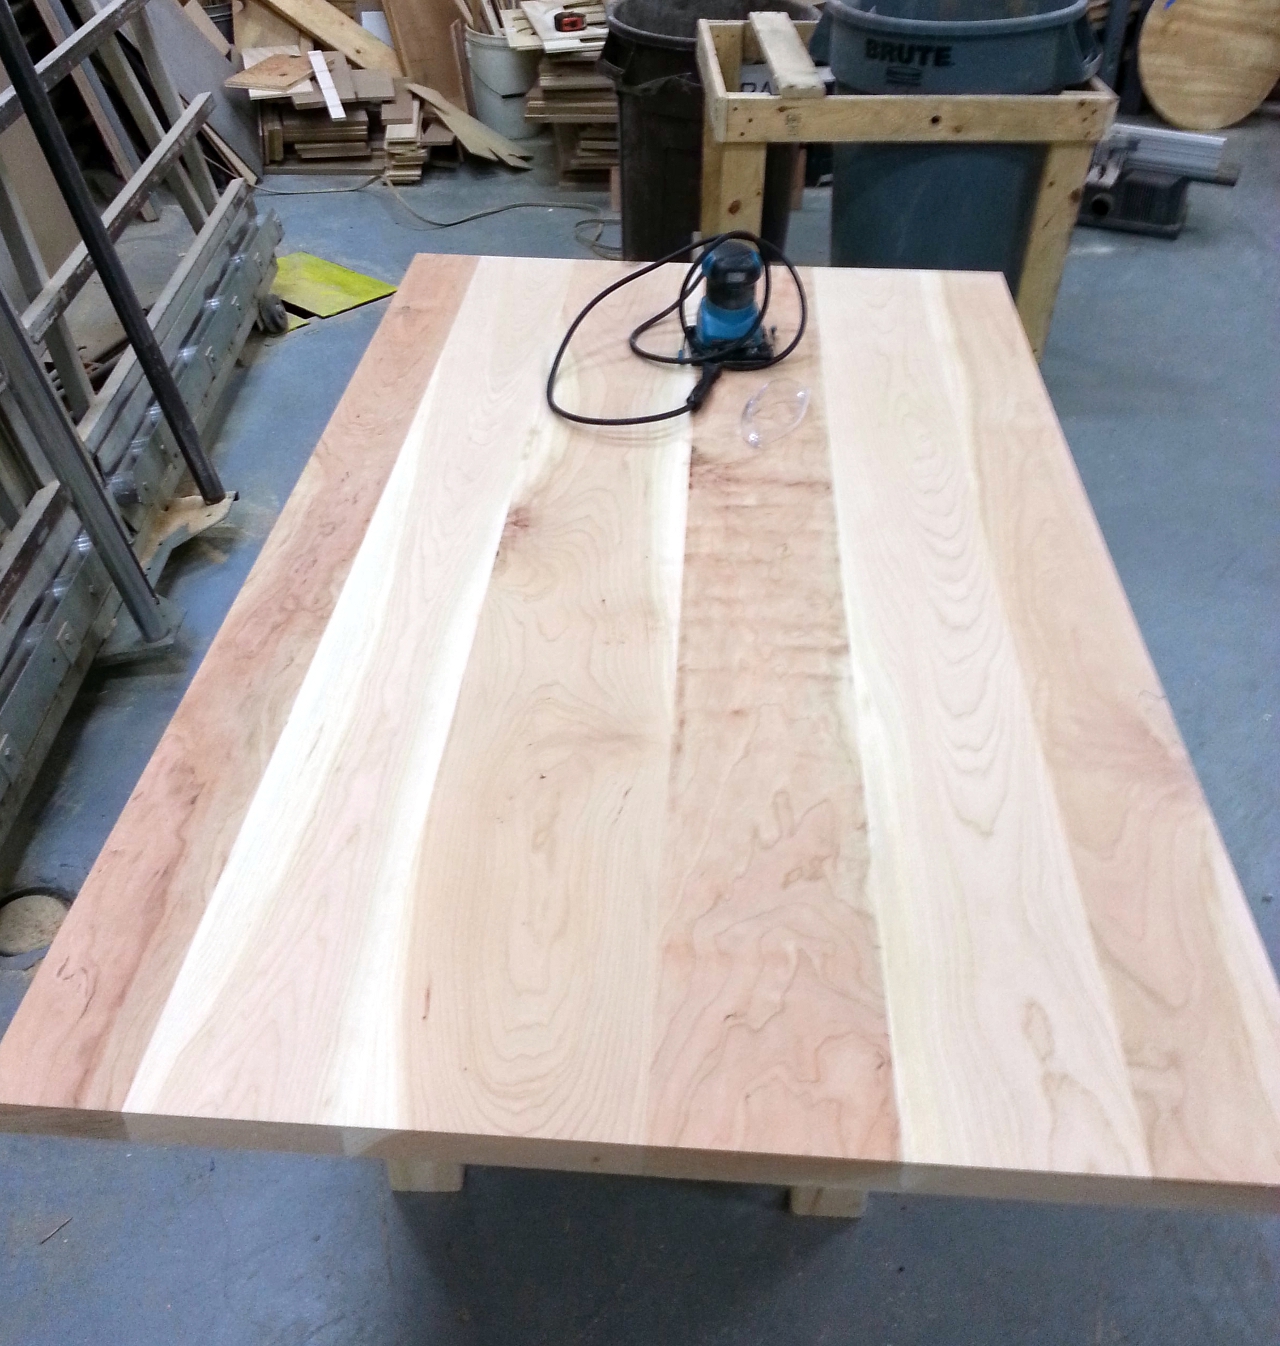
So here it is after glue up. To save myself a bunch of time I took it back to Kettle Moraine Hardwoods as they have a 42 inch drum sander you can use for a couple bucks in shop fees. Then I transported it to the Makerspace to use the panel saw to square up the ends and sand it again to finish. (40 grit drum sander, 80 grit -> 180 grit -> 320 grit on the palm sander)
Step 7: Finish
I really like oil based finishes as they bring out lot of the natural color and figure of the wood. Plus I had some lying around from that entry way table I mentioned earlier so I knew how the finish would turn out. (Velvit Oil)
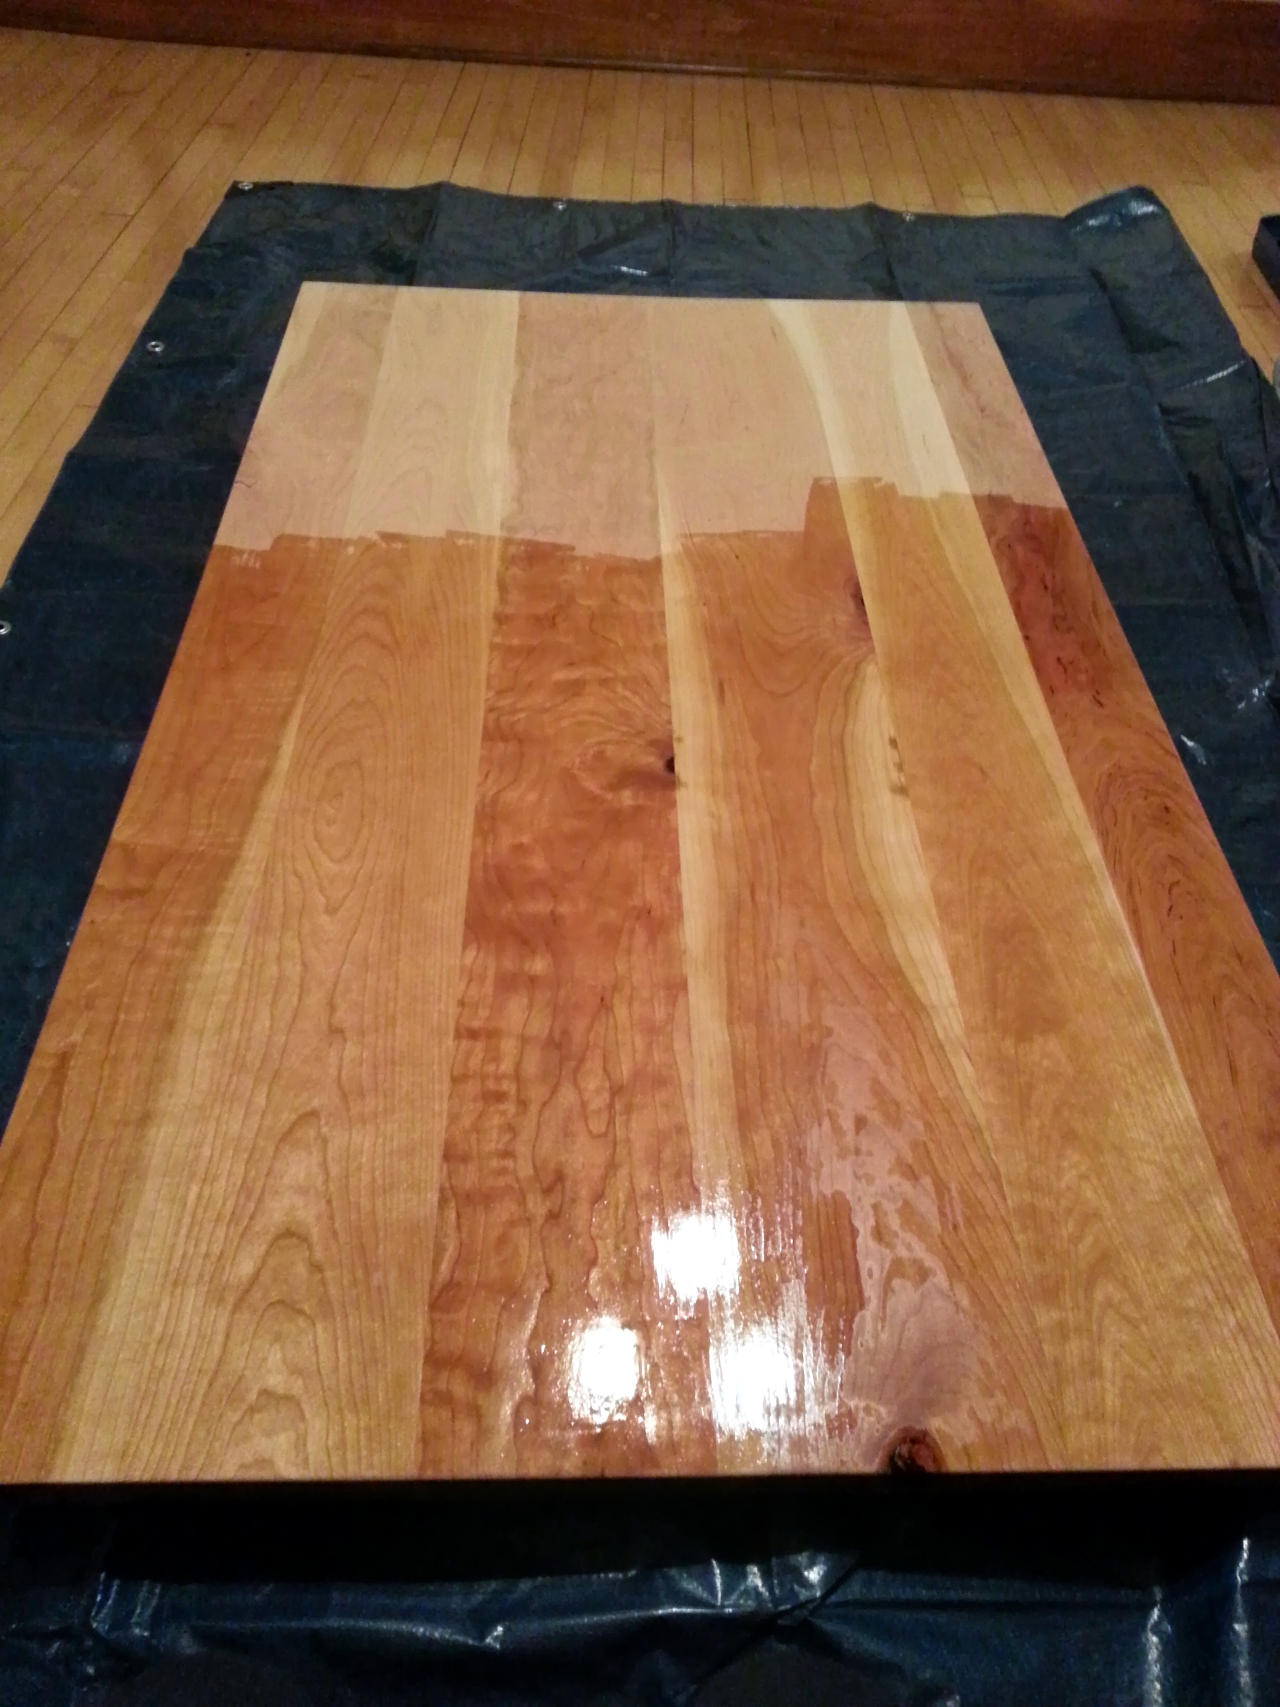
You can see the difference in color (sorry for the poor color balance) but the cherry has a beautiful redness to it. I also applied Paste Wax to the top as extra insurance against stains and water, etc.
Step 8: Attach Legs
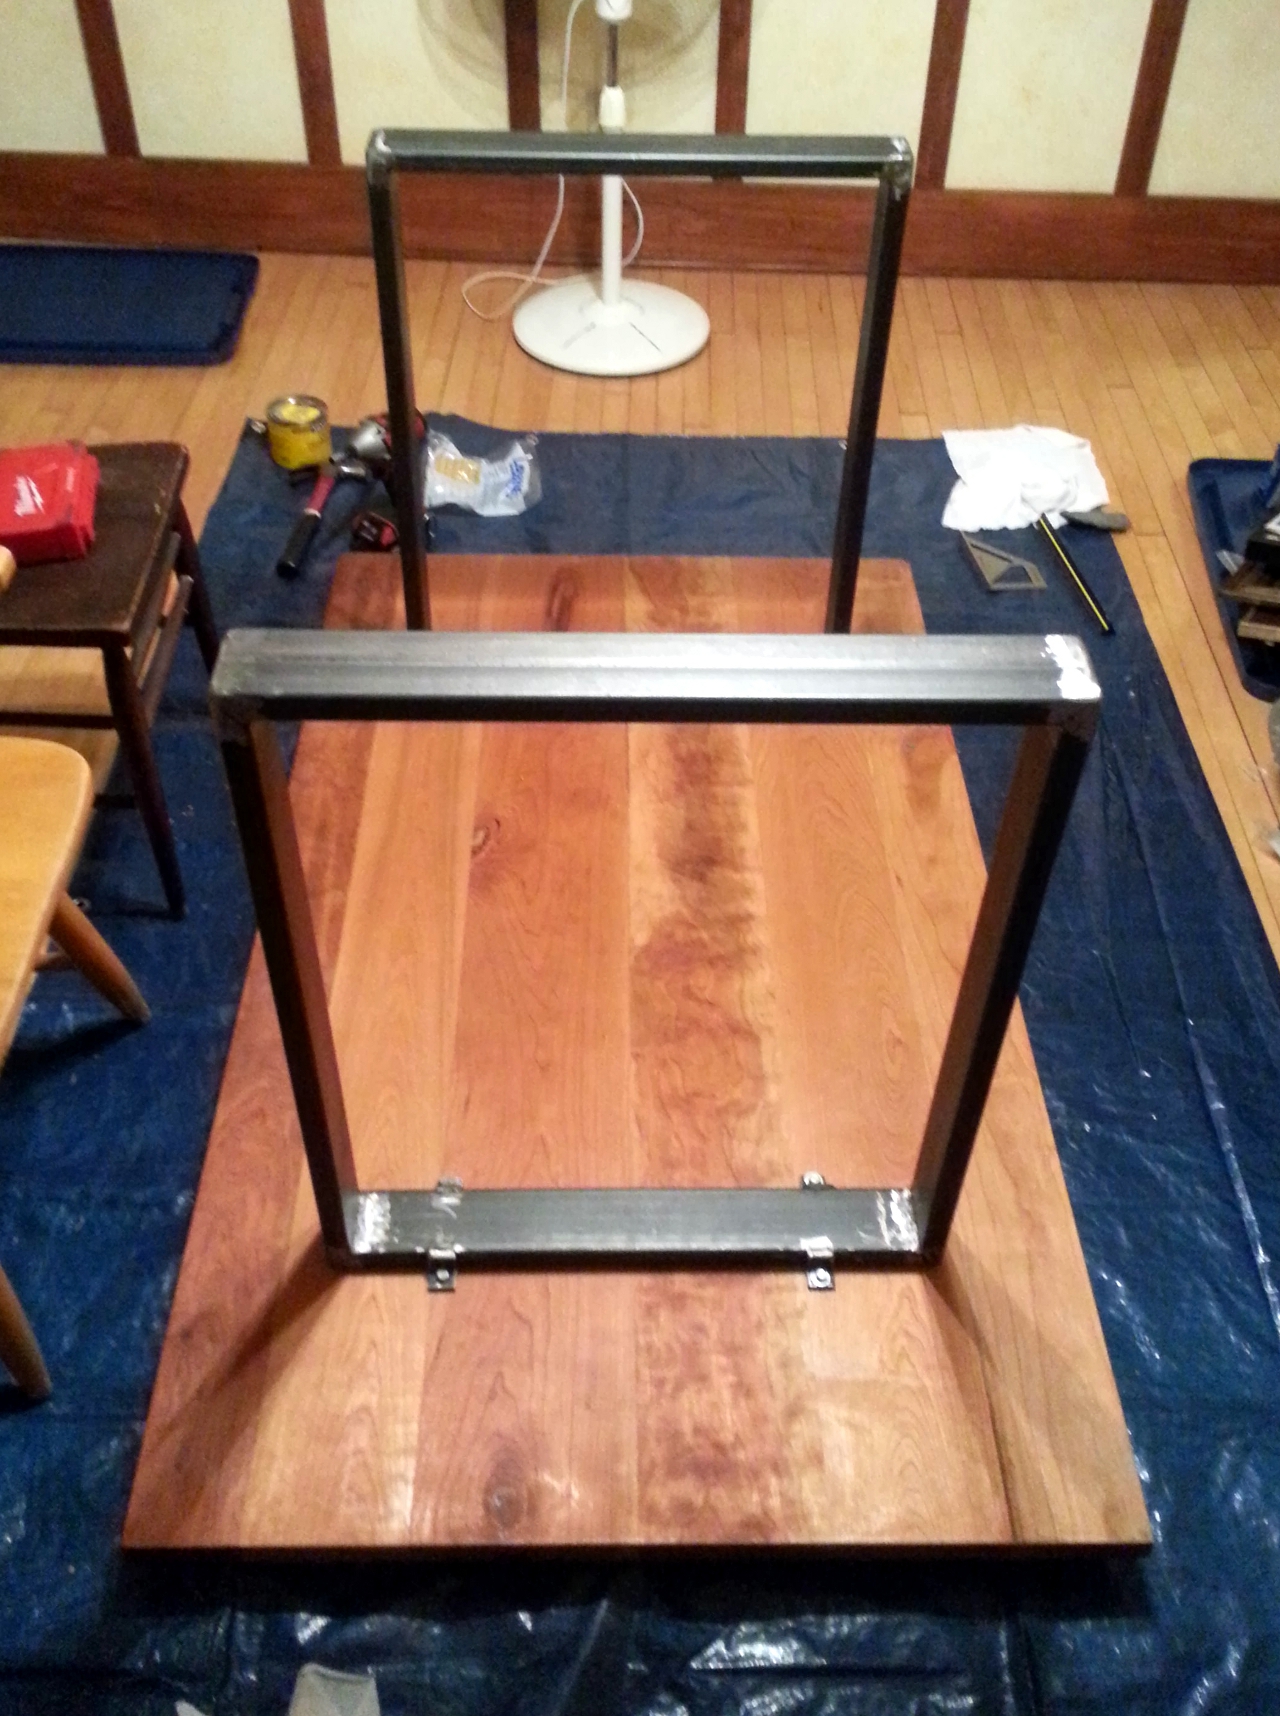
I kind of eyeballed this. But I did use a square and my engineer’s scale to try to align everything as best as possible. I did pre-drill holes for the lag bolts as there would be no way the bolts go in without them.
Step 9: Celebrate!
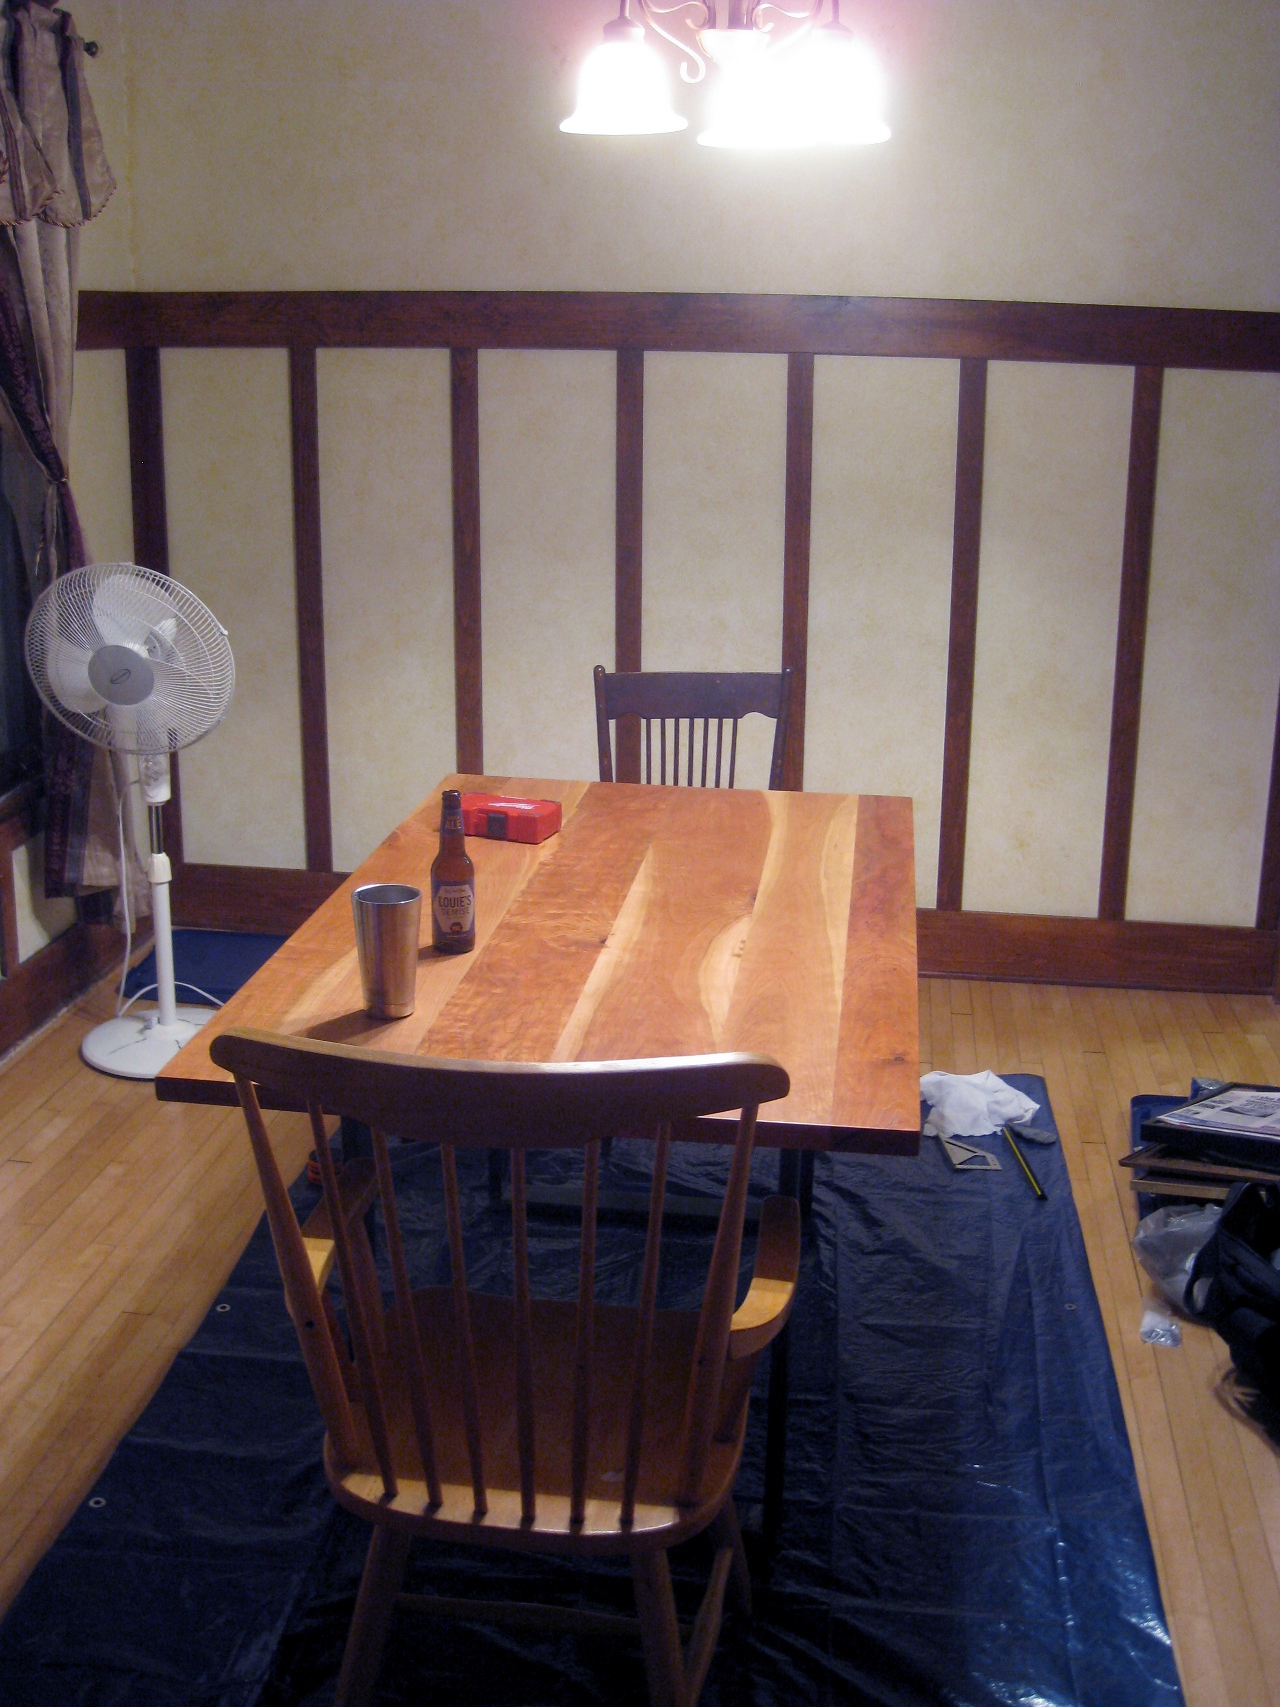
With beer!
Also I stood on the table to make sure it was stable, and it was. So that worked out.
Alternate shots:
With perhaps more natural lighting.
And a close up of some of the figure in the cherry.

Conclusion:
So for $350 in materials ($200 for wood with lots left over, $120 for metal, $30 for shop fees) I built a table I’m pretty satisfied with. Plus its way cooler than MDF crap with veneer or paint to cover up crappy wood. And should last quite a while… I hope.
Hey, maybe I like my cheap cardboard tables and chairs. That way I Have something for my friends to smash. Damn Hipster.
It looks good. Would look even better with me there, scarfing down some good grub.
Love the grain in the middle of the table. Turned out great!