Years back, I used to throw a lot of cocktail parties. Between myself and two good friends, we owned five cocktail shakers and 35+ martini glasses. During the parties, we’d typically be the only three people shaking martinis for all the guests. Though that’s awesome, it also means we missed out on much of the socializing and mingling during each party. In preparation for a recent birthday party, the solution came to me: Use Lasers! So, I laser cut ten coaster-sized pieces of basswood and then laser engraved my twelve favorite Martini and Champagne cocktail recipes on them. I also cut stands for them that had a laser engraved “best practices” guide for shaking Martinis – you know, the things that bartenders are typically too busy to do for you: Chill your glass before pouring your drink into it, shaking your drink until it is sufficiently cold, etc. The drinks have recipes that taste better than what most bartenders will make for you, because they include things like an amount of lemon or lime that they’re too busy to squeeze into your drink.
 The party was an even more awesome experience for me, because I wasn’t only shaking drinks all night. It was also even more awesome for the guests, as they found that great cocktails are super easy to make! And who doesn’t like to make things?
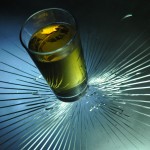
 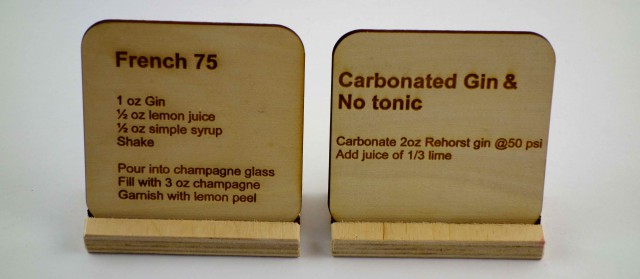 Also, the carbonated Gin & No tonic is real crowd pleaser! See my previous post about home carbonation for more info, and note that all types of inappropriate things can be carbonated: Gin, Ardbeg Corryvreckan, grapes, etc!
Category Archives: beverages
Bullet-Proof Coffee Table
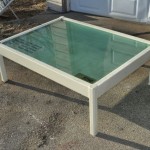
This weekend, I built a bullet-proof coffee table.
For years, I’ve had a three-foot by four-foot piece of bullet-proof glass that I removed from a bank while working construction there. I saved the glass, thinking that it would make an AWESOME table. Well, I finally got around to building it.
I cut pallet-racking cross-pieces to build a frame that would wrap around the glass. Pallet racks already have a 1.5″ indent in them to hold lumber, which was perfect for a supporting lip for the glass.
The legs were two-inch steel square tube, cut to 18″ long. After cutting the pieces, I tack welded the whole frame together, checked for square, and tested it against the glass. I then did all the welds, capped off the ends of the legs, and ground round the top corners.
After that, it was a coat of primer, a coat of 1980’s bank industrial beige paint, and laying the glass into the frame.
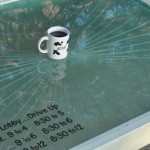
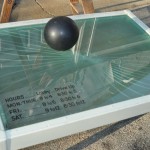
I still wanted to test how bullet-proof it was, but simply, and safer than with a gun. I did have a bowling ball handy! Check out the video for how I made an interesting pattern in the glass!
After I marked the glass, I thought it would look really cool backlit! Once it was dark, I put a temporary light behind the glass, and was very pleased with the results. The cracks light up great! I’ll now have to permanently wire up some lighting under it.
I have a full DIY build write-up on it at Instructables. In fact, it’s in the INDESTRUCTIBLE contest there, and I’d love to get your vote!
Oh, and can anyone stop over and help me move this table? It weighs a TON!
MGD Midi Controller
What do you get when you solder a can of MGD to a Teensy? Why, an MGD Midi Controller, of course!
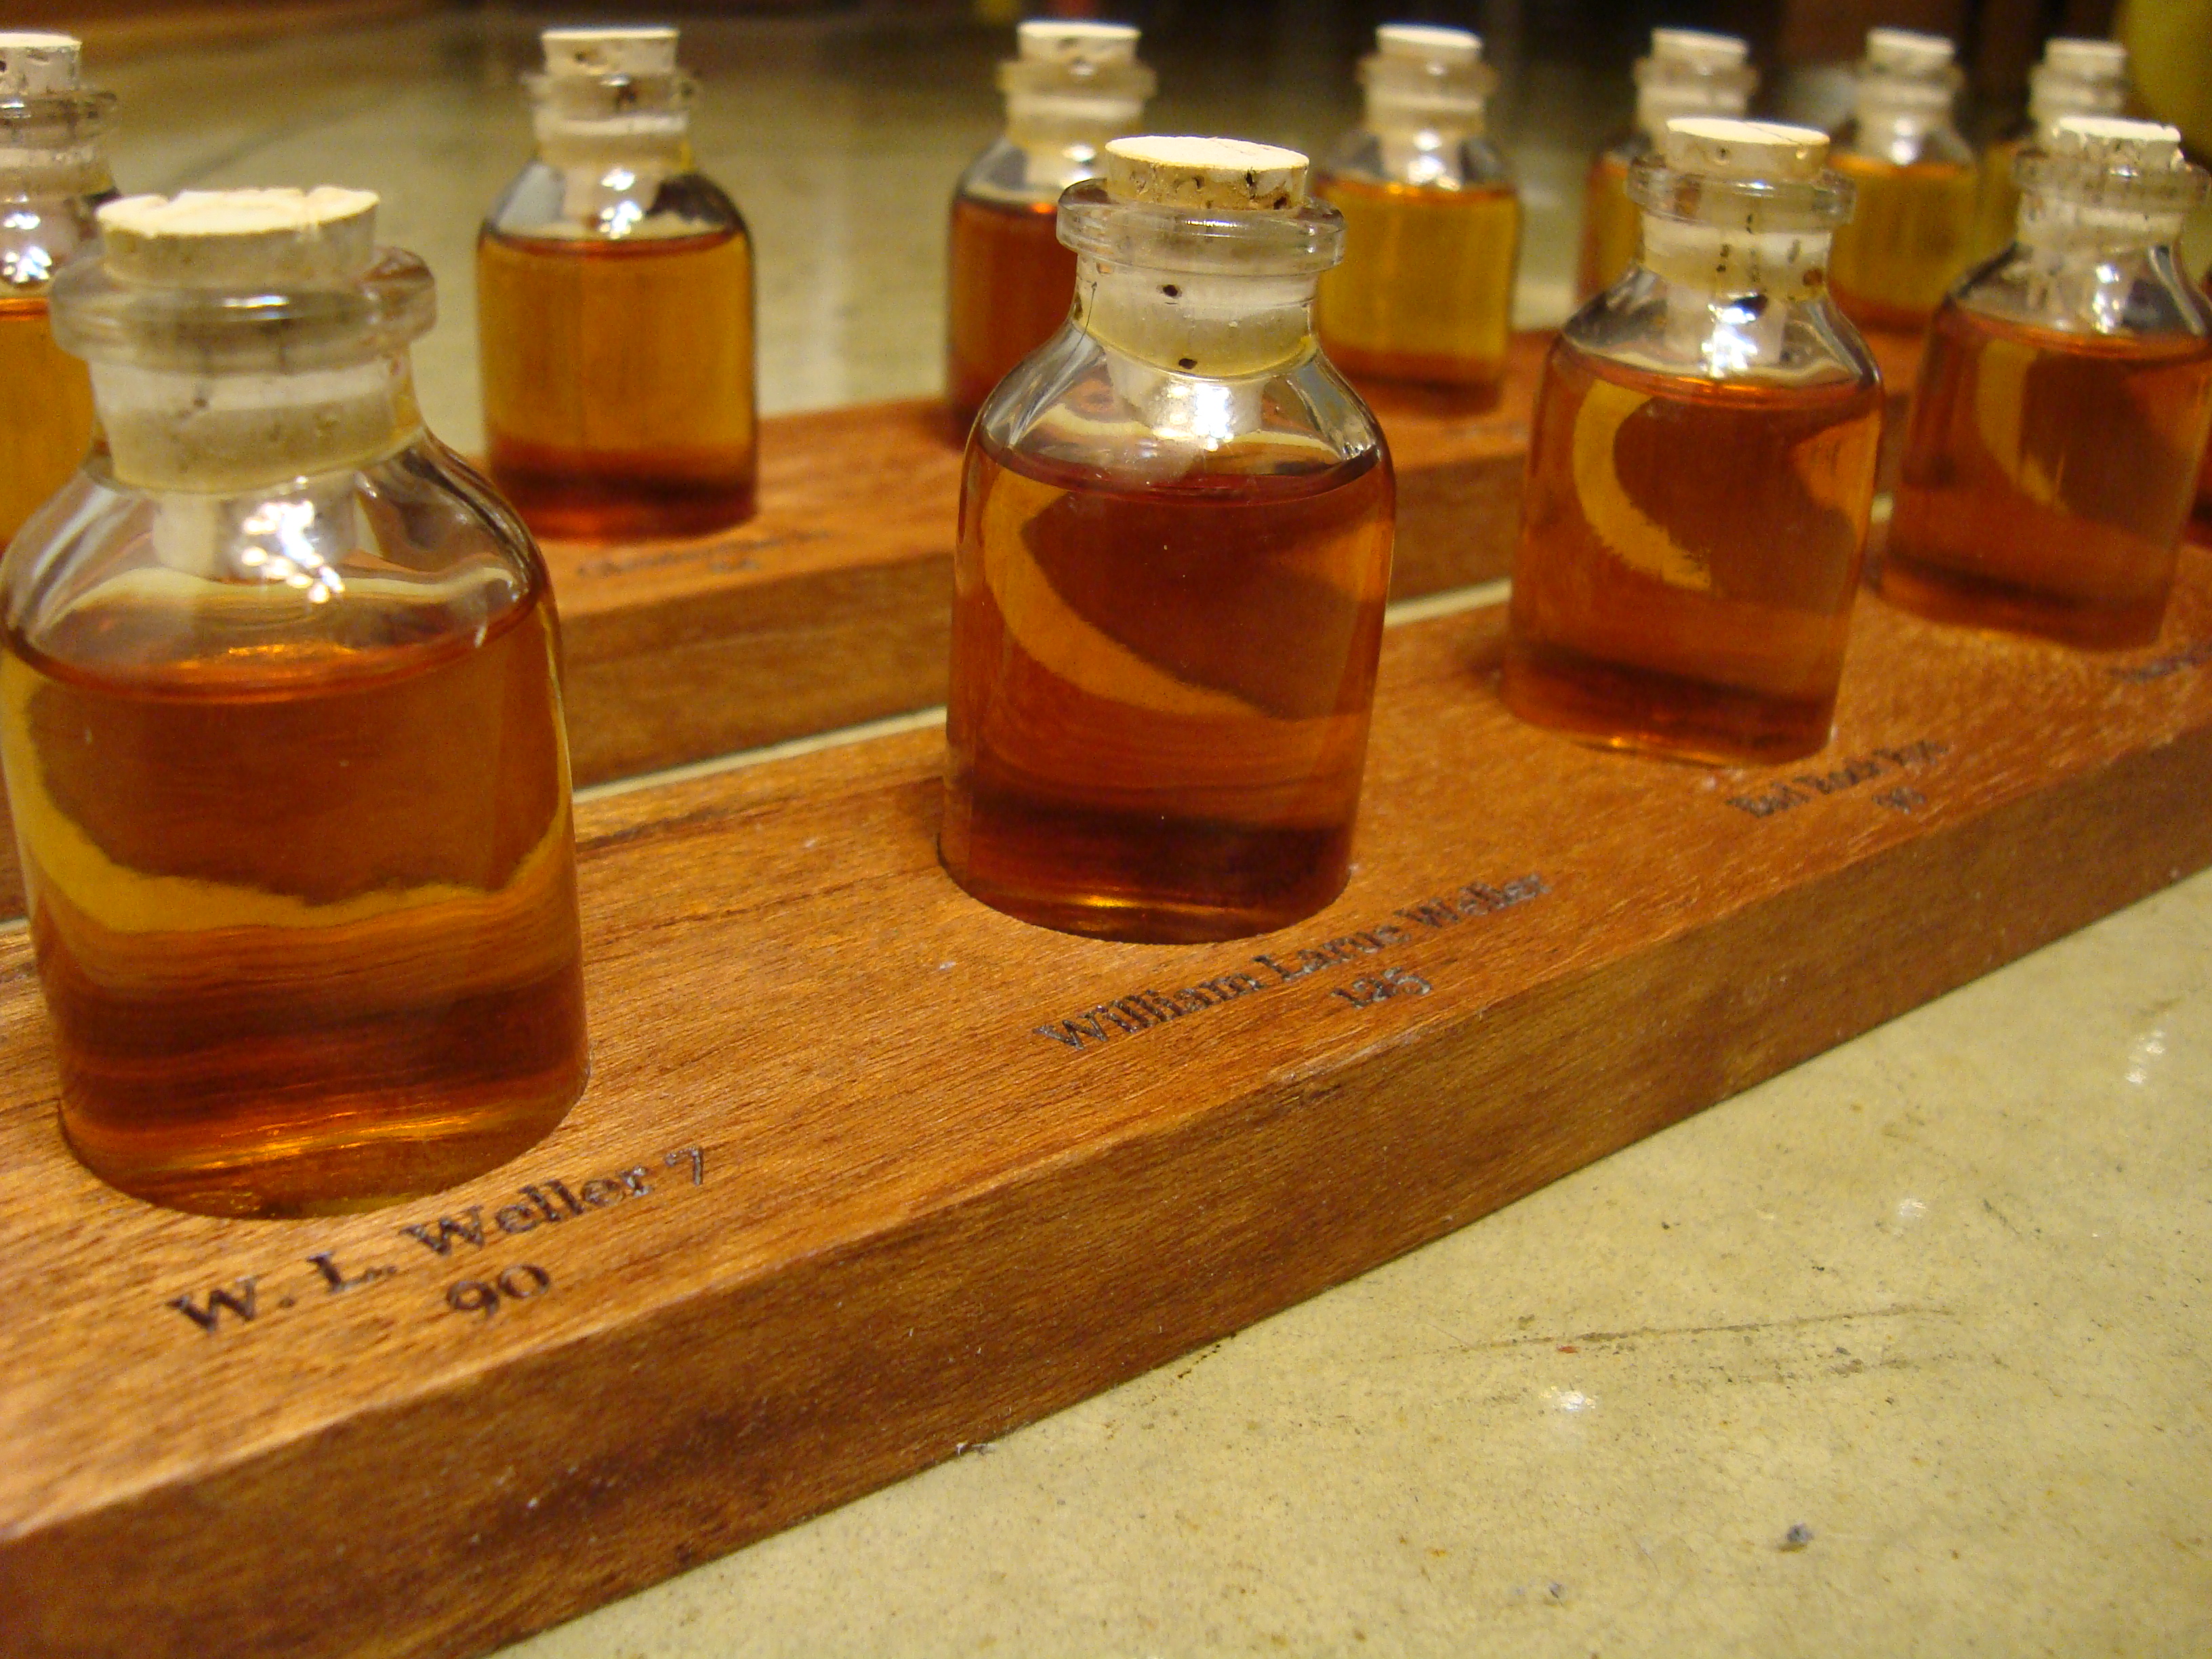
Lasers + Whisky = Delightful Wedding Gift
One of our members got married yesterday, and I crafted a fine gift for him and his wife at the Makerspace. The happy couple enjoys whisky, and I thought that providing a tour might be a nice idea. The tour starts at inexpensive bourbon, moves through wheated whiskies, and on to rye. The tour continues in Scotland with some easy to enjoy Sherry cask finish bottlings, and then moves on to rare, Islay and finally mature bottlings (25 Year old Talisker!).
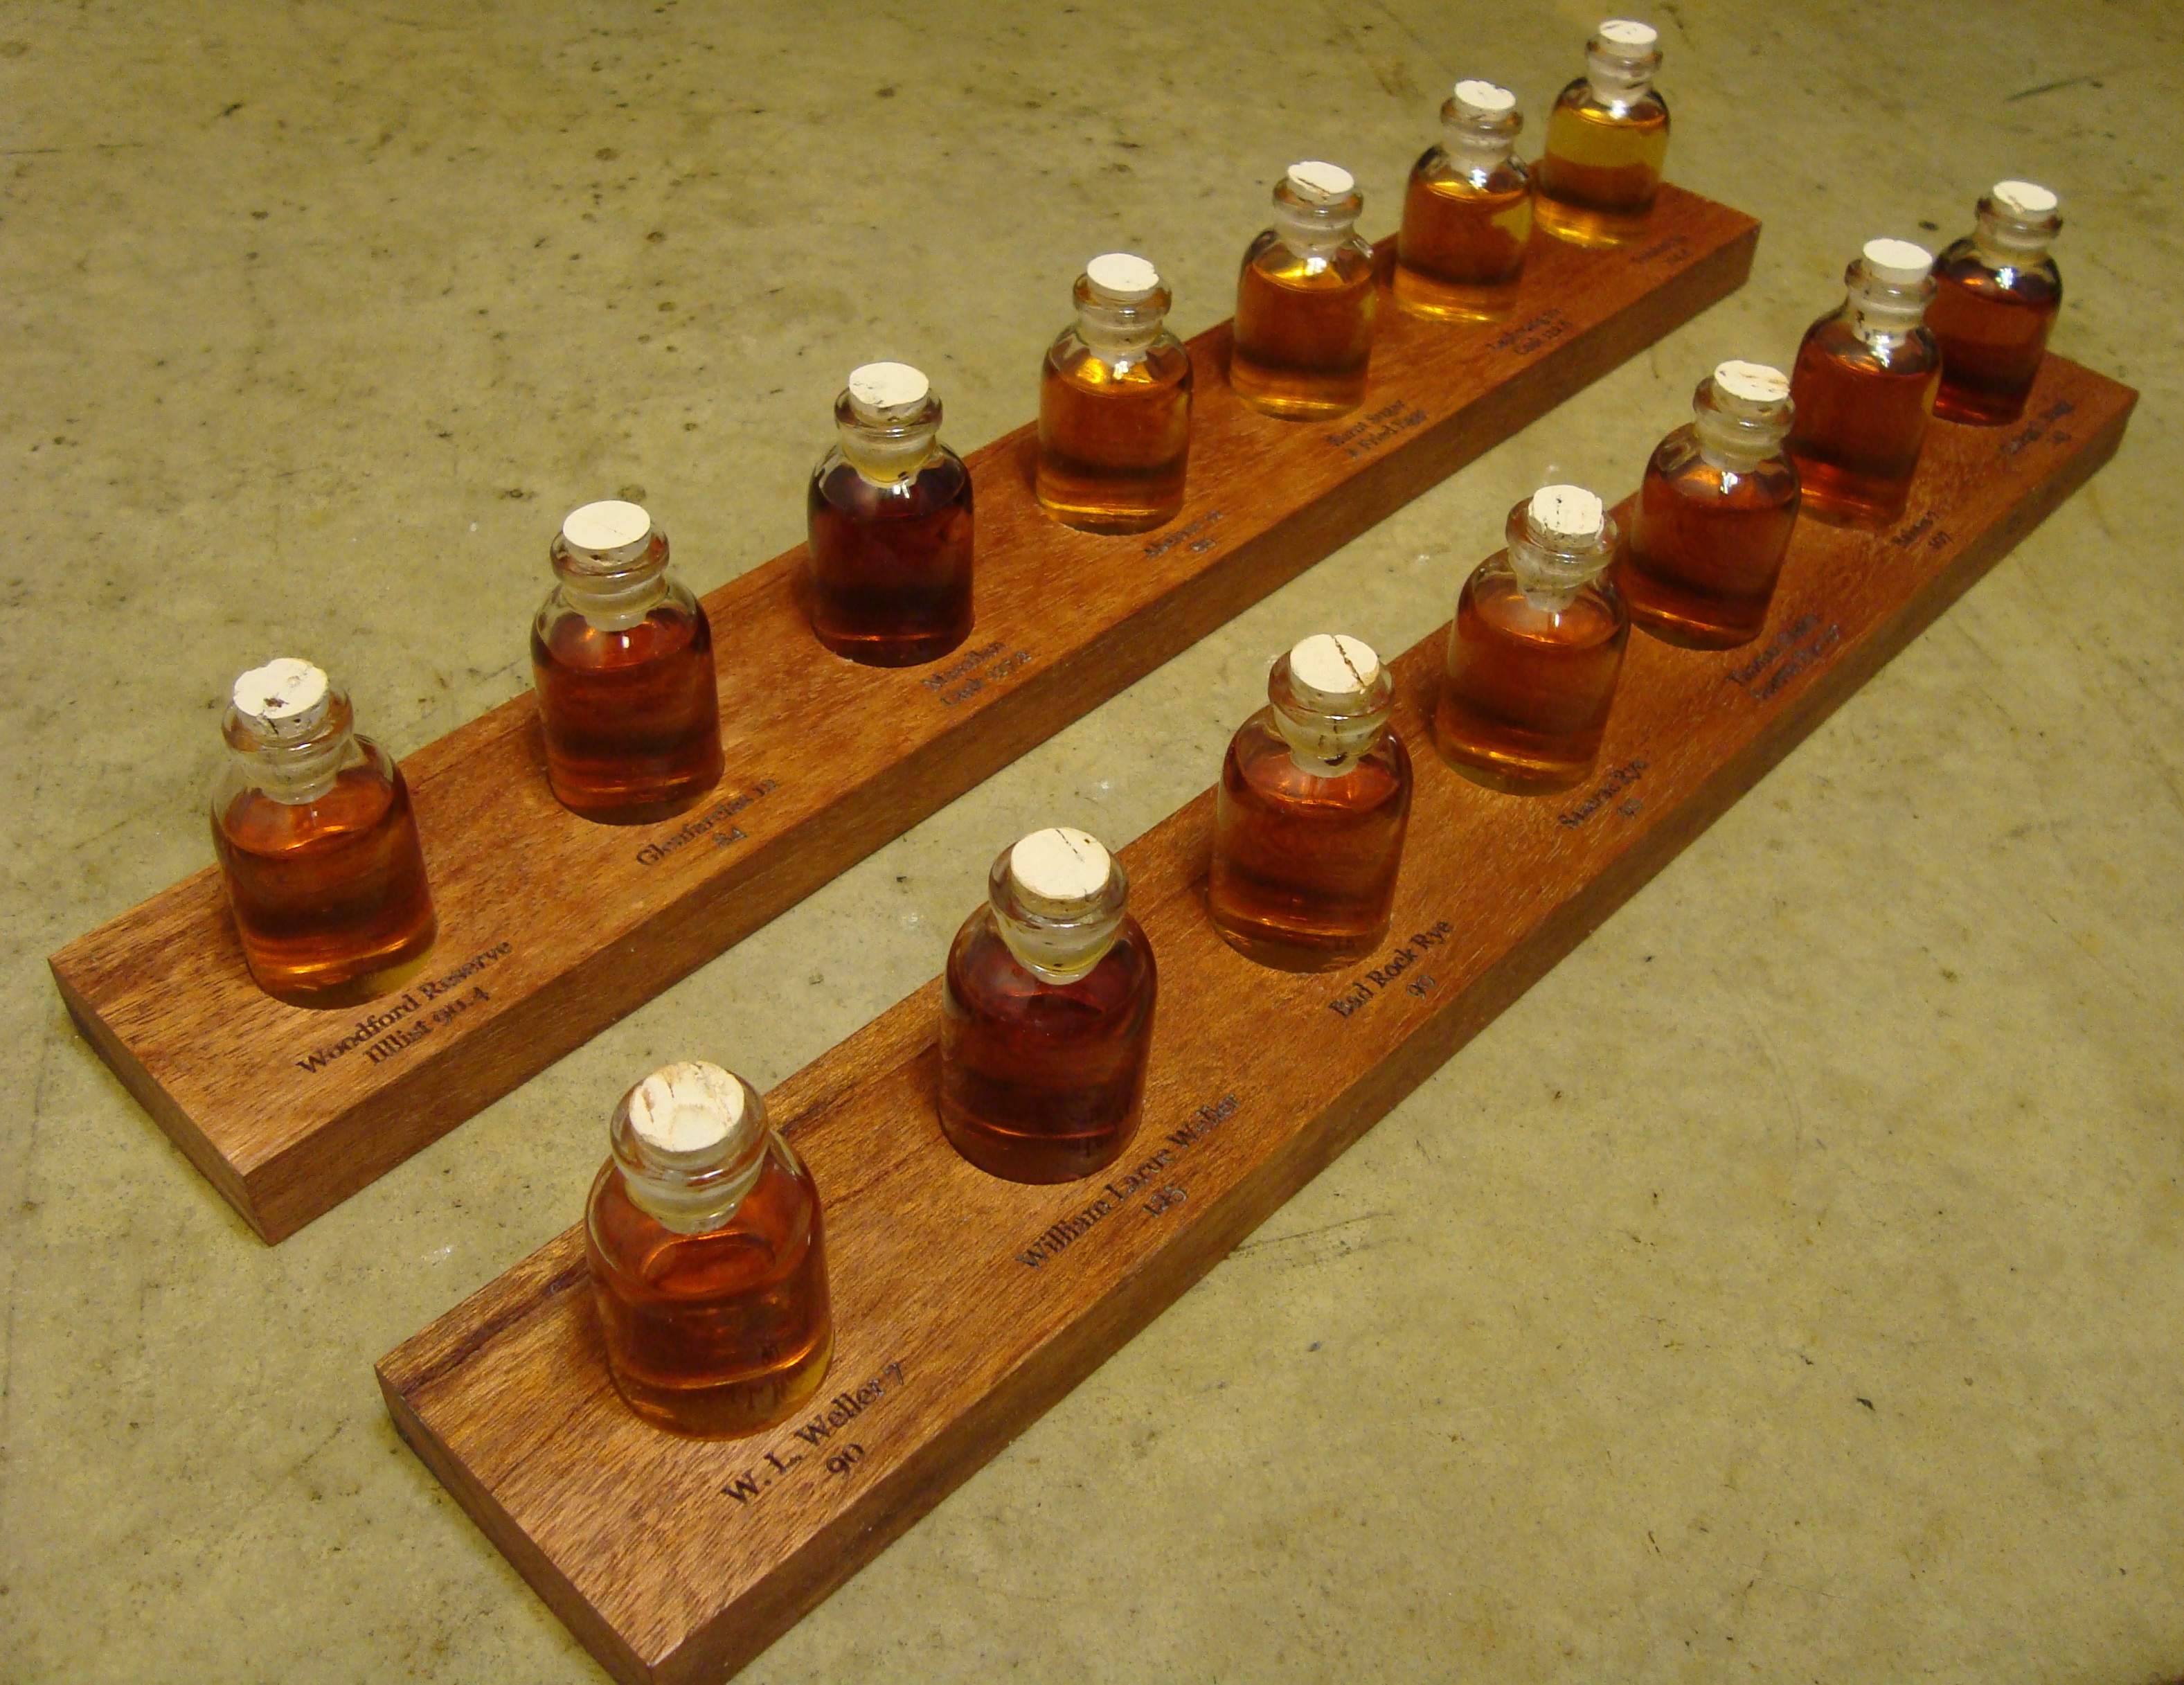
I found some old mohogany baseboard that had some aging varnish on one side and some old caulking on another. After cutting two 18″ long sections, a few minutes of belt-sanding had them looking great. I used a 1 1/4″ Forstner drill bit to bore 0.3″ deep pockets for the bottles to fit in. I used one of our two laser cutters to etch the name/age/proof of each of the whisky sample on top, plus a congratulatory message on the reverse side. To bring out the rich orangy-red mahogany color, I wiped on Beeswax / Mineral Oil . Check it out close up, while imagining the symbolism of things getting better with age!
How do you make the BADASS more badass?
Simple. Add lasers.
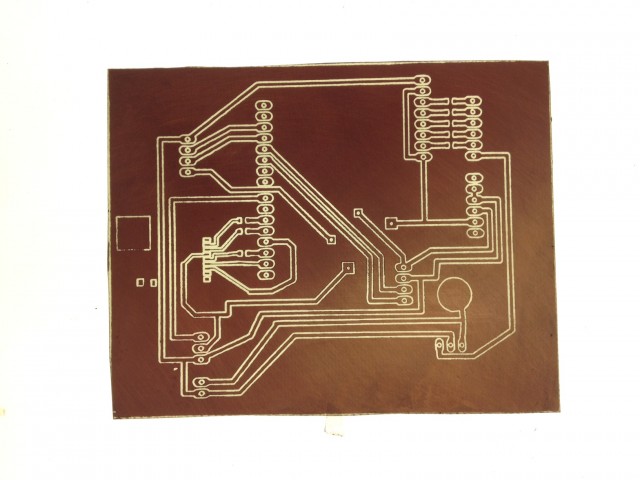
Video of Vectorized Laser PCB Fabrication
The next generation BADASS board was too big to fit through the card laminator, so I figured I’d try my hand at Tom’s laser etching method. By using the trace program included with CorelDraw I was able to make a vectorized path for the board. One pass takes about 5 min at 50% speed.