Video Wall of Terror

This weekend, I helped decorate for a Halloween Party at my sister’s house. There’s an odd hallway that connects their main large public room to the rest of the house. It’s used for storage, and has shelves on both sides.

This year, I decided to decorate that area by creating a video wall effect. Something like a Television Control Room of Terror!

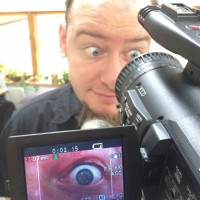
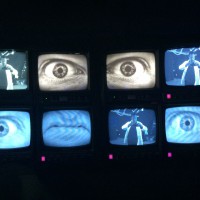
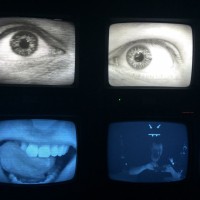
To start with, I simply filmed my brother-in-law with a video camera – only from WAY TOO CLOSE! I shot macro video of his eye and mouth. Then I edited the footage to create a custom looping DVD.

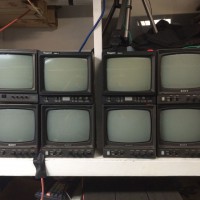
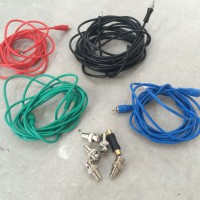
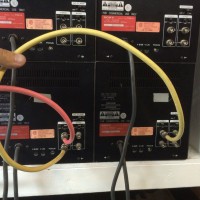
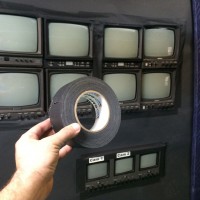
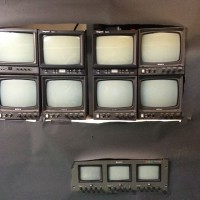
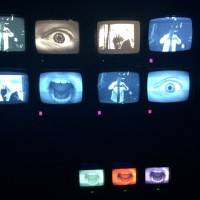
In the hallway, I set up multiple monitors. These are old monochrome standard definition monitors that were on their way to the recycling center. They were professional monitors, which means that they can pass a video signal through from one monitor to another, making it easy to daisy chain several monitors.

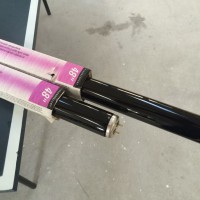
Next to the monitors, I set up three DVD players (including one car DVD player – hey I use what I got!) to play the three different custom DVDs – Right Eye, Left Eye, and Mouth. Each of the three videos is a different length, so they will continue to drift out of sync. That way, as they loop, the visuals are a continuingly changing experience through the whole evening.

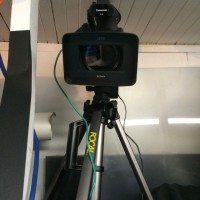
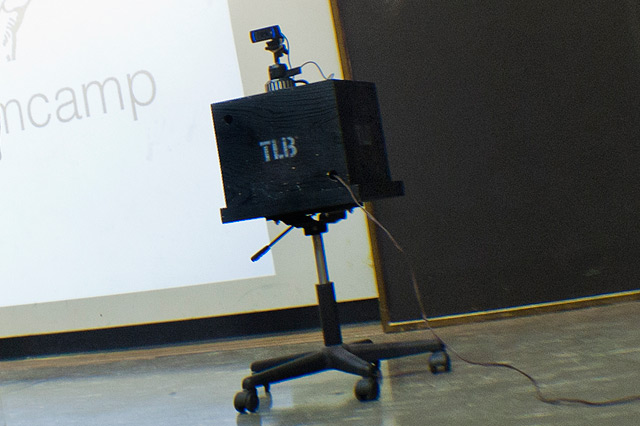
Above the monitors, I set up a video camera on a tripod and fed it to some of the monitors. That way, when party-goers look at the monitor, they also see themselves. Having feedback on some of the monitors adds a sense of interactivity to the project.

After the monitors and DVD players were all set up, I covered the rest of the shelving with black paper. In a dark hallway, lit only be black lights, it’s a great effect of creepy images floating in the hall.

If you want more details on this project, I made a full step-by-step write-up on Instructables.

3D printed webcam-to-microscope adapter

I recently acquired a B&L Balplan biological microscope (about $200 on ebay) to look at really small critters and decided it would be nice to be able to record some of their antics.  After a few measurements with a caliper and about 30 minutes with Sketchup, the design was ready to print on MegaMax.  Initial test results, seen below, look pretty good!   The camera is a Logitech Quickcam Pro for Notebooks (seriously, when are they just going to start using model numbers?) that can capture video at 960×720 and 15 fps.   The camera is not a current product at Logitech but can be picked up for $10-20 on ebay.  The still and video were captured using quvcview running on my laptop (ubuntu 13.04).  Logitech’s software works great on Windows.  The image below shows “horns” on the head of a pinhead sized bug that was crawling around in my work room.  Magnification is 640X!

The adapter design and .stl files will appear on Thingiverse soon.

Since dead bugs don’t move the video is just the focus being swept:  

Camera in microscope adapter.

Camera in microscope adapter.

uscope mount 2

Another view of the camera in the microscope adapter

uscope mount 4

Camera and adapter attached to microscope

Horns on a tiny insect's head magnified 640x

Horns on a tiny insect’s head magnified 640x

Time Lapse Bot on Watch

Time Lapse Bot

With Milwaukee Makerspace still in a state of constant change, I thought that Time Lapse Bot might enjoy keeping an eye on things…

Time Lapse Bot consists of an old laptop running (an older version of) EvoCam to capture an image every X number of minutes or seconds.

Time Lapse Box

The whole thing fits in a nice box that you can easily carry around and place on a table or other flat surface to capture images. You’ve probably seen Time Lapse Bot at various BarCamp events around Milwaukee.

Time Lapse Bot + Base

Eventually carrying Time Lapse Bot around looking for something to set it on got tiresome, so I built a rolling base from an old office chair. We also upgraded the camera over time, starting originally with an old VHS camera with a USB adapter, then moving up to a MiniDV camera with FireWire, and now a Logitech C910 Webcam, which captures HD quality images. (We also recently added a gooseneck for easier camera positioning, and a bit of height, as you can see in the top photo.)

There’s a heap more info about Time Lapse Bot over on my web site… and if you remember the Red Lotus build from last summer, or the Grand Opening at Chase, yeah, those were done with Time Lapse Bot.

Roomba-Bot!

Today, I stopped in at the Makerspace with the plan to work on a small project for a Halloween party this Saturday.

The plan was to take a “Roomba” robot vacuum cleaner that I got for $1.00 at a rummage sale, and covert it into the robot base for a giant spider or some other scary creature that could wander around at a Halloween party.

I started pulling screws out of the bottom to figure out how to remove the brushes and vacuum blower. It took some tinkering to figure out what I could and couldn’t remove and not cause a fault. In the end, it didn’t look like I could remove the blower motor and still have the thing run, so I simply removed the fan blades from the blower.

By that time, I was now thinking about video cameras and how easy it would be to run a 1/4-20 bolt right through the plastic. A bolt and two nuts quickly made a camera mount.

In the other room were some ping-pong balls, and I had a black sharpie. A little hot glue and Roomba-cam has some personality.

Look for Roomba-cam running around the Milwaukee Makerspace and please treat Roomba-cam nice – he is watching you and WILL upload to YouTube!

-Ben Nelson

Thursday Night Time Lapse

A time lapse video complied from the Milwaukee Makerspace CCTV system. 7 hours of video compressed into 4 minutes. All events took place between 4:30 and 11:30 PM Thursday, September 29, 2011.

Activities include:
– Rich welding
– Chris and Rich working on their electric cars
– Chris driving his electric car in and out of the shop
– Tom, Adam, and Royce working in Diptrace
– Bret, Rich, Royce, and Adam blacksmithing items with the forge
– Various people working on misc. projects and chatting
– Royce, Brant, and Adam etching and tin-plating circuit boards
– Pete working on his Makerbot 3D printer