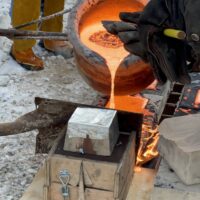
Casting Area Update

Many of you my not know, but the casting area has been diligently meeting every Wednesday at 5pm for almost 2 years now. Some weeks we haven’t been able to get together but for the most part it has been a consistent schedule. Aluminum casting has always been a thing we have done, even back at Lenox. Since moving over the equipment we have expanded our ability to cast other Non-Ferrous metals such as Copper, Brass and Bronze. We have also expanded our capabilities to do Ceramic Shell, and Sodium Silicate Resin Bonded molds. Iron Casting has always been a goal to do when looking for the new building. We can finally say that we are ready to start up our Cupola Furnace who goes by R2V2.

The only requirement is we need to have molds made and iron broken. Until we have molds that equate to an estimated total of 500 lbs of metal,  we will not be able light up the furnace.

Meet us on Wednesdays at 5pm to get signed off on mold making processes and getting signed off to use the crucible furnace. Bring a pattern to get cast or if you just want to check out the area come on by. No appointments are needed. We need your help to make molds. Premade artist tile molds are available for sale with the cost of metal included.

In addition, if you happen to see a cast iron tub, sink, or radiators on the side of the road please contact Dave to collect it. The more cast iron donations we can get the better.

Casting Area Wiki

Money Shooting Tool.

Are you a boat or home owner?  Do you wish paying your bills was more fun?  Do you have stacks of cash sitting around just taking up space?  Well this is the project for you!  Over the next month we will be designing version 2 of the Rain Maker.  It’s a tool that you load with cash and then launch at about the speed most of my project eat cash lately.  Version 2 you ask?  That’s right most of the longer projects we model in class take me several attempts to get right.  Here is a link so you can see it in action. 

https://www.instagram.com/p/CYP6pMlIizE/

The first draft lets me work out the ideas and see if I can get a working prototype.   In this case I knew I wanted to try over molding like our favorite tool company here in Milwaukee and I was not sure if my cash accelerator device would work.  About a hundred hours of printing later I can tell you it does and I learned a lot of do’s and don’t when over molding on 3d printed parts.  I do really like the feel of the urathane rubber in my hand and it is so much fun to see money shooting our the front of the tool.  This is going to be a fun one so join us Mondays @ 7pm or watch the series on YouTube.


Fun With Fractals

Over the past few months I have been playing with 3D fractals to create slip cast pottery.  I found a free program called Mandelbulber 3D and you know me, If it’s free I’ll take 3.  It’s shocking to me the availability of free software like this.  Right now I am just scraping the surface on what the software can do but I have a few examples of shapes made in the software posted on Thingiverse.

https://www.thingiverse.com/thing:5138435

Creating the fractals with the Mandelbulber is fairly straight forward.  Just experiment with varying a few values and click render.  The hard part is getting the shape to be cast-able with out having to make a 27 part mold.  A few weeks ago I pulled the first cast from my first successful mold.  This is part fractal and part Fusion.  The foot of the cup is part of the fractal pattern and the body of the cup is a shape designed in Fusion 360.  Although the final product warped in the kiln I think it was a good proof of concept.

After the shape is created digitally you have to make it physical.  My go to method is usually my 3D printer.  The constraints that make a part easy to 3d print without supports are similar to the  constraints that make a part easy to remove from a mold.  To make the slip cast mold I don’t print the cup but a plastic mold of the cup, there are two reasons for this.  First if you are going to make lots of slip casts you are going to need more than one mold.  Because of the time it takes to cast each cup you will need to pour several mold each day.  Second with a hard plastic mold you can make a soft silicone part.  This saves me from making a large silicone Mother Mold of my 3D printed mold.  My Mother Mold is half of the 3D printed mold with the full silicone cast part inside.  It’s worth noting that there is 15-18 percent of shrinkage from pour to final firing so you will need to scale up your prints to an almost comical size. 

(photo coming soon)…

On a side note I did some experimenting is soaking silicone parts in IPA to expand them.  This is a fun exercise if you have never done it.  To expand a part just place it in a container of IPA for several hours.  I let one part sit over night and go about the amount of growth I was looking for to but the part shrinks down slowly when removed from the IPA and the growth amount is not very predictable.  Below you can see an example of how much larger the part grew and the final fired piece from this process.

I am in the process of printing my molds right now so tonight at the open meeting I might have printed molds to show.  I also have other shapes to pass around.


Casting Maker Faire Ingots

For the last few months Kayla has been working on casting a pile of ingots for Maker Faire Milwaukee.  These ingots are made from scrap metal donated to the Milwaukee Makerspace by its members.  Everything from Kayla’s personal favorite, hard drive casings, to parts of tools and engines.  Its really cool to see her take trash and turn it into treasure in the form of aluminum bars.

casting 2 images

Be sure to watch for Kayla at Maker Faire Milwaukee pouring hot metal and helping people make stuff September 24th-25th at Wisconsin State Faire Park.

IMG_2552

Molding & Casting a Prop Bracer

The mold and final cast part.

The mold and final cast part.

As someone who has gone to GenCon quite a few years and knows several of the GMs of major events, I’ve started getting asked to make props…  This year I have decided to expand my experiences in molding and casting in order to make one of the props.  The prop requested was a “Bracer that looks like it is made of Amber – part of the shell of an insect”.  Thankfully I was afforded quite a bit of creative leeway beyond that.


In the past I have used Smooth-on products, but one of the members of the Makerspace mentioned they were a distributor for Alumilite, so I thought I would give them a try.  This was my first experience with most of the Alumilite products.


I ordered the following supplies:

UMR 12 oz.

Alumilite Dye 1 oz. Red

Alumilite Dye 1 oz. Yellow

Mold Putty – 15 2 lb. Lt. Blue

Amazing Clear Cast 2 gal. Kit Clear

Synthetic Clay


Other items I used:

PVC Pipe form

A form made out of a 3″ PVC pipe shaped to look like a human arm.

3” Diameter PVC Pipe – Approximately 18” long

3” Diameter Hose Clamp

Plaster Bandages

Vaseline

Disposable Mixing Containers

Stir Sticks

Steel Wire (to hold the mold together)

Syringe

Drinking Straw


I wanted to make a “generic” bracer that would fit either arm, not a right or left arm bracer, so I didn’t want to do a life cast of my arm first – it would be too specific.  Instead I picked up a piece of 3” pvc pipe, cut a section out of most of it (leaving a part connected) and then used a hose clamp to tighten the open end down.  It turned into a really good stand-in for a human arm.  The shape is close enough that it is recognizable, but is not left or right arm specific.  (Note that the screws in the picture were added at a later stage)


Once I had the basic form for the arm, I used the synthetic clay to create the shape of the bracer.  I was going for an organic look, so I wanted curves and no sharp edges.  The biggest challenge I had was trying to smooth out the sculpt.  I still need to figure out the right technique.  Sadly, I forgot to take pictures of the sculpted bracer.


The form and original covered with mold putty.

The form and original covered with mold putty.

Once I had the sculpture complete, I added some screws around the edges as alignment points.  I was careful to make sure the heads were close to the PVC so they would not get stuck in the molding material.  Then I got to try my first new material – the Mold Putty.  I really liked the idea of it – take two parts, hand-mix, then just push it onto the original.  It essentially worked exactly that way.  I thought the mixed consistency was almost perfect for my application.  Unfortunately, the biggest difficulty is being sure not to trap air in it – particularly when placing a second mixed batch next to an already placed batch.  I ended up with some imperfections in the final mold because of this.  Would I use it again?  Yes, but I think I may also try other approaches – either a box and pourable rubber, or brush-on rubber.


The mold with half of the mother mold present.

The mold with half of the mother mold present.

Given the way I wanted to cast the bracer – standing vertically – I wanted to make sure that I was able to hold the rubber mold to the arm form well.  So, using the plaster bandages, I made a two-part “mother mold” for the rubber mold.  First, I coated everything with Vaseline as a release agent, then I covered half of the arm piece with plaster bandaging, making sure the edges were particularly strong, and that the top edge, where I would be creating the second half of the mold, was also quite smooth.  After the first half of the mother mold cured, I then coated the edge of the plaster with Vaseline to make sure the other half would not stick to the first half.  Once I was done placing the Vaseline, I then coated the other half with plaster bandages.


Once all of the plaster dried, I used a sharpie and drew lines across the edges of the plaster.  These lines are so that I could realign them easily after I took the mold apart to remove the original sculpt.


After I removed the original sculpt, I realized I forgot something major…  A way to get the resin into the mold.  Oops!  After a bit of thought, I decided the easiest way to get the resin in would be to drill some holes through the PVC pipe and pour it in that way.  Ideally, I would have designed pour holes and vent holes into the original design of the sculpt.  Something to remember for the next one!  In order to try to control the fluid a bit better, I used straws to extend the holes out.  Bendy straws would have been good – I’m not sure how effective straight straws were.


Using the volume of clay from the original sculpt, I did a rough guess at how much resin would be needed to fill the mold (~12oz).  I measured out 6oz of each of the two parts, added one drop of red and six drops of yellow to one of them, then mixed it.  I used a syringe to suck up the mixed resin and transfer it into the mold.  It worked quite well, although it was a bit disconcerting because of the number of bubbles that were exposed during the suction process.  Thankfully, as soon as the resin reached normal pressure the bubbles disappeared.


The raw bracer prop as removed from the mold.

The raw bracer prop as removed from the mold.

The resin takes 24 hours to cure.  24 hours wondering if it turned out.


And after that full day of waiting, I de-molded it.  Quite the pleasant surprise!  I think it may have slightly too much red, so I’ll have to correct that for my next iteration.  I’m still debating about sanding and buffing it in order to get it to be more glass-like.