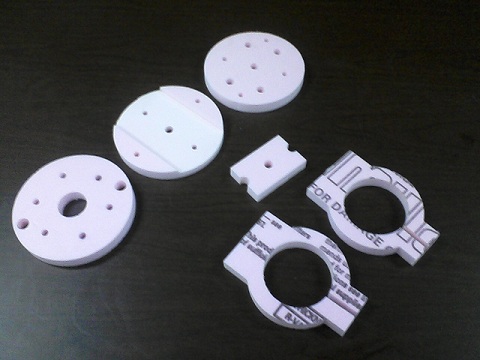
I am nearly done with a custom bracket for my Hitachi router that I will mount onto the end of our Kuka industrial robot arm. I cut everything out in foam first to check out the whole scheme and save wear and tear on the cutting bit.
The software chain I used to accomplish this was lengthy. I designed all of these pieces in 3D in Solidworks, created a Solidworks 2D drawing, saved that as an AutoCAD drawing, brought that drawing into Vectric’s Aspire, then created machine code that the Makerspace CNC router used to cut the pieces from a sheet of foam.
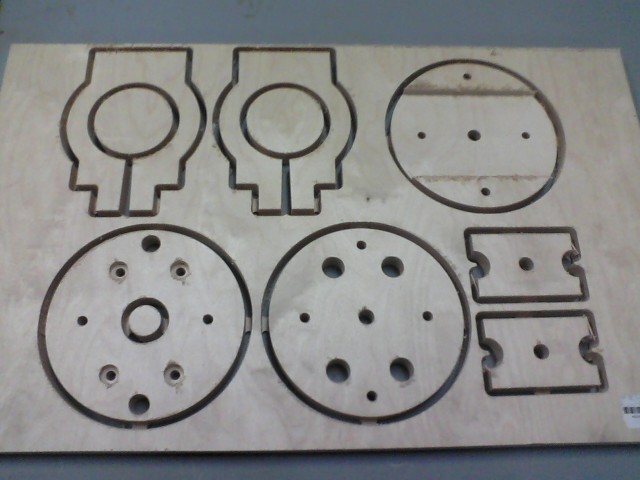
Finally, once I was satisfied that everything would cut correctly, I switched to 3/4″ thick Baltic Birch plywood. This is a “nicer” grade of plywood than the stuff that is used in day-to-day building construction work. This wood is stronger by virtue of a greater number of plies, and it also looks nicer. I happened to have a sheet left-over from a previous project, so it was all good!
The idea was simple: make something to help keep track of our supplies so we know when we’re running low on the essentials. After weeks of kicking the idea around and various rough doodles, this project finally took shape. Two days after the first cut on the laser cutter, it was complete.
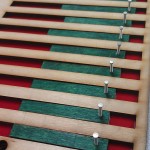
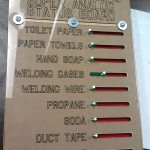
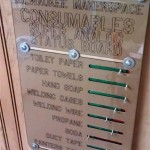
Made from multiple layers of acrylic, cardboard, and wood, the “Milwaukee Makerspace Consumables Super Analog Status Board” is a clipboard-sized device with nine sliders installed in enclosed slots. Sliding the tabs right displays more green to indicate “full” or “lots” and sliding left reveals the red acrylic below to indicate “empty” or “low.” The user can carry the board around the Space with them as they check on supplies and when done, a large hole centered at the top allows the board to be hung up and displayed on a wall.
The hardware holding the whole thing together can be loosened and the layers disassembled. The cardboard insert that the text resides on can be swapped out should we decide to change the list of items we want to keep tabs on. The supplies being tracked currently include:
Toilet Paper
Paper Towels
Hand Soap
Welding Gases
Welding Wire
Propane
Soda
Duct Tape
Painter’s Tape
A digital version may or may not be planned for future release.
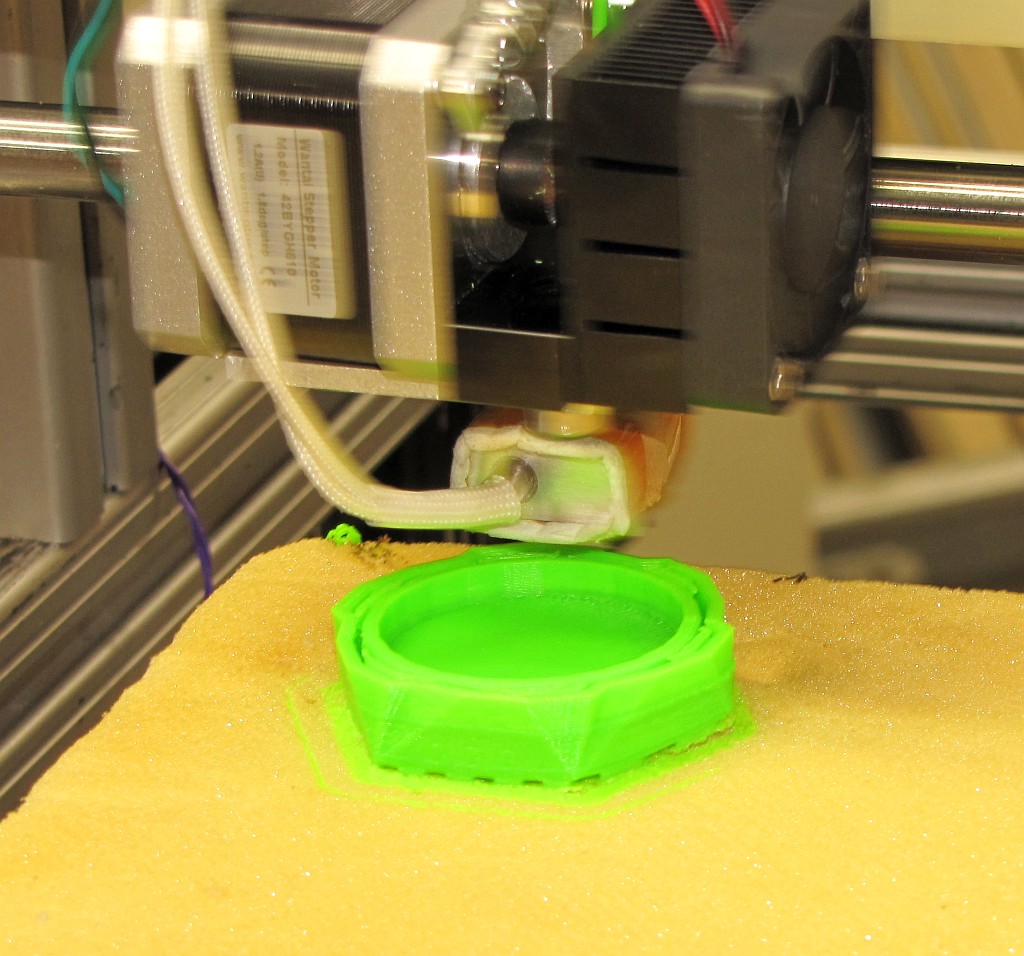
After a year’s work designing, building, scrapping, redesigning, building, and working through software and firmware issues, the MegaMax 3D printer is now functional. It has some common 3D printing issues like printed objects peeling up off the glass printbed. Tweaked settings in Slic3r, ABS “juice”, and Aquanet hairspray have all been tested with moderate success in attempts to improve adhesion to the printbed. Finally, have_blue gave me a block of foam out of the Stratasys printer to try out and it seems to work better than the other methods and doesn’t require heating the bed! Further experiments to be conducted post-haste.
Hopefully, we can use this as a backdrop for events like the Art Jamboree.
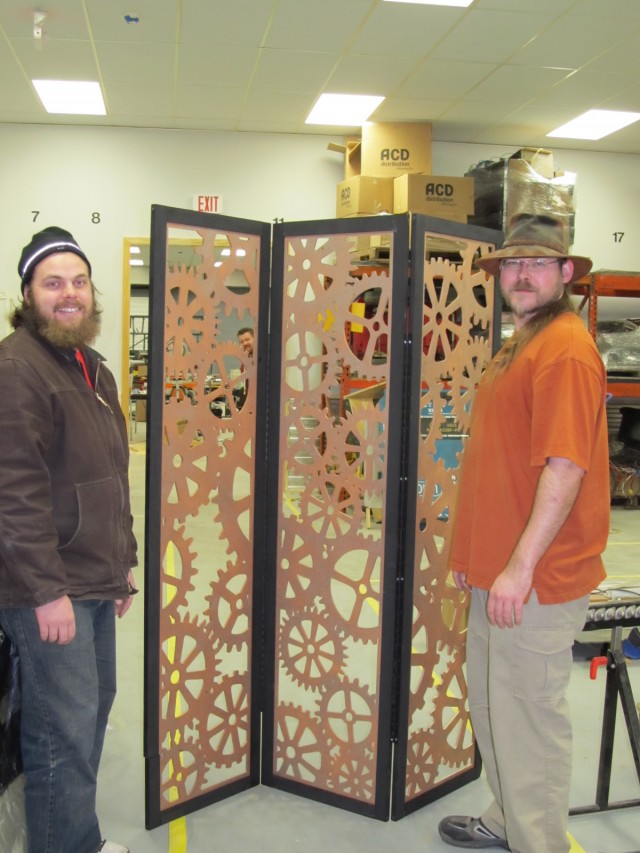
I’ve been toying with the idea of room dividers for a while now. I don’t exactly have use for one, but I think they look neat and it’s basically a blank canvas. Drawing inspiration from my Clockwork Boxes, I decided that a gear motif would best suit the makerspace, thus giving me a new use for the piece: as a backdrop at events we participate in such as Art Jamboree and the various Maker Faires.
There are 3 of us in this photo. Really.
The actual screens were cut out with a large-scale CNC router, while the frame was ripped from 2×4’s, with a dado groove down the center for the screen to slip into. Thanks, Jason H.!!
Assembly went well, although there were a few hiccups. The drill bit wasn’t long enough, so some minor splitting occurred at a couple of spots. The frame was slightly warped and so needed to be clamped and glued before being screwed together.
After allowing the paint to dry overnight, myself, Matt W., and Jason H. assembled this thing just prior to heading to the Art Jamboree at the Hilton in Milwaukee.
I’ve updated Robert Indiana’s iconic sculpture “LOVE” for our times! While “Love” may have been an appropriate sentiment from 1964 to 1970 when the 2D and 3D versions were made, I think that the revised text is more appropriate for the 2000’s and 2010’s. Fear is 8” tall and 4” deep, and while not a monumental outdoor sculpture, FEAR appears fairly sizable on a table top.
Fear, which is solid aluminum and weighs over 7 lbs, was cast last Thursday with quite a few other pieces. The great thing about having an aluminum foundry at the Makerspace is that the whole thing cost about $7! – $4 for propane, $1 for Styrofoam, and $3 for some Rotozip bits. If FEAR were cast in bronze, it would weigh over 20 lbs, which would cost $200 for the metal alone. As it is, we melted down old heat sinks, stock cutoffs and hard drive frames, so the metal is essentially free.
In the spirit of Indiana who made his own font, I drew FEAR up in Inkscape using Georgia Bold, but I increased the height of the Serifs a bit. Shane helped me with the file manipulation and G-code generation (Thanks!), so I could use the CNC router to cut FEAR out of styrofoam. I exported FEAR’s hairline thickness outline as .dxf so it I could bring it into CamBam to generate the G-code. The outer contour of FEAR was selected, and the following settings were chosen:
Feedrates -> Cut Feedrate -> 300 (inches per second)
Options -> Roughing/Finishing -> Finishing
Tool -> Tool Diameter -> 0.125 (inches)
Tool -> Tool Profile -> End Mill
Identical settings were chosen for the inner contours of FEAR, with the exception of General -> Name -> Inside. Then, I just selected “Generate G-code.” Check out the real-time video of Makerspace CNC router running the G-code and cutting out the 1” thick Styrofoam (Owens Corning Foamular 150).
After cutting four 1” thick pieces, they were stacked and glued together. I buried the foam FEAR in petrobond, and then attached Styrofoam sprues and vents. For a more complete explanation of the quick lost-styrofoam casting process, check out this post. Stay tuned for details of our next Aluminum pour, which will be in January in the New Milwaukee Makerspace!
 I am nearly done with a custom bracket for my Hitachi router that I will mount onto the end of our Kuka industrial robot arm. I cut everything out in foam first to check out the whole scheme and save wear and tear on the cutting bit.
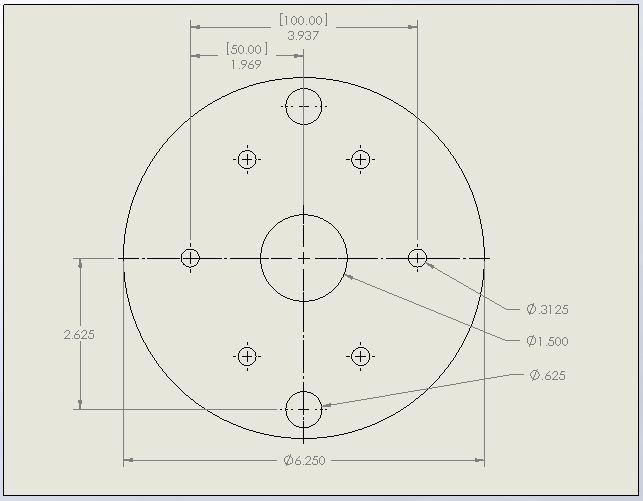 The software chain I used to accomplish this was lengthy. I designed all of these pieces in 3D in Solidworks, created a Solidworks 2D drawing, saved that as an AutoCAD drawing, brought that drawing into Vectric’s Aspire, then created machine code that the Makerspace CNC router used to cut the pieces from a sheet of foam.
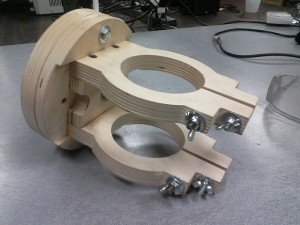

 I’ve updated Robert Indiana’s iconic sculpture “
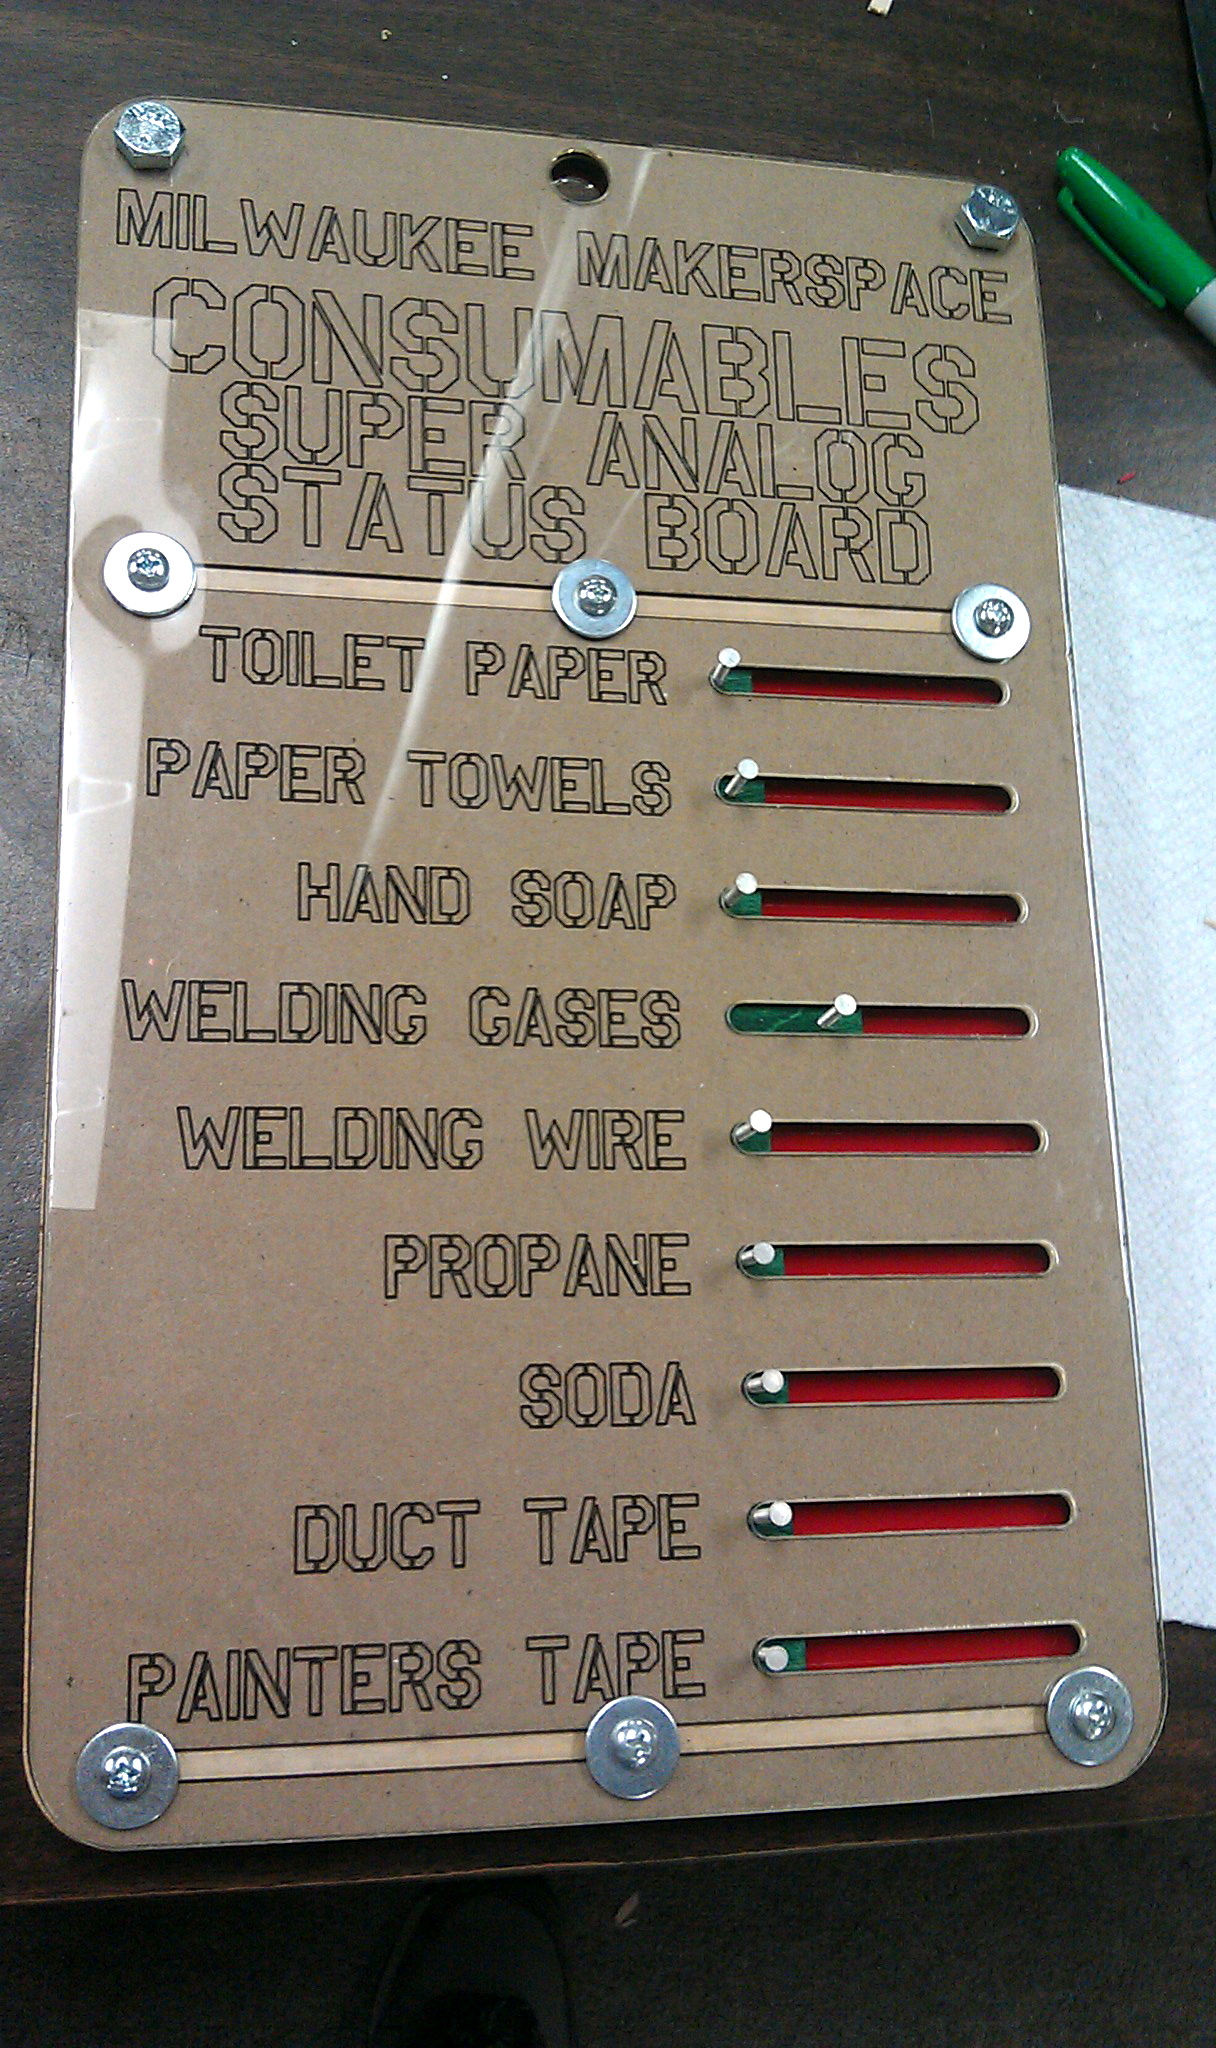