Space Improvement Workshop

improve!

You’ve been waiting for this… It’s The Return of the Space Improvement Workshop!

What’s that you say? Space Improvement? How could we possibly improve the space anymore? Sure, it seems impossible, but we think we can do it.

In fact, the wiki has this huge list of things to do, and since we moved from the old location on short notice, there’s still some unpacking to do, as well as cleaning, and just general organization. All of these things will help improve the space and make the processing of actually making things in the space, that much easier.

So please, join us on Sunday, February 24th, 2013 at 1pm as we run this totally awesome Space Improvement Workshop.

(There’s been rumors of pizza and appropriate beverages for those willing to join us.)

Water, Water…

Water!

We had to pause a bit last night when we saw some water in the space… Our old location at Chase was well known for the leaky roof and the occasional floods. It turns out the water was just from the electrician’s truck that was pulled into the space. Whew!

The Lenox building has been water-tight so far (knock on MDF!) and we’re feeling secure in the fact that everything that should stay dry will stay dry.

Kevin also demanded I take an “arty” photo of the water. Enjoy!

We’re Back!

OPEN!

You’ve been waiting for it, we’ve been waiting for it… Milwaukee Makerspace can now officially re-open, and we’ll be holding our first official meeting of the year at 7pm on Tuesday, January 29th, 2013.

Come on down to 2555 South Lenox Street in Milwaukee, Wisconsin, and see the new Milwaukee Makerspace. It’s bigger, better and 178% more makier!

See you Tuesday!

Baltimore Hackerspace Visit


Baltimore Hackerspace

During a recent trip to Baltimore I got to visit Baltimore Hackerspace, take a quick tour, and talk to two of their members.

Our story actually starts back in 2011, when I was passing through Baltimore and tried to connect with Baltimore Node (another hackerspace in Baltimore) and when I mentioned on their mailing list I’d be passing through town, I got an invite to stop by Baltimore Hackerspace, which at the time was called “Harford Hackerspace” and was located in one of the member’s garage. Well, I never made it to either space last year, so I thought I’d try again this year… sadly, Baltimore Node does not currently have a space due to some issues with Load of Fun, the building they are located in. (Side note: I snapped a photo of Load of Fun back in 2009, before I was even a Milwaukee Makerspace member.)

Confused yet? Good! Anyway, Mike from Baltimore Hackerspace was kind enough to meet me there on a Wednesday afternoon for a tour. We talked about Power Wheels, Make Magazine, The Red Bull Challenge, how Baltimore Hackerspace operates, how Milwaukee Makerspace operates, and general making and hacking activities.

I snapped a few photos as well… enjoy!

Baltimore Hackerspace
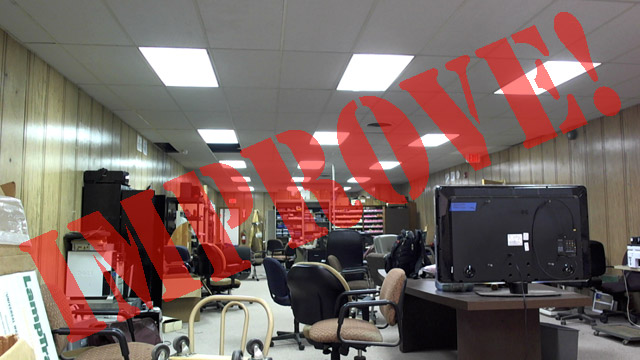
Baltimore Hackerspace was not easy to find! It’s in an industrial unit (which looks a little like a storage unit) with no sign on the door. I think some signage is in their future, as it’ll really help new visitors find the place.

Power Wheels
Here’s their Power Wheels car. It looks unlike any other Power Wheels car I’ve seen. Like most Power Wheels cars, it occasionally starts on fire. :)

Telepresence Zen Garden
Here’s the “Telepresence Zen Garden” they built for the 2012 RedBull Creation Competition.

Robot Game
They had a robot game thingy, which was a little like Operation, but you had to guide a wand over the wire and not touch it, or the robot freaked out.

Recycle Robot
OK, this thing was impressive, and confusing. When I first saw this robot I assumed it was some commercially available unit, but it turned it was build using mostly scrap! Mark (the guy working on it) finds interesting pieces from children’s toys, household appliances, etc. and puts it all together. And, that weird thing to the right is indeed a walker, modified to assist the robot in walking, at least until it can walk on its own, without the help of a balancing mechanism. Great project!

Baltimore Hackerspace
There was also art to be found… I don’t know if this was done by a member, but it definitely added color to the space and let you know where you were. ;)

Space Invaders
Some Space Invaders were descending down the wall… I hope they fill the whole wall with them, it would definitely look cool.

Whiteboard
They had a small office for meetings, with a big table and chairs for hacking and what-not. The office also had this whiteboard, which may contain the secrets of the universe… or something.

MakerBot Thing-O-Matic
What’s a hackerspace without a 3D printer? Here’s their MakerBot Thing-O-Matic ready to melt some plastic.

Keyboard
Looks like they’ve also got some music fans (and maybe video nerds?) as members. I love the color bars!

Well, that concludes our tour of Baltimore Hackerspace… if you’re ever in Charm City, check ’em out!

Easy Star Trek “Red Shirt” Costume

I always have the best of intentions. When getting invited to a costume party, I plan to put lots of time and effort into it to create an EPIC costume. Time after time, I put it off and come up with something at the last minute.

The great thing about a costume is that you DON’T have to spend lots of money on one. In fact, you can create a very good costume, just from clothing and props you already had.

Recently, a friend had been working on a Star Trek prop, which got me thinking about how simple a Star Fleet uniform would be to make. Not a perfect one full of detail, but something fun, simple, and cheap.

To start, I gathered together a red T-shirt, black pants and shoes. I didn’t have a long-sleeved shirt, so I just layered the red short-sleeved over a black long-sleeved T-shirt.

A Federation insignia or communicator badge is an important element to the costume, but is simple to make. I just went to the web and did an image search. When I found one I liked, I downloaded it, scaled to to about 2.5″ tall in my graphics software, and then printed it onto tag-board with my inkjet printer. I cut out the insignia, and put a piece of tape on back. A safety pin glued to the back would work great as well. From just a few feet away, it doesn’t look like paper at all, it just looks like the logo you expect to see on the uniform.

Of course no Star Fleet Officer on an away mission would be without a phaser. I had several to pick from: a TV remote, an infrared thermometer, or my cordless beard trimmer. Basically any dark plastic item that you can point threateningly can be a phaser. I chose a digital tire pressure gauge as my hand-weapon of choice.

Also handy would be a tri-corder. I DID spend a bit of money on this one – $.99 cents. Since I happened to have a smart phone, I downloaded a tri-corder app. It has lots of blinking lights and sound effects that add considerably to the outfit.

I also wanted to point out that I was NOT a main character. Nope, not Kirk or Picard or any of those guys – just a nameless red shirt that’s guaranteed to get killed by the alien/monster of the week. To do so, I created a “Hi, my name is:” badge from a computer-printable address label and a marker. I tried both “Red Shirt” and “Expendable” as name-tags. At the one costume party I went to, people got the joke and had a good chuckle – and then had an urge to kill me…. (Lion-O quickly took me out with the Sword of Omens.)

So, remember, a costume doesn’t have to cost a fortune in time and money – just recycle some clothes and other items into a simple and clever outfit anyone can appreciate.

-Ben