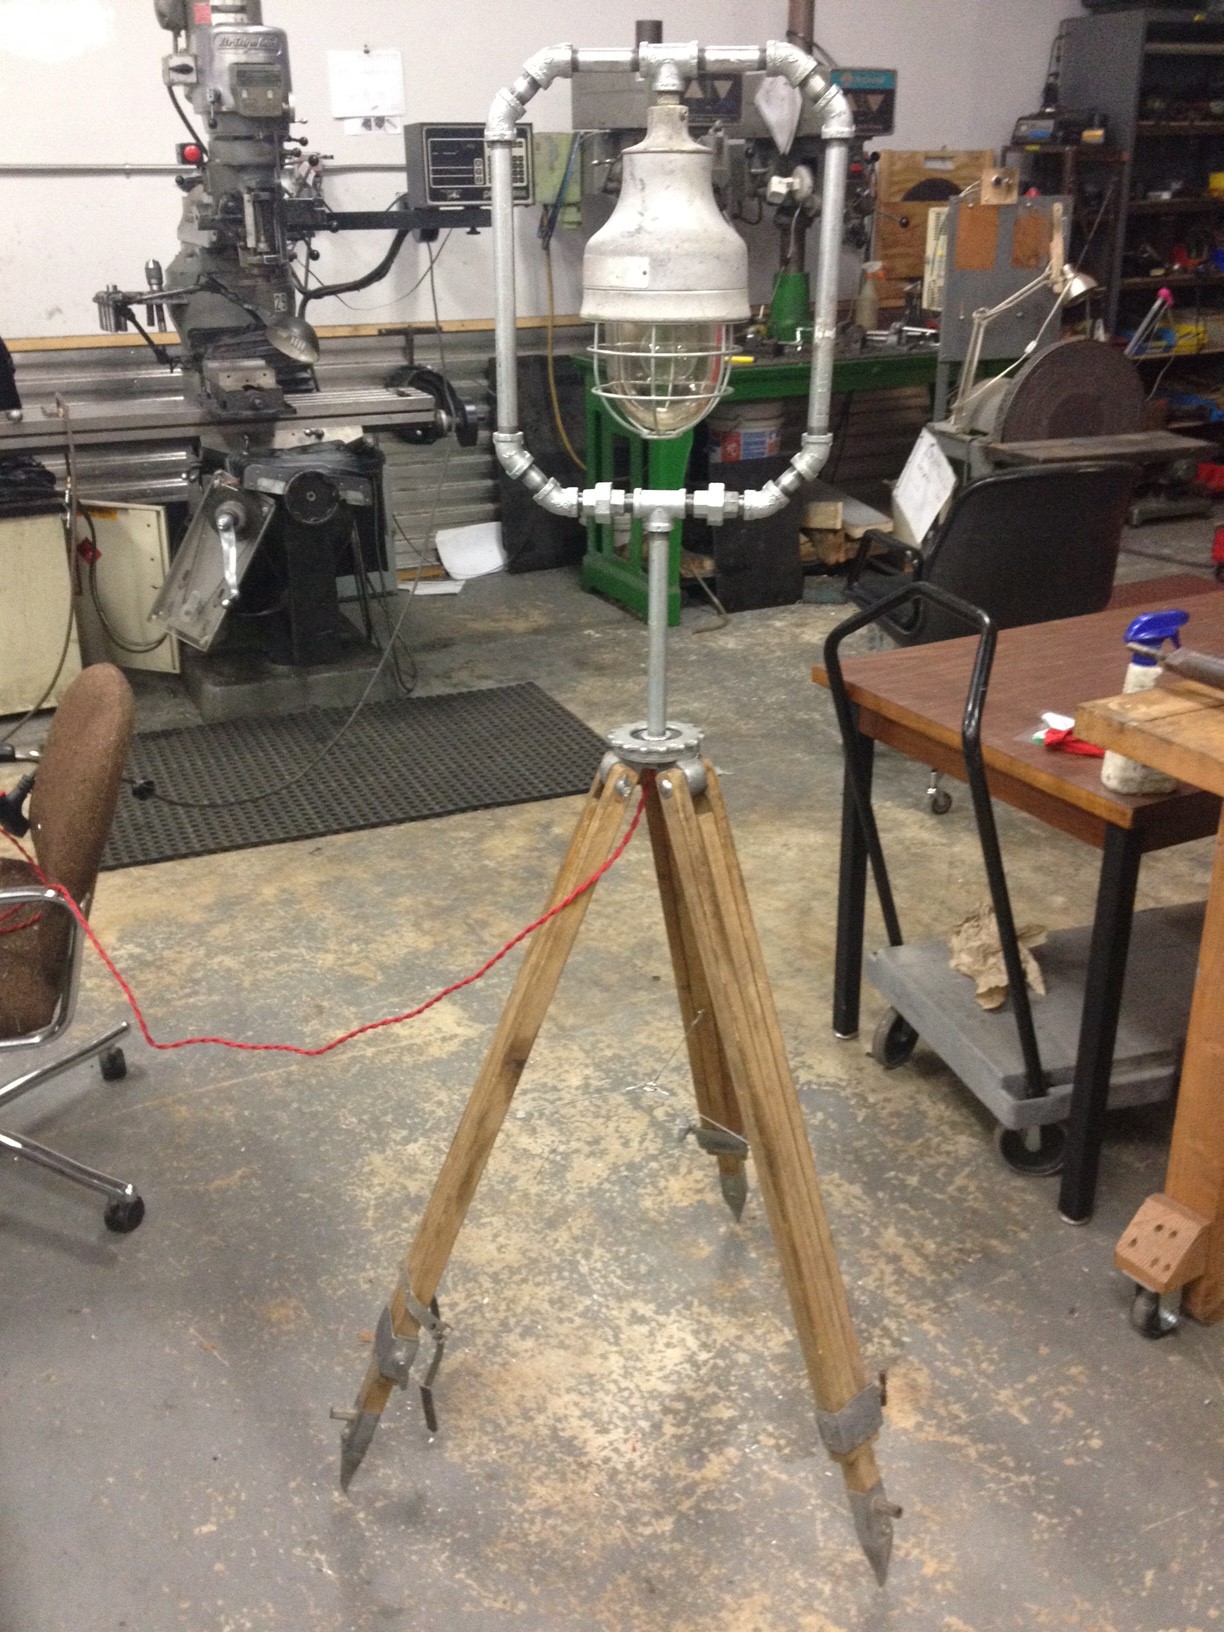
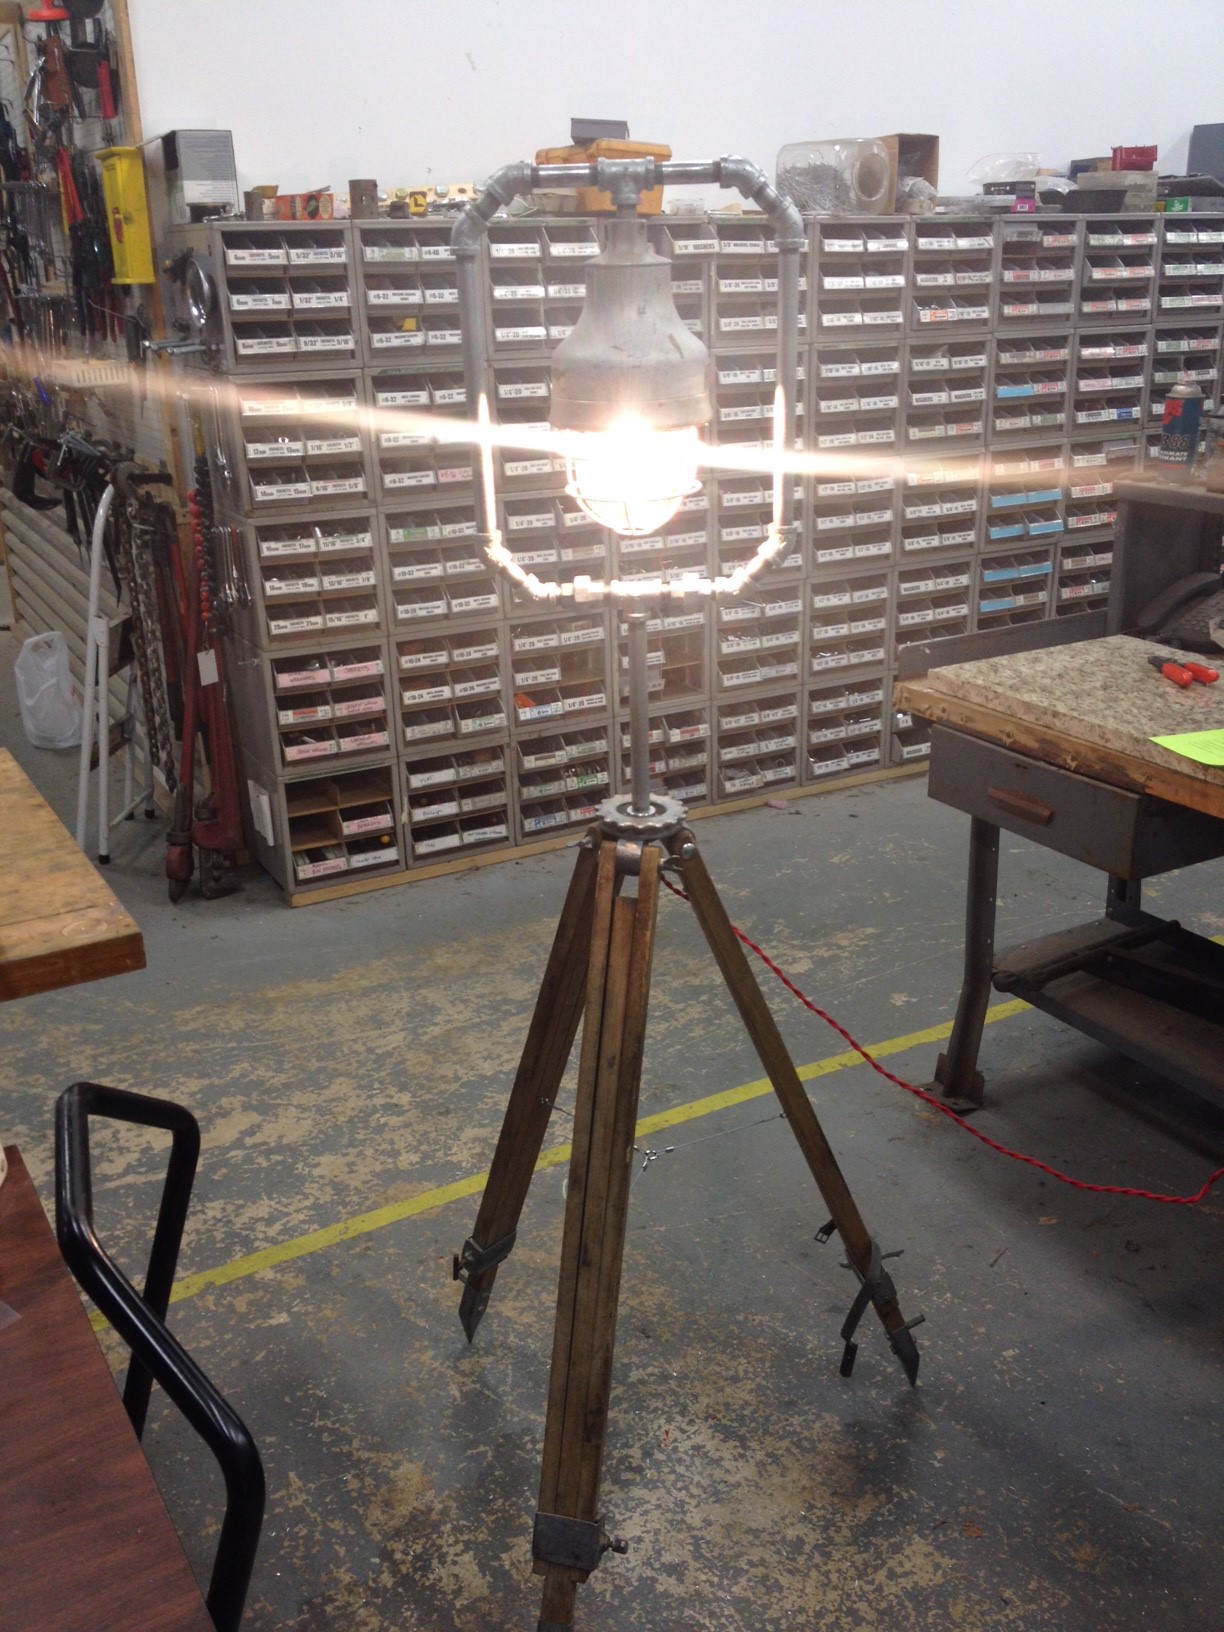
Joseph created a very unique lamp using an old surveyor’s tripod, blast proof industrial light, and galvanized pipe.

Be a part of a hacker/builder community where ideas are shared, innovation is fostered and the maker experience is hands-on.
Join us Tour the SpaceJoseph created a very unique lamp using an old surveyor’s tripod, blast proof industrial light, and galvanized pipe.
Last weekend I made a 60 bottle wine rack from some 1″ pine. I sized it to fit on a counter top in my basement, under the upper cabinets. I was pretty happy with the design of a somewhat smaller Belgian beer rack I made in the past, so I copied some of its basic style. I really like the strong vertical lines of this design, as it contrasts with the strong horizontals of most wine racks.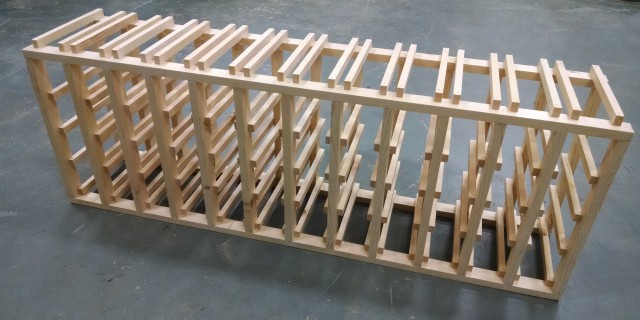
With the compound miter saw and table saw, I transformed three 6′ long pine 1″ x 12″ boards into the necessary 150 pieces! The rack holds 60 bottles, so I cut 120 10″ x 9/16″ x 3/4″ pieces. These are connected to 26 uprights that measure 18.1″ x 3/4″ x 1.5″, which are connected to 4 horizontals that are 52″ x 3/4″ x 1.5″. Note that a spacing of 3.1″ is sufficient for wine bottles, but 3.35″ is the minimum for most champagne bottles. The 3.35″ width also holds half bottles and just barely holds 12 oz beer bottles. Also note that for strength reasons, the 10″ long pieces need to be cut along the grain, not across it. Here are all the pieces, just before I nailed them together:

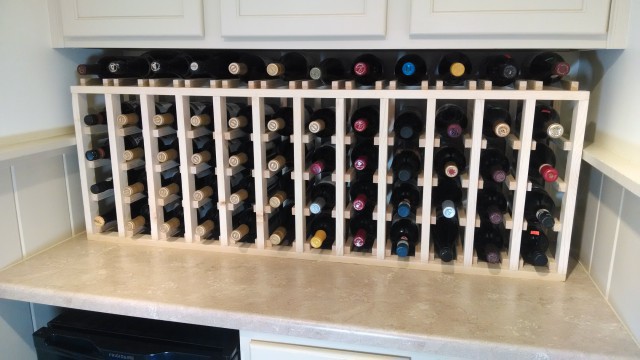
It took about 1.5 hours to cut the pieces, and 1.5 hours to assemble them. Note that I used a nail gun and 1″ long, 18 gauge nails for most connections, except the uprights to horizontals, where I used 2″ long nails. Check out the completed wine rack, made from $25 of wood and nails, in use!
Years back, I used to throw a lot of cocktail parties. Between myself and two good friends, we owned five cocktail shakers and 35+ martini glasses. During the parties, we’d typically be the only three people shaking martinis for all the guests. Though that’s awesome, it also means we missed out on much of the socializing and mingling during each party. In preparation for a recent birthday party, the solution came to me: Use Lasers! So, I laser cut ten coaster-sized pieces of basswood and then laser engraved my twelve favorite Martini and Champagne cocktail recipes on them. I also cut stands for them that had a laser engraved “best practices” guide for shaking Martinis – you know, the things that bartenders are typically too busy to do for you: Chill your glass before pouring your drink into it, shaking your drink until it is sufficiently cold, etc. The drinks have recipes that taste better than what most bartenders will make for you, because they include things like an amount of lemon or lime that they’re too busy to squeeze into your drink.
 The party was an even more awesome experience for me, because I wasn’t only shaking drinks all night. It was also even more awesome for the guests, as they found that great cocktails are super easy to make! And who doesn’t like to make things?
 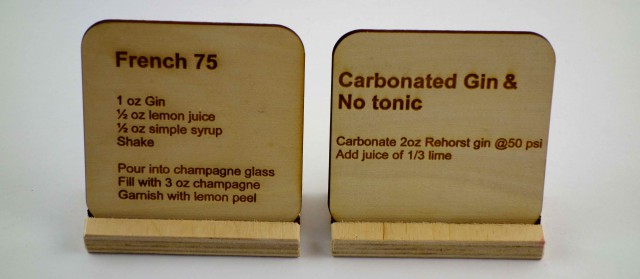 Also, the carbonated Gin & No tonic is real crowd pleaser! See my previous post about home carbonation for more info, and note that all types of inappropriate things can be carbonated: Gin, Ardbeg Corryvreckan, grapes, etc!
If you’ve ever looked to purchase patio furniture its either cheap and crappy …or expensive and still crappy.
So I decided to make my own. Because I wanted to drink beers on my porch and tell kids to get off my lawn.
With no further ado:
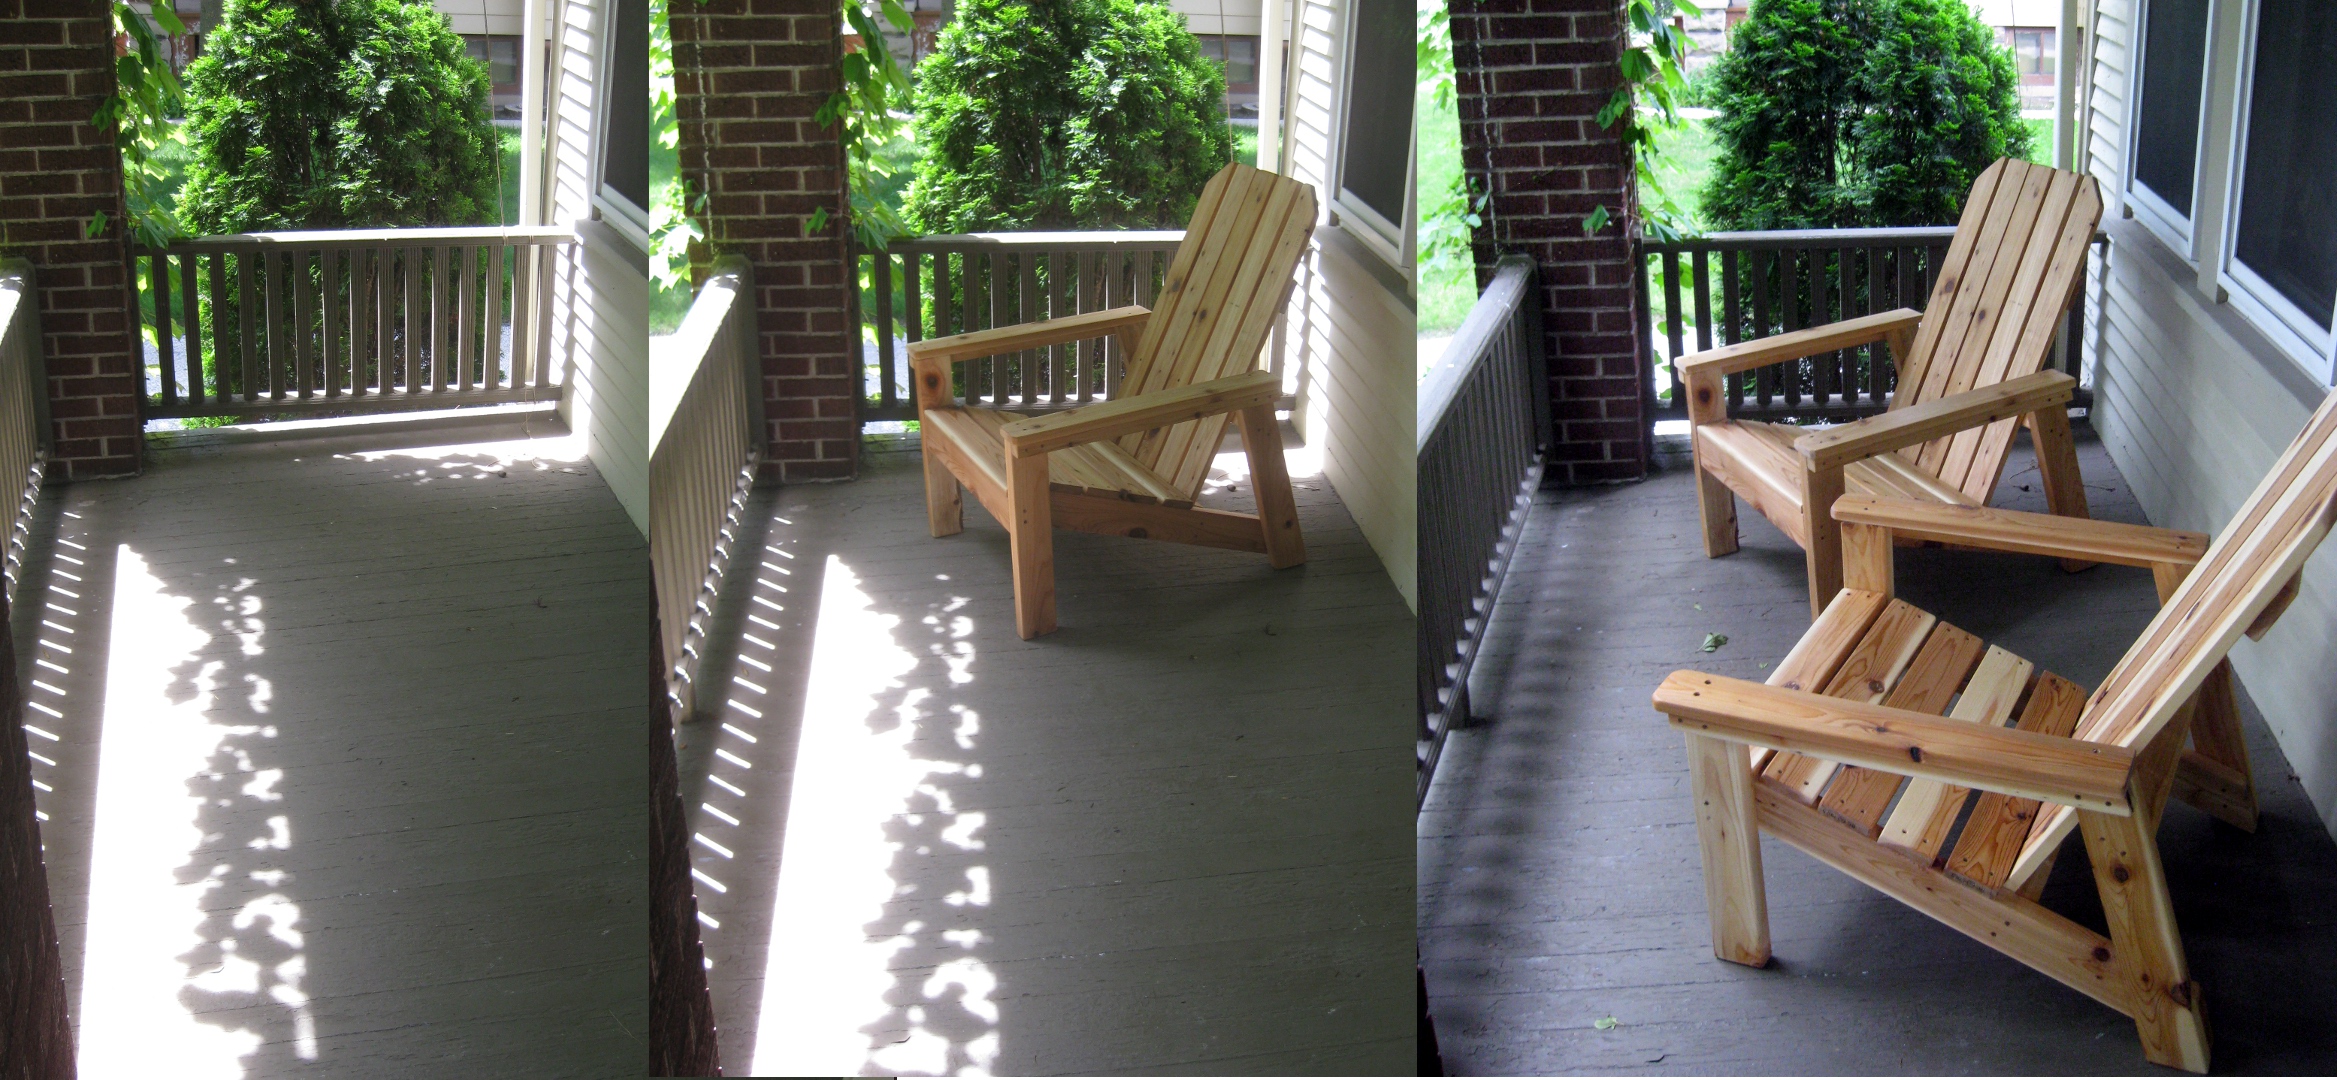
Figure 1: My Porch Before, During, After
Step 1: Find Plans.
I’ve never used any Ana-White plans before, but I found these that seemed reasonable. After some review though, I found the cutlist sucks so any of the pieces with angled cuts are listed at final dimensions rather than initial rough cut dimensions. Namely the angled stretchers need to be cut long (34″ish) and then angled. Same goes for the back legs (~22″) and the 2×2 arm supports (~28″). So do your own due dilligence before slicing all your lumber up.
Step 2: Cut All the Lumber
Pine sucks and I hate paint. So I went with Cedar.
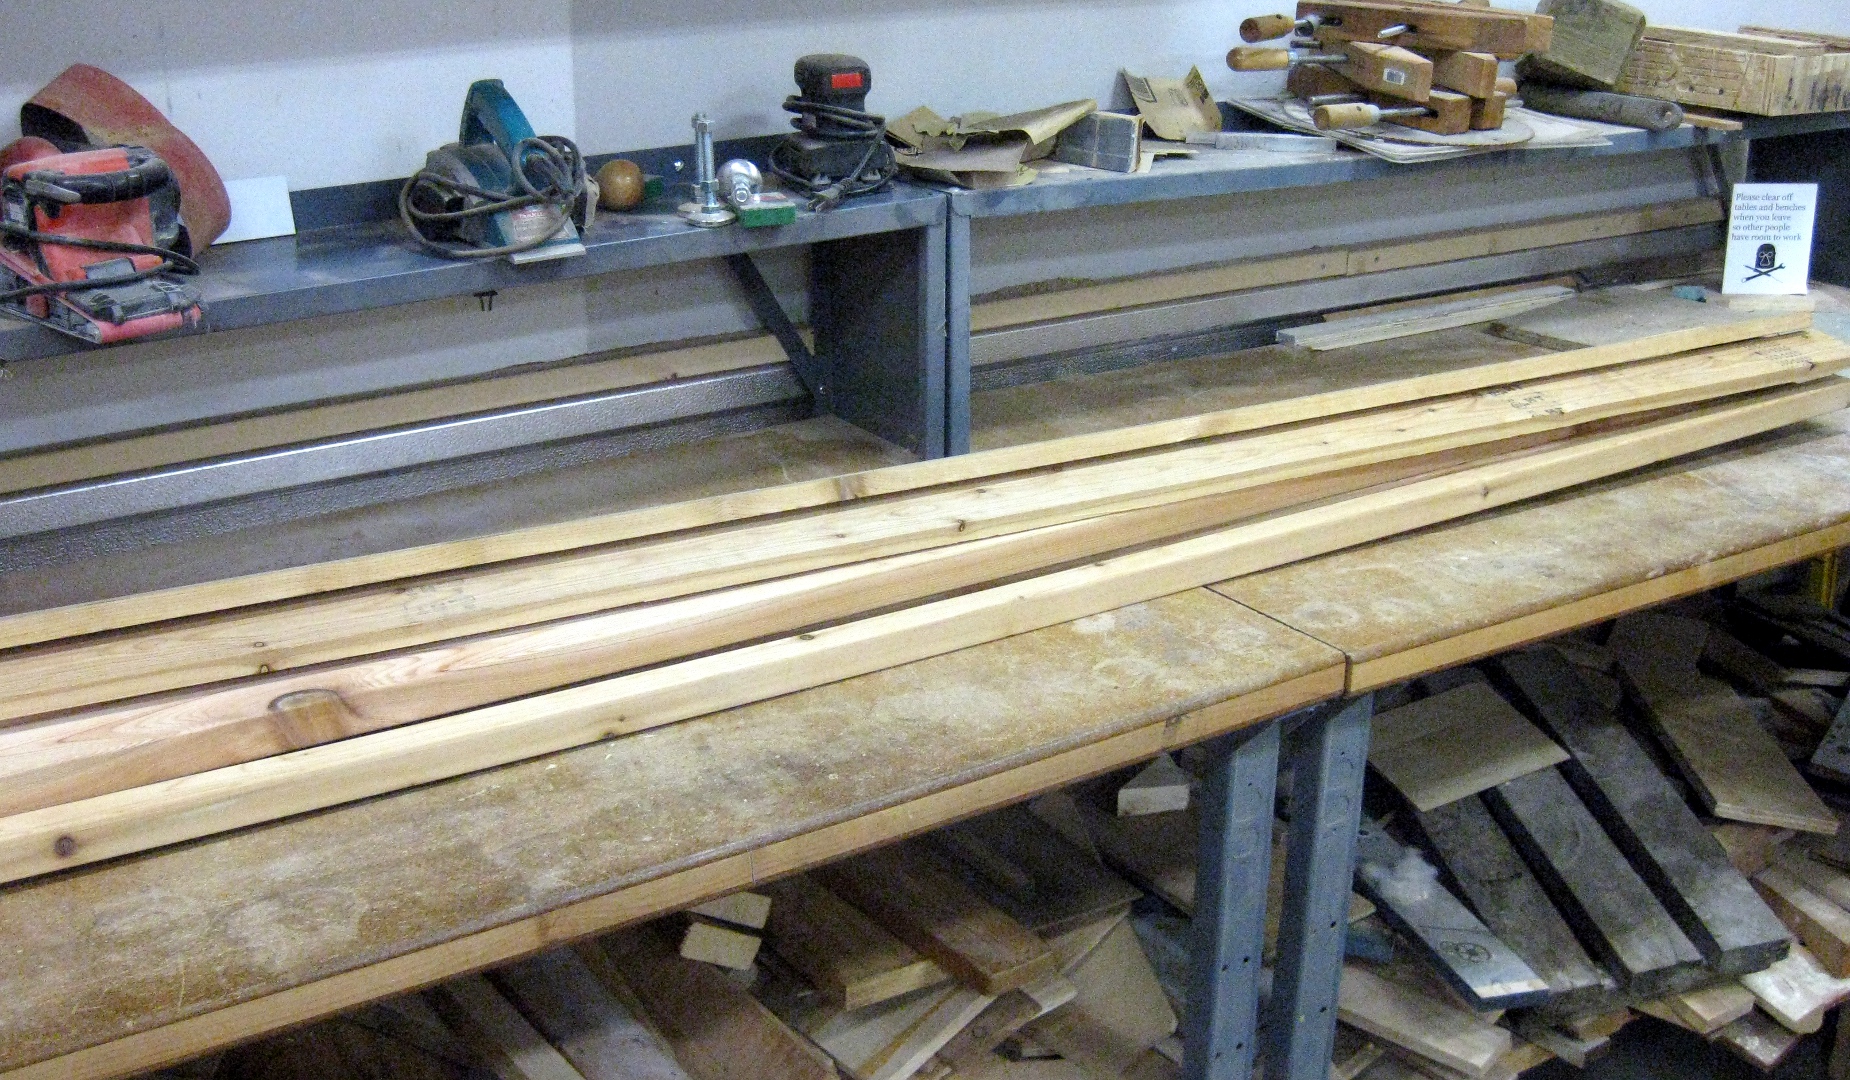
Figure 2: Rough Cedar from Menards

Figure 3: Cut to Size and Length
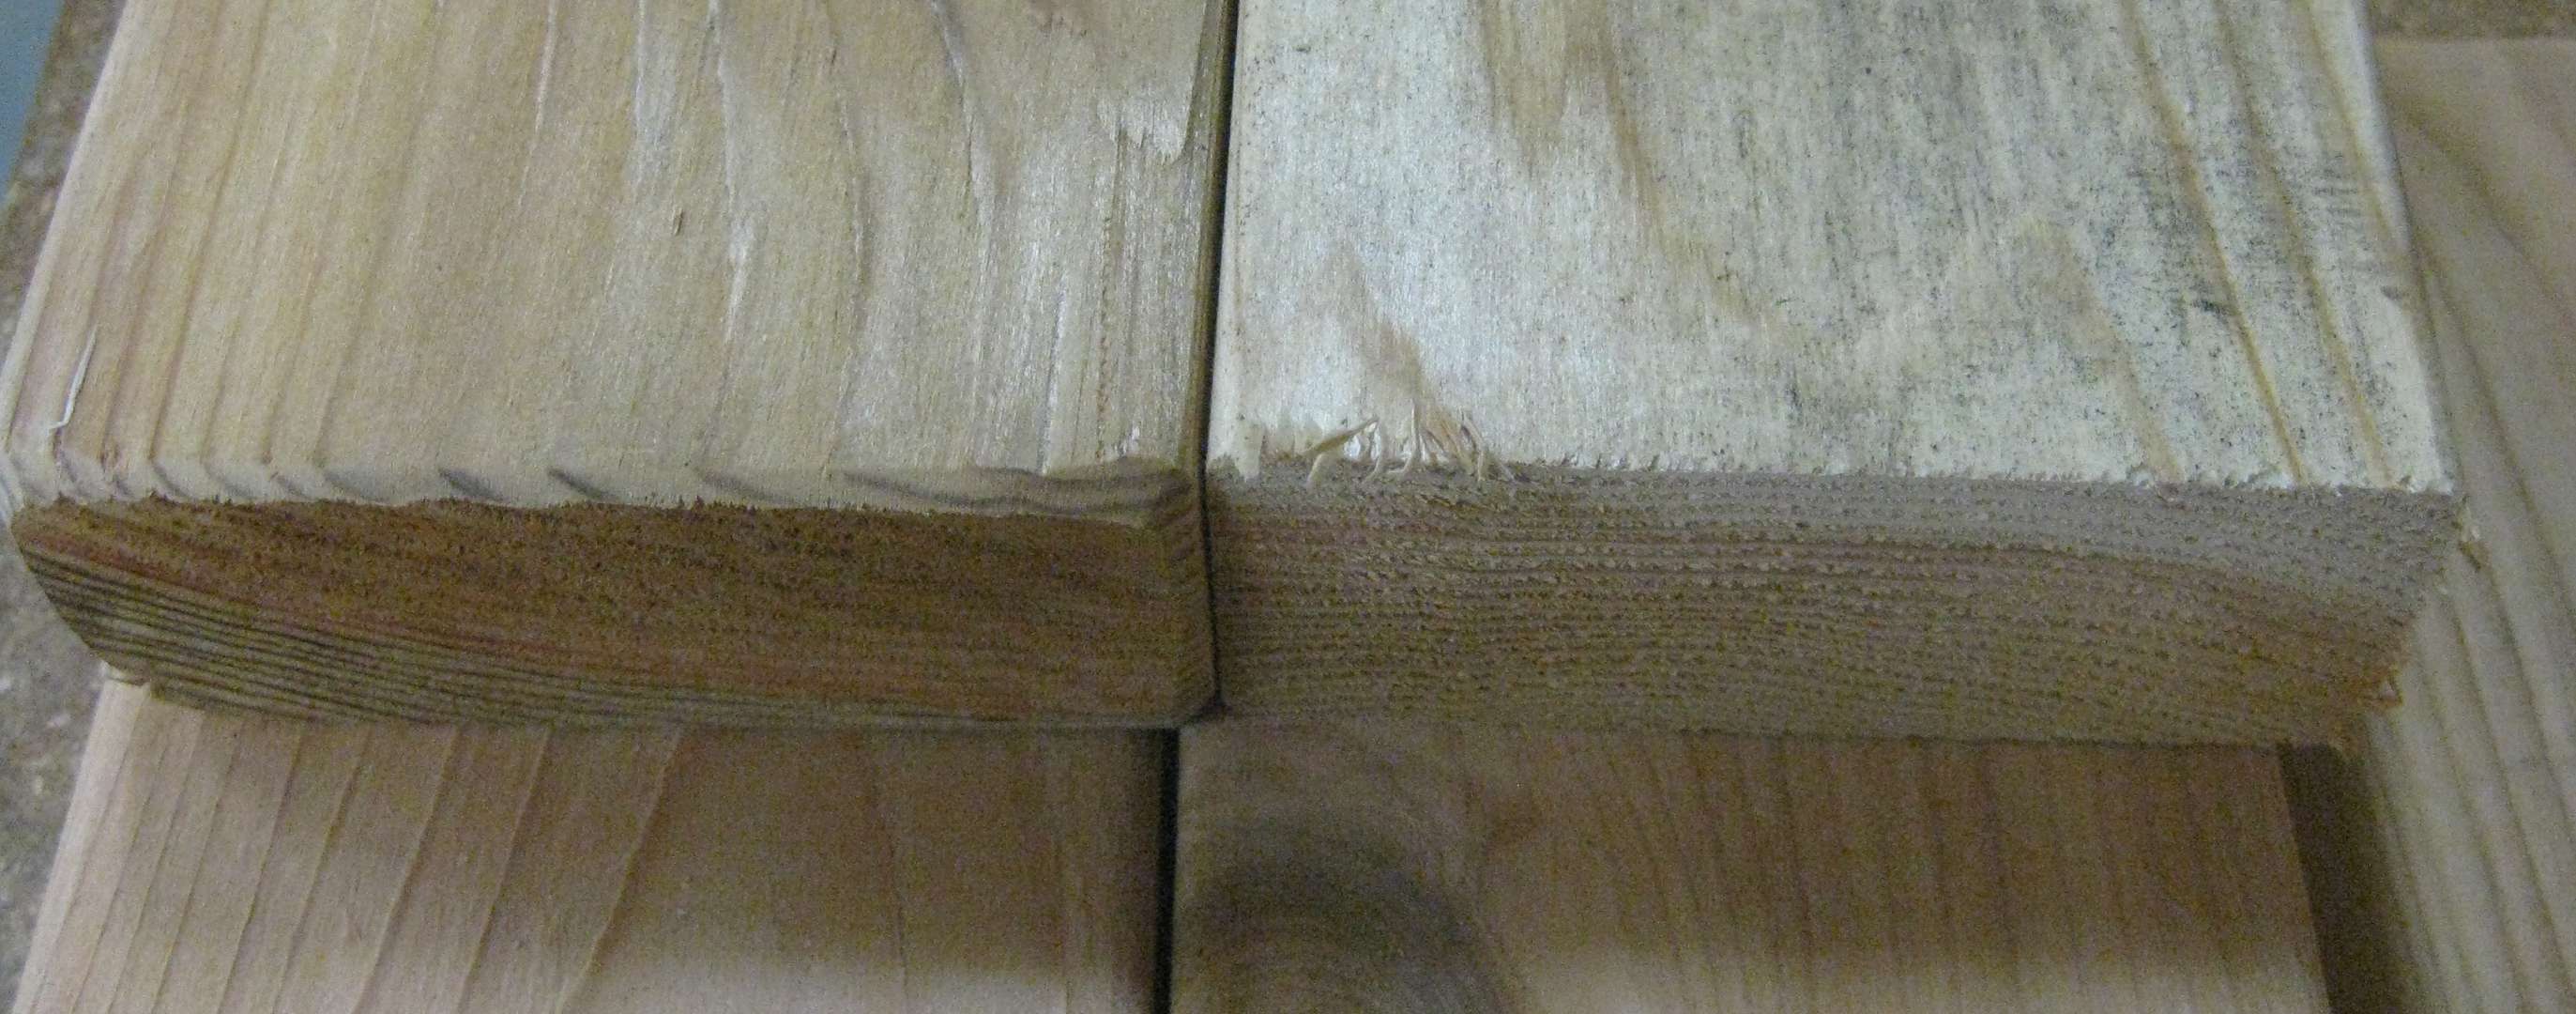
Figure 4: Apply Belt Sander
I recommend using a belt/drum sander on any of the rough cuts to give it a cleaner finished look.
Step 3: Follow Directions (Assembly)
Aside from the cutlist, the plans are straightforward and easy to follow. I built the sides and back as assemblies because I couldn’t transport a completely assembled chair in my car.

Figure 5: Side Assembly
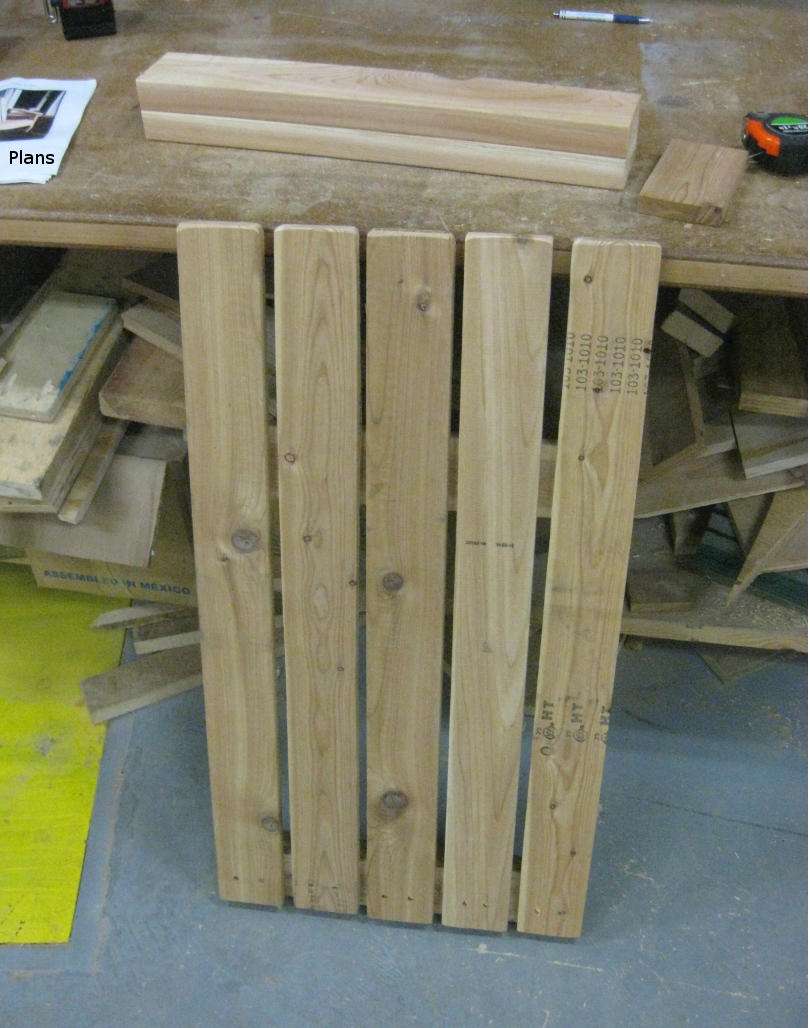
Figure 6: Chair Back Assembly
I deviated from the design a bit as I didn’t feel like using a jig saw, so I just set the miter saw for 45deg and lopped off each corner of the back (which you’ll see in the final assembly pictures)
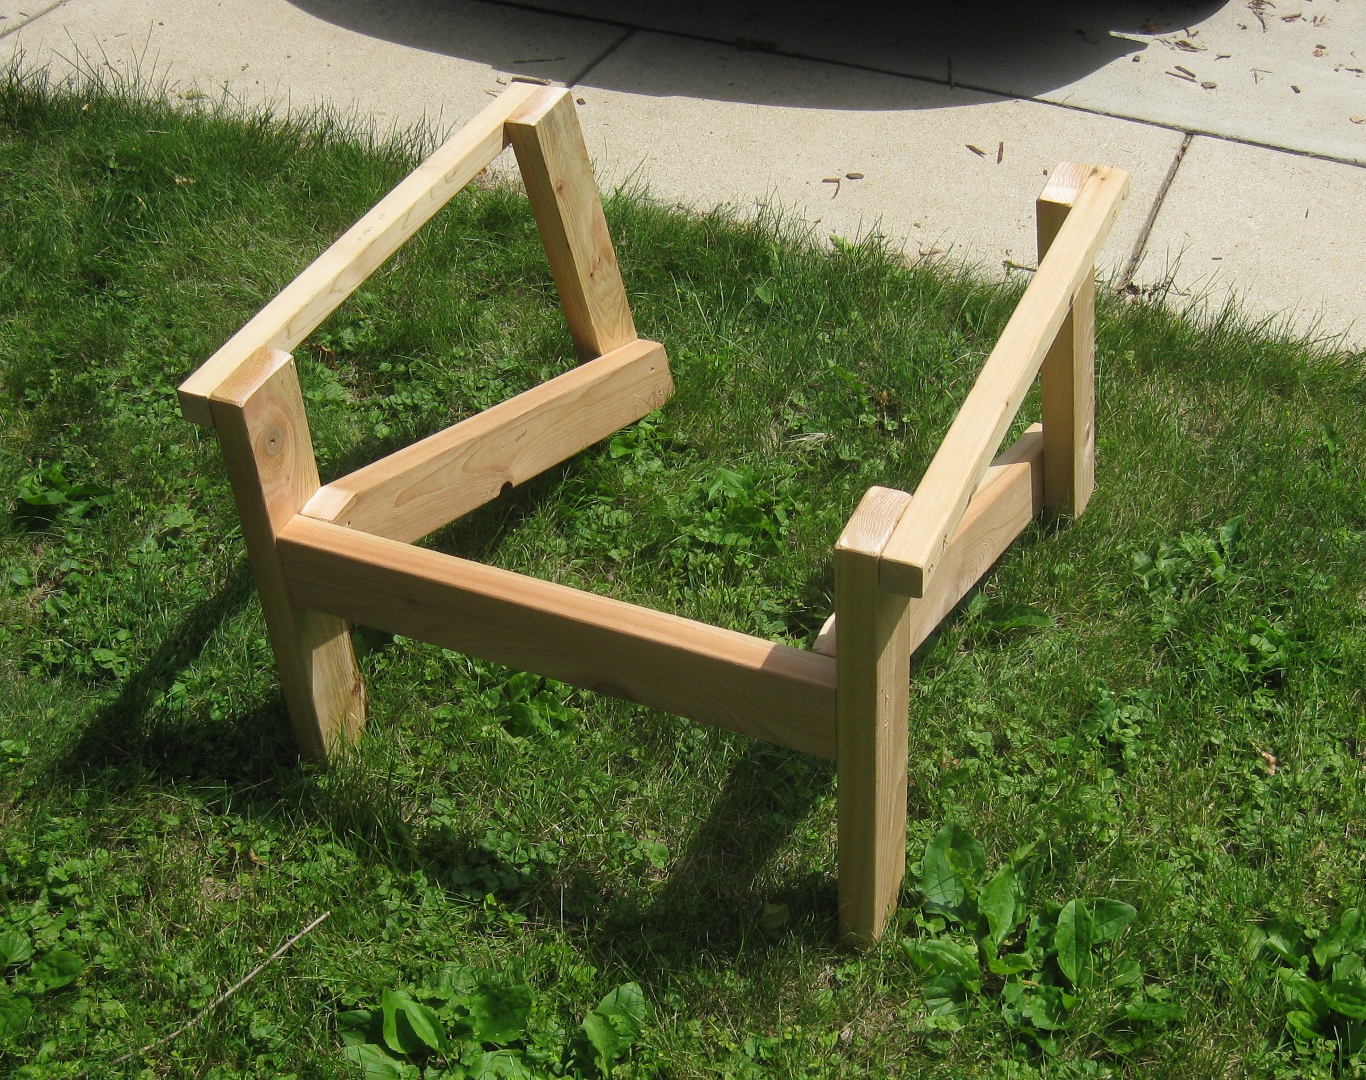
Figure 7: Starting Assembly
I transported the large pieces back to my apartment so I could put it together on-site. I don’t have any pictures of the middle steps, so it kind of jumps from here to completely assembled. Read the directions, you’ll know what to do.
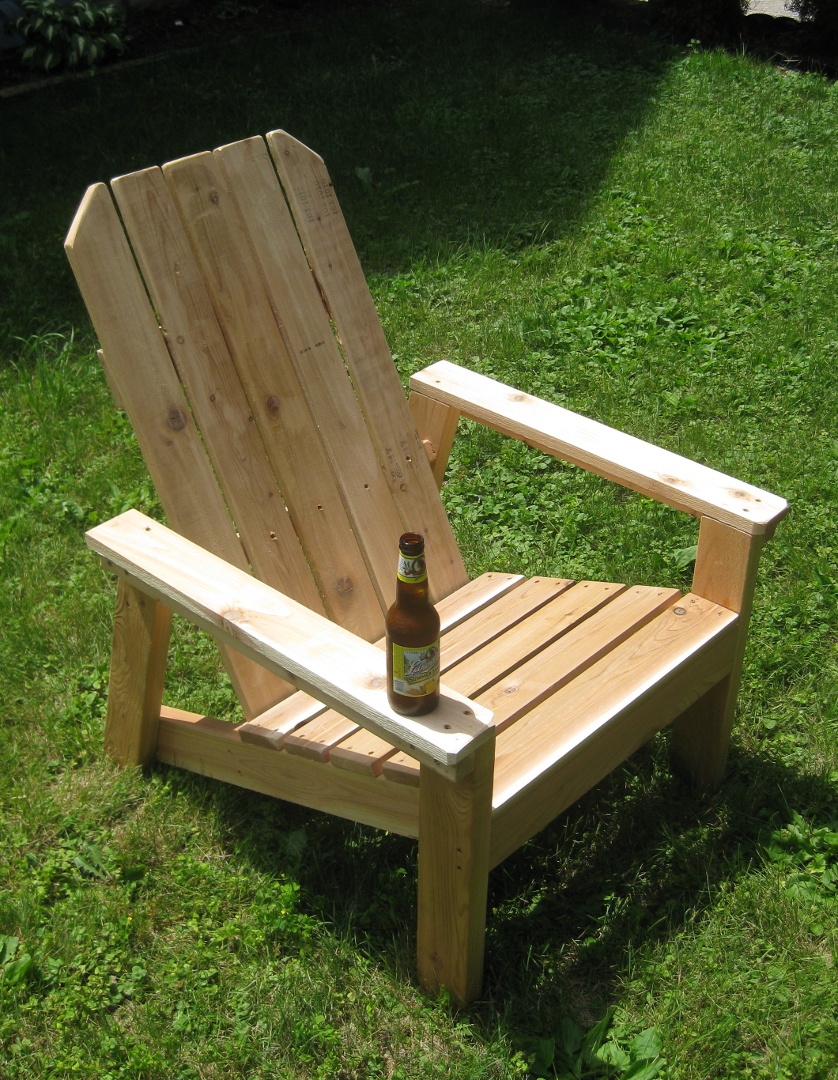
Figure 8: Assembly Done (Structural Testing)
Ta da. A chair.
The beer made up for the sunburn.
Step 4: Finishing
Like I mentioned above, I don’t like paint. So I winged this phase of the project.
I like oil based finished to bring out natural color, so I grabbed a can of Danish Oil. Cedar is naturally rot and insect resistant, but since I had some spray Spar Urethane lying around I figured a coat of that couldn’t hurt either. Lastly, because I like the texture of wax finishes I applied Paste Wax to any of the upright surfaces where you’d touch the chair in normal operation.
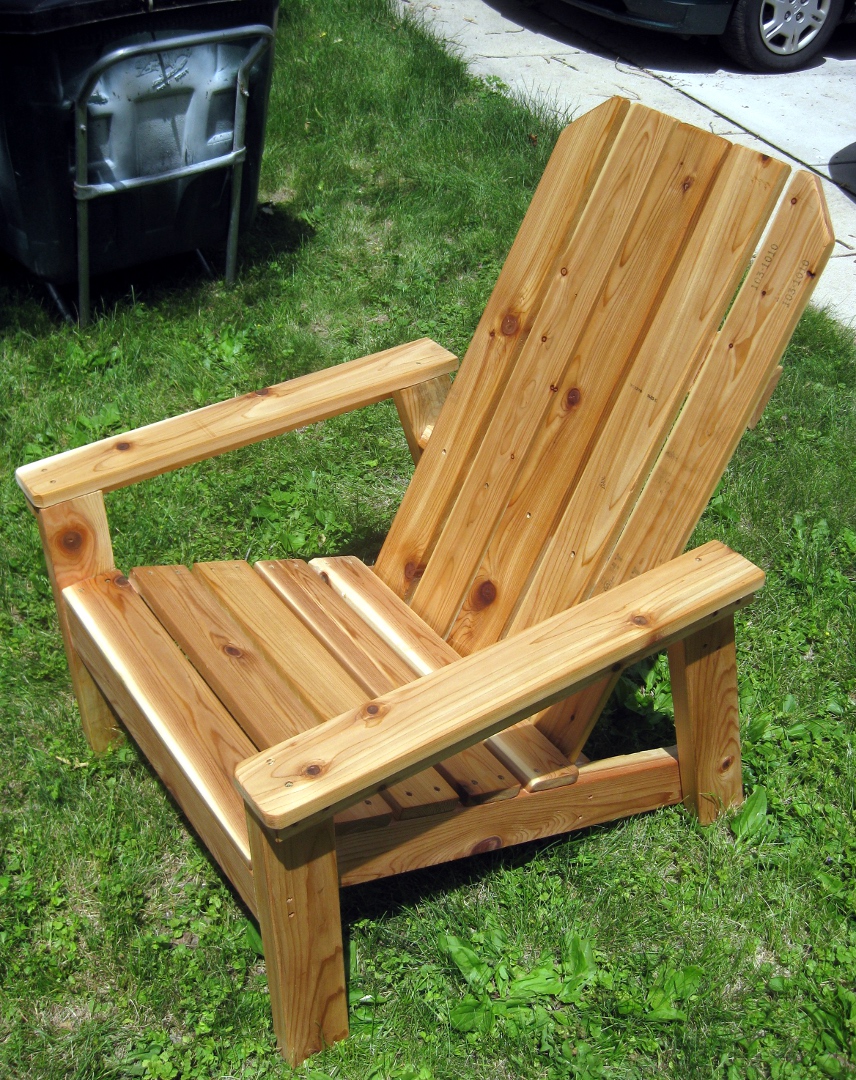
Figure 9: Done!
I applied the Danish Oil by hand, which was a pain, but worked out well enough in the end it seems.
Step 5: Build a Second Chair
This second one is a little better finished based on some in-process learnings from the first chair. I picked up a countersink bit to help clean up the exposed screw holes and tried a little harder to be symmetric and even with the holes as well.
I need to either build a table, or figure out a way to add a cupholder feature. (But so far the porch itself works fine)
Step 6: Fin
Each chair was something like $41 for material not including screws, glue, and finishes and took approximately 4 hours to cut, assemble, and finish.
This weekend I made an end table for my living room. Its in the style of two night stands I made, this one for the tool at hand contest, and this second one! The legs of this series of small tables are getting increasingly eccentric. To build it, I started with three pieces of 2×12 lumber, and a 1/2″ diameter dowel rod. I avoided using metal fasteners, and instead used only wood glue and 8 3″ long dowel pegs to attach the legs to ensure that sculpting the table with my chainsaw-blade-equipped angle grinder would be safe(r). To save some labor with the grinder, I actually cut some of the zig-zag legs with a band saw first. Even with the pre-cutting, I ended up making 1.5 cubic feet of wood chips and saw dust.
