It’s not going so well . . .
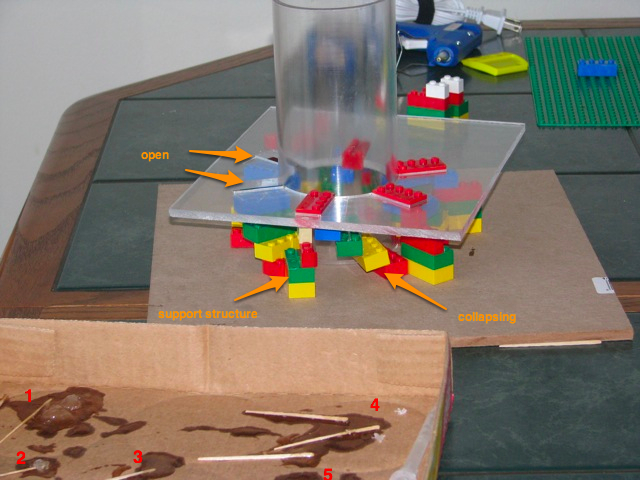
In a previous post, I outlined the plan for constructing the LegoLamp. It was good theory, but not really workable. This post will be a “what I learned,” rather than “look at what I built.” The picture tells the story.
Legos are rectilinear, the cylinder is not. Which means the contact between them is a line. That’s not a lot of gluing surface. Ideally, I would have cut the brick-end to match the curve of the cylinder. But Lego are hollow. Removing that much material would have removed the end of the brick. I counted on the relatively thick hot-glue adhesive to smoosh, expanding the area of the joint.
The laser-cut template has very tight tolerances. This was deliberate. Making the template tight allowed it to serve, in theory, as a substrate for the next layer of bricks. The tight fit to the current layer of bricks would hold the template perpendicular to the cylinder.
In the background, you can see the hot-glue gun has been retired. There is a yellow, plastic-razor-holder next to it. Hot glue was not the proper adhesive for this job. I installed, removed, and scraped, 3 layers of bricks — twice — before abandoning the hot glue. The template is so tight, it leaves no room for adhesive. The glue gets scraped-off and smeared onto the cylinder as the brick is fit. After the first layer, placing a brick is not merely a matter of fitting it into the template. The template must be aligned with the lower layer of bricks so that the new brick will snap onto the one beneath it. The glue is not-so-hot by the time the template is properly aligned and the brick is inserted. The resulting joint is weak.
I switched to two-part epoxy, to gain a longer working time. In short, it still wasn’t sufficient. Five minutes was long enough to place the persnickety first brick of a row, plus 3 more. Then the epoxy became unworkable, and I had to dispense more. I wasted a lot of epoxy. Adding insult to injury, the working time was 5 minutes but the minimum set time was 20. That means 30 minutes per layer. Sixteen layers is 8 hours of gluing. That’s too long. And, the epoxy had the same smearing and small-contact-surface issues as the hot glue. Some of the epoxy joints are no stronger than the hot-glue joints (i.e., they fall apart if touched).
The template works as a substrate for the next layer of bricks. But the etched outline is not sufficient to accurately place that next layer. When the template is rotated & raised to lock onto the 2nd layer, it doesn’t fit. The bricks are not placed within the tolerance of the template. I can’t use the template to support the new layer as the glue sets. Without that support, the bricks tend to fall out of parallel as the adhesive sets. This makes the next layer even more difficult to place, stresses the lower layer’s joint in the process, and results in collapses like the one in the photo. I created support structures from other pieces of Lego. These work for the initial layers. But they add to the difficulty of placing a brick. They can’t be used after the first 5 layers, because there’s no space for them.
Clearly, it’s time to back away from the project and rethink it.


