Photography Area Improvements!

We’ve had a dedicated photography area at the Makerspace since moving to our new building in January.  However, the lighting was powerful and direct, which resulted in some pretty exciting shadows.  Today, I set up four 400 watt equivalent, 105 watt (somewhat) compact florescent lights on stands that each have shoot through umbrella diffusers.  Check them out in room just off the craft lab.

Four_Photo_Stands_with_Umbrellas

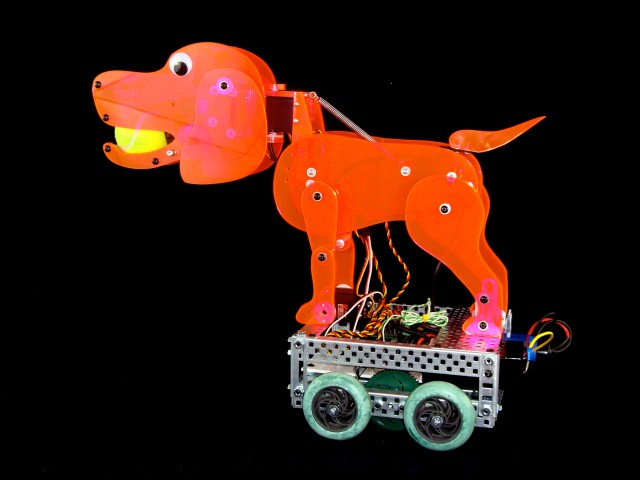
Now we can take photos that aren’t a nightmere of shadows and hot spots!  Like this teaser photo of FIDO, shown below.  Stay tuned for more info on him!

Mystery_Project_witout_glare_or_shadows

Remote-Controlled LED Room Lighting

This gallery contains 4 photos.

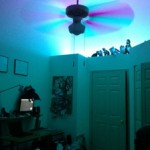
My apartment has sub-par to poor lighting.  Combine that with our lease’s “no painting walls” policy and you’ve got a one-way ticket to Drab-ville.  Many moons ago I planned to replace the over-cabinet lighting in our kitchen with RGB LEDs controlled by Arduino, but I never found the motivation to actually do it.  Then one […]

LEGOlamp

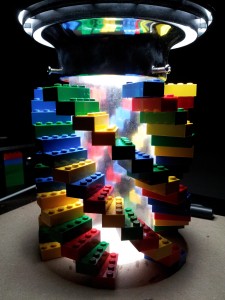
LEGO_lamp_2_complete_dark   This is the assembled LEGOlamp.  It will be mounted as a ceiling fixture, with an internal bulb.  To light it for this picture, I used a desklamp to project light into the tube.

One idea I tried after the previous post, was slicing the tube into 16 rings.  The idea was to glue the bricks to the tube, with the bricks stacked vertically, then offset the rings after the bricks were attached.  That approach failed.  I was unable to cut the rings smoothly, resulting in large gaps between them.  When stacked, they looked horrible.

In the end, a simple change of adhesive and application made the difference.  First, I abandoned both hot glue and epoxy.  I discovered gel super glue has sufficient open time to position the bricks, but also sets quickly enough that clamping and supporting the bricks was unnecessary.  I addition, I realized the important joint is between the bricks.  If the bricks are firmly cemented to each other, the connection to the tube can be a series of comparatively weak joins.  Less glue on the end-face means less glue to smear, and less chance of accidentally gluing the template in place.


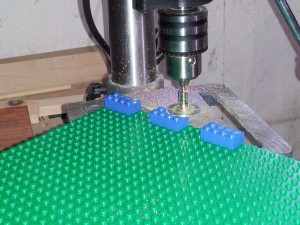
drillpress_dremel_saw  Many people have asked how I cut the LEGO bricks.  Initially, I used a sharp chisel.  That was tedious, as each brick had to be clamped.  After that, I switched to a rotary-tool held in a fixture, with a standard abrasive cut-off disk.  That worked well enough.  Finally, I hit on chucking a Dremel-sized circular saw blade into a drill press.  That provided a rock-solid platform.  Better still, once the height was set it didn’t vary.  Unlike the abrasive disk, the bricks weren’t heated by the saw blade.  No molten plastic flying around.  Using this method, the bricks required little-or-no touch-up work with a sharp knife.

Ho Ho Lights

My Husband and I wanted to put up some kind of Christmas decorations in our apartment windows over looking the city. After talking about it for a while, I decided to make lighted letters saying, “HO HO HO” …but since we only have two pairs of windows, it would have to just be, “HO HO”.

In the wee hours on Black Friday, we got the materials: 4 sheets of wood, 4 boxes of 100 count LED lights, and extension cords. After sketching out the design…

…and cutting out the letters…

…it was time to drill the 400 holes and hot glue all the lights in place.

It only took a weekend to make and hang these and I think the end result is well worth it.

MAHRER CHRERSTMAHS

LegoLamp follow-up

There are some issues . . .

It’s not going so well . . .

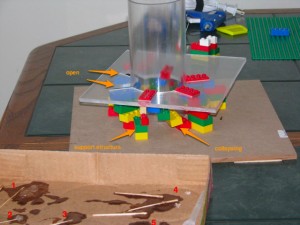
In a previous post, I outlined the plan for constructing the LegoLamp.  It was good theory, but not really workable.  This post will be a “what I learned,” rather than “look at what I built.”  The picture tells the story.

Legos are rectilinear, the cylinder is not.  Which means the contact between them is a line.  That’s not a lot of gluing surface.  Ideally, I would have cut the brick-end to match the curve of the cylinder.  But Lego are hollow.  Removing that much material would have removed the end of the brick.  I counted on the relatively thick hot-glue adhesive to smoosh, expanding the area of the joint.

The laser-cut template has very tight tolerances.  This was deliberate.  Making the template tight allowed it to serve, in theory, as a substrate for the next layer of bricks.  The tight fit to the current layer of bricks would hold the template perpendicular to the cylinder.

In the background, you can see the hot-glue gun has been retired.  There is a yellow, plastic-razor-holder next to it.  Hot glue was not the proper adhesive for this job.   I installed, removed, and scraped, 3 layers of bricks — twice — before abandoning the hot glue.  The template is so tight, it leaves no room for adhesive.  The glue gets scraped-off and smeared onto the cylinder as the brick is fit.  After the first layer, placing a brick is not merely a matter of fitting it into the template.  The template must be aligned with the lower layer of bricks so that the new brick will snap onto the one beneath it.  The glue is not-so-hot by the time the template is properly aligned and the brick is inserted.  The resulting joint is weak.

I switched to two-part epoxy, to gain a longer working time.  In short, it still wasn’t sufficient.  Five minutes was long enough to place the persnickety first brick of a row, plus 3 more.  Then the epoxy became unworkable, and I had to dispense more.  I wasted a lot of epoxy.  Adding insult to injury, the working time was 5 minutes but the minimum set time was 20.  That means 30 minutes per layer.  Sixteen layers is 8 hours of gluing.  That’s too long.  And, the epoxy had the same smearing and small-contact-surface issues as the hot glue.  Some of the epoxy joints are no stronger than the hot-glue joints (i.e., they fall apart if touched).

The template works as a substrate for the next layer of bricks.  But the etched outline is not sufficient to accurately place that next layer.  When the template is rotated & raised to lock onto the 2nd layer, it doesn’t fit.  The bricks are not placed within the tolerance of the template.  I can’t use the template to support the new layer as the glue sets.  Without that support, the bricks tend to fall out of parallel as the adhesive sets.  This makes the next layer even more difficult to place, stresses the lower layer’s joint in the process, and results in collapses like the one in the photo.  I created support structures from other pieces of Lego.  These work for the initial layers.  But they add to the difficulty of placing a brick.  They can’t be used after the first 5 layers, because there’s no space for them.

Clearly, it’s time to back away from the project and rethink it.