First Small Engine Repair Meetup Recap

First Small Engine Repair Meetup Recap
Resurrecting a Snow Blower, Just in Time for Easter

Just in time for Easter, a group of gearheads—and aspiring gearheads—gathered for our very first Small Engine Repair meetup with one shared mission: see if we could bring Mike T’s snow blower back from the dead. (Spoiler alert: we did!)

Starting Off

We kicked off the night with introductions and a discussion of everyone’s previous experience, as well as what they hoped to learn from the meetups. It was a great mix—some folks with deep mechanical know-how, others just starting out and eager to get their hands dirty.

We decided that a great starting point for tackling any small engine problem (especially one with a carburetor) would be learning how to clean a carburetor—a key piece of knowledge for anyone working on these kinds of machines.

Carb Talk

What followed was an open group discussion and knowledge share on carburetors—what they do, how they work, and how they fail. Ryan jumped in with some super helpful explanations, and we all gathered around the screen to watch a YouTube video that walked through the repair of the exact type of carburetor on a similar snow blower. (Link below!)

The Resurrection

Working in Dan L’s rented space, we got our hands on the real deal. After removing all the guards and parts necessary to access the snow blower’s carburetor, we tore it down, carefully cleaned out all the orifices, and reassembled and reinstalled it. We also replaced the spark plug just to cover all our bases.

Throughout the process, we shared tips on tool usage, tricks for getting stubborn parts unstuck, and the finer points of gaskets and seals. We even had some good laughs about tool terminology—and the importance of knowing the difference between an open-end wrench and a #1 Phillips screwdriver when someone’s shouting for help. (Or you are looking for a tool yourself)

Community in Action

It was awesome to see everyone sharing their knowledge, asking questions, and learning by doing. Whether you were elbow-deep in the carburetor or just soaking in the process, there was something for everyone.

Vroom Vrrom

After just a simple cleaning and spark plug change, an Easter miracle Mike’s blower roared back to life on the third crank in fulfillment of the service manual. 

…. Actually,     it started on the first crank, but that didn’t make as good an Easter joke…..


Resources for Further study.

Want to dive deeper? Here are some of the resources we used or mentioned during the meetup:

The Planet, Dude… And Space Rules

As part of our discussion, we covered the dos and don’ts of working on engines. It is your responsibility to clean up after yourself. Extra care MUST be taken to ensure that your mess is contained, and that oils, fuels, paints, and other materials cannot possibly be released into the environment, make a mess for others, or get anywhere near a drain. YOUR EQUIPMENT IS YOUR RESPONSIBILITY.

Regarding the recycling of oil, any AutoZone or auto parts store is required to accept used oil from individuals.
AutoZone Recycling

For oil, old gas, or any other hazardous materials (such as old paint, etc.), the City of Milwaukee will accept hazmat materials from Milwaukee residents for free. Again, this is your responsibility; MMS cannot recycle these materials for you. Your machine, your mess, your cleanup.
City of Milwaukee Hazardous Waste Disposal

Lastly, space rules currently state that no car work involving fluids can be done at the space due to previous issues with people not cleaning up after themselves. Let’s continue to show that small engine owners are responsible and do not make a mess. Remember Smokey the Bear and Woodsy Owl? Treat your projects, no matter what they are, just like hiking in the woods: leave no trace when working at MMS. Dont start wild fires either.

Watch and Listen to Woodsy Owl Give a Hoot Don’t Pollute

Whats next

If you have another idea for a small engine project, please post it on the members-only message board or let Dan L know that we had so much fun with this one, let’s do other group projects in the future.


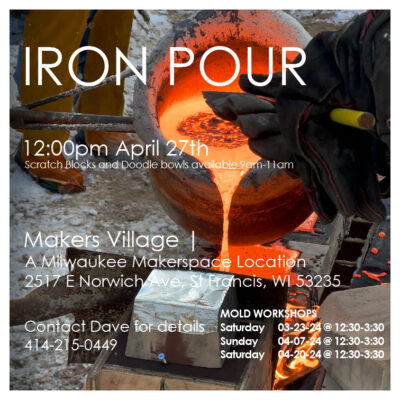
Iron Casting: Spring Iron Pour

The Casting Area is running another Iron Pour.

This Event will be open to participants, Members and Non-Members.

Please contact Dave directly if you are a Visiting Artist/Non-member and need studio time to make your own artist mold. All non-members must sign the “Iron Casting Waiver” to participate.

Studio Time is to be scheduled in advance. If you plan on bringing a mold or making a mold all weights must be estimated and metal must be broken by said attendee. If you are unable to break iron due to medical reasons please reach out to Dave.  

Resin-bonded sand molds are weighed before they get to the pour floor. 

Artist Tile and Doodle Bowl Workshops:

Saturday 03-23-24 @ 12:30-3:30
Sunday 04-07-24 @ 12:30-3:30
Saturday 04-20-24 @ 12:30-3:30

Saturday April 27th 
We are planning to have the Safety Meeting at noon. If you plan on participating on the pour floor, show up to the safety meeting and sign the waiver, it’s required. Observation will be available from the north side of the pour floor. Observation will only be accessible from Norwich Ave. The proposed Schedule is the following:

8:00am Pour floor setup (leveling and placing molds)
9:00am Scratch blocks & Doodle Bowls available for sale.

10:30am burn-in (preheat furnace with immersion burner forced air and natural gas) 

12:00 safety meeting Immediately after the safety meeting, we go on blast.

*Going on Blast – removing immersion burner and attaching Blower to the furnace and entirely running of forced air and Coke Start charging iron/coke as it settles

1:00pm Should have first tap, Tapping every 13 minutes. 

4:00pm Drop bottom when all molds are filled – brief clean up.


Sunday, April 28th 

10:00am Clean-up and devesting molds:

Clean-up is required if you have an artist mold on the pour floor. All Artist Tiles/Doodle Bowls will be out on display for pickup. No additional payment is required for these items. For Artist Molds, gating and pour cups may be cut off and thrown in the iron pile.

Please weigh your castings and provide payment in the donation bin or via Wild Aprocot bit.ly/3wKtOcS Please Refer to the rates section for pricing https://wiki.milwaukeemakerspace.org/areas/casting/rates

Contact Dave for more information at dave@davidmarnold.com or via cell phone 4142150499
Redbull Flugtag Milwaukee

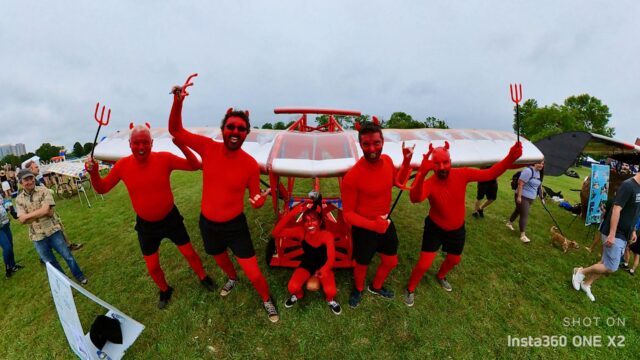
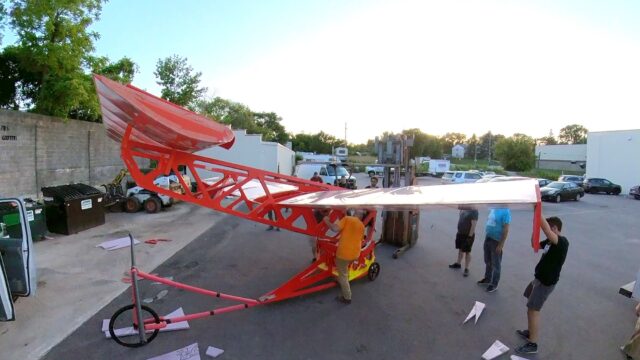
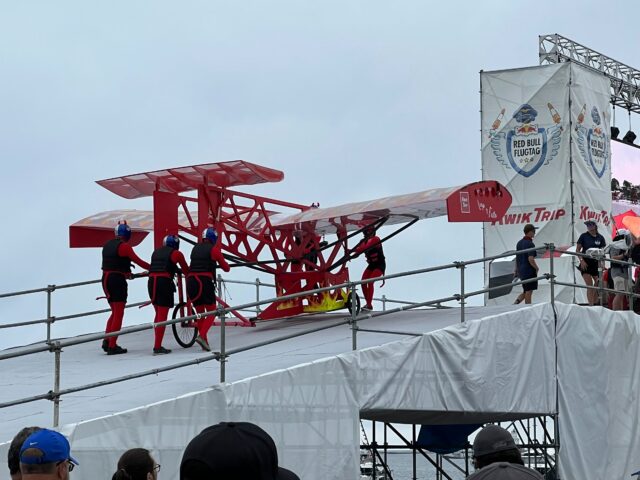
For the past 2 months a team of makers has been frantically designing and building a glider for Redbull Flugtag.  It was one of the most fun projects I have ever had the privilege of working on.  Thought we did not place in the competition I wanted to share what we have learned and share some CAD files for future Flugtag builders to find and reference if they wish.

Team Flies at All:

When I put up the call to see if other members where interested in participating I was shocked when almost 20 people came to the first meeting.  At that meeting two opposing directions were posed for our entry.  One was a craft that would be as crazy as possible that would just be fun to look at and not attempt flight in a meaning full way.  The second was “team flies at all” who thought the fun part of the project would be the challenges of making a craft that would generate lift.  As the next weeks went on that second team was the only group that kept meeting and planning.  

Material choice and testing:

At one of the first design meetings Jon Drayna brought in a sample that he had worked on that week that would become the structure of our design.  It was 1 inch pink insulation board laminated on either side with 2mm strips of wood.  This made the normally flexible material very ridged while still being extremally light weight.

With this structure in mind I went to work in Fusion 360 and modeled up a craft.  Using a paper added to a google drive the team was sharing I was able to design a parametric air foil that would in theory provide high lift at low speed.  I even devoted the weekly Fusion 360 class to making an airfoil.  Below is a link to that class and the parametric airfoil Fusion 360 file will be in the link at the bottom.

We chose to cover our wings with window cling film.  I think this is one of the best choices we made.  Even though the film required lots of care it was cheap and light weight compared to alternatives.  On the day of the event we saw boat vinyl and lots of other materials but I stand by our window film.  Another decision that I was happy with on our craft were the ridged supports in the front and back of our wing.  Lots of teams chose not to do this and their air foil shapes were lost due to the shrinking material. 

Our biggest lesson:

If you have ever attempted to do something for the first time before you know that it usually doesn’t work.  We all had lots of optimism about our chances to “fly” but it takes practice to learn new things.  You can’t make an omelet with out breaking a few eggs.  On Flugtag our point of failure was the cart.  We knew that if the back of the cart were to push up on the back of the glider it would push the nose down right into the water.  We had taken care to design a two part cart that would we thought drop away from the craft with the use of a one way hinge mechanism.  The idea was as the front of the cart holding the glider went off the edge it would fall down bending at the hinge and not creating leverage lifting the back of the glider.  Maybe it was swelling due to humidity or jus the paint being sticky but this was our point of failure.   You can see in the video the cart breaking part of the tail as it forced it up and as soon as it fell away the wings started to work.  It was too late at that point though.

I use used a bad word in that last paragraph, failure.  At least most people think of it as a bad word.  Lets reframe that right now.  Failure is what happens on the path to success.  Failure is what happens when you are pushing your self far beyond your current capabilities and knowledge.  No one has ever learned something from success it is failure that teaches us and failure that motivates us.  

We failed to fly but we succeeded at working together to build one of the coolest projects to ever come out of this building.  It was so much fun working with everyone that pitched in for an hour or two or for weeks on end.  The bravest member of the Makerspace, Faith, got to stand on a stage in front of 50,000 people and answer questions about what a the Milwaukee Makerspace is.  I have zero regret except for maybe not jumping of the edge of the ramp…

Open Source Everything:

We learned so much.  You can take a look at our CAD files and build images and learn with us.  All are at the link below for you to copy and improve.

Open Source Project Link.

Cerveza and Ceramics

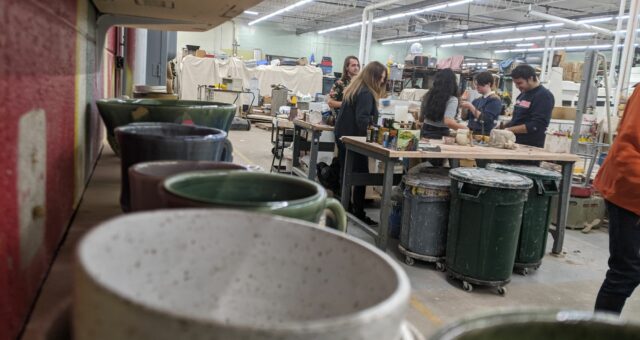
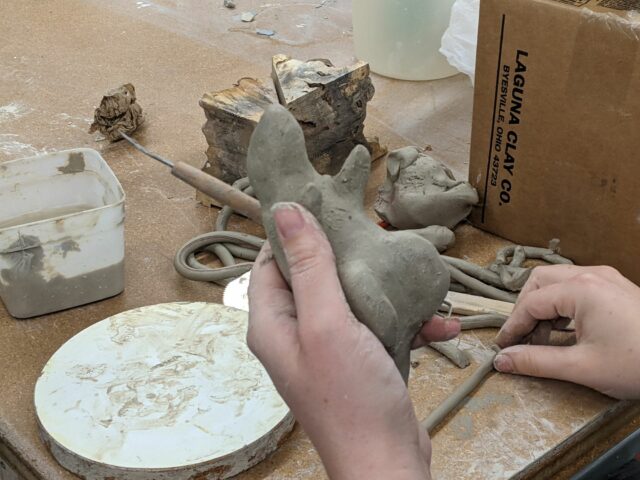
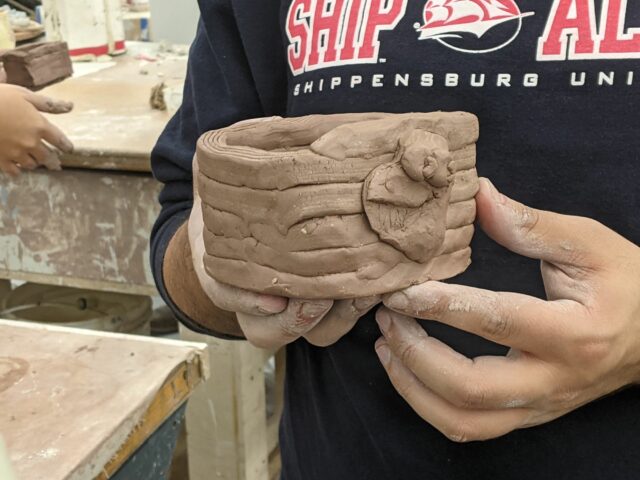
Every Wednesday at for the past few months Jeff has been hosting “Cervesia and Ceramics”.  It’s an evening playing with clay fueled by the power of beer.  Over the past few months I have seen Jeff do wheel throwing classes, hand building seminars, and general clay based standup comedy (mostly while sitting at a wheel). 

Every week members stop by just to hang out a chat or to join us for a beer.  Some of those on lookers even get talked into getting their hands full of clay.  If you have never picked up a lump of clay ask Tom Klein about his experience a couple weeks ago when Jeff peer pressured him into sitting down at a wheel for the first time.  

Stop in tomorrow or any Wednesday.  The Milwaukee Makerspace is by far the best ceramics studio in the Milaukee area also the most affordable.