Video Wall of Terror

This weekend, I helped decorate for a Halloween Party at my sister’s house. There’s an odd hallway that connects their main large public room to the rest of the house. It’s used for storage, and has shelves on both sides.

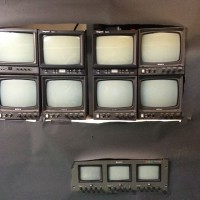
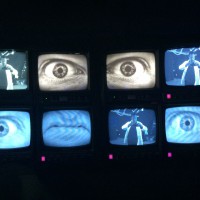
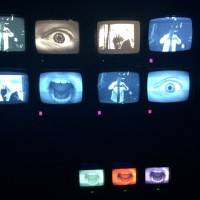
This year, I decided to decorate that area by creating a video wall effect. Something like a Television Control Room of Terror!

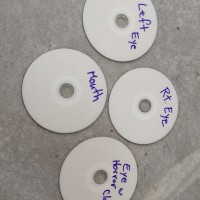
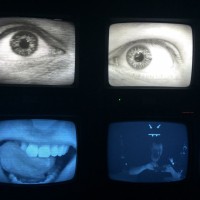
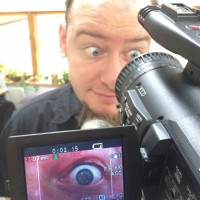
To start with, I simply filmed my brother-in-law with a video camera – only from WAY TOO CLOSE! I shot macro video of his eye and mouth. Then I edited the footage to create a custom looping DVD.

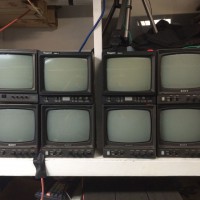
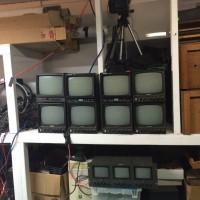
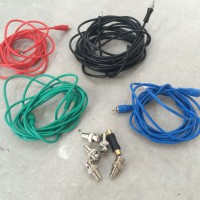
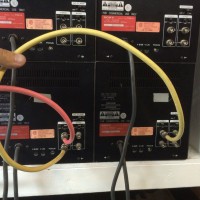
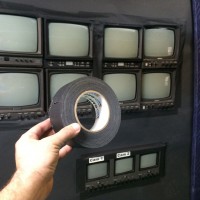
In the hallway, I set up multiple monitors. These are old monochrome standard definition monitors that were on their way to the recycling center. They were professional monitors, which means that they can pass a video signal through from one monitor to another, making it easy to daisy chain several monitors.

Next to the monitors, I set up three DVD players (including one car DVD player – hey I use what I got!) to play the three different custom DVDs – Right Eye, Left Eye, and Mouth. Each of the three videos is a different length, so they will continue to drift out of sync. That way, as they loop, the visuals are a continuingly changing experience through the whole evening.

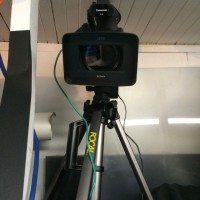
Above the monitors, I set up a video camera on a tripod and fed it to some of the monitors. That way, when party-goers look at the monitor, they also see themselves. Having feedback on some of the monitors adds a sense of interactivity to the project.

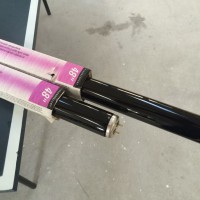
After the monitors and DVD players were all set up, I covered the rest of the shelving with black paper. In a dark hallway, lit only be black lights, it’s a great effect of creepy images floating in the hall.

If you want more details on this project, I made a full step-by-step write-up on Instructables.
3D Printable shock mount for PCM-M10 digital recorder

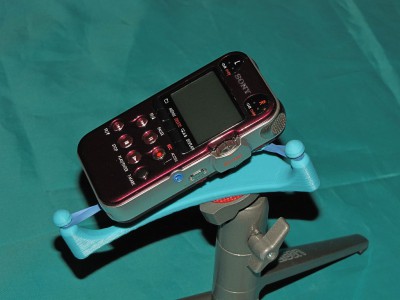
PCM-M10 Shock Mount

PCM-M10 Shock Mount

Several years ago I played with a lot of audio stuff including making binaural recordings of things like cicadas, train rides, and festivals in Japan, and the singing of tree frogs in my back yard when I lived in a forest in Missouri.  Those recordings were done on a MiniDisc recorder because it was the best available audio quality recorder for people on a budget (i.e. cheapskates) like me.   Time and technology wait for no one, and I’ve been getting the itch to do some recording again, so I recently picked up a Sony PCM-M10 recorder.   This little machine records in many different formats up to and including 24 bit/96 ksps (though self-noise really limits the machine to about 15 actual bits).  The audio is recorded onto micro SD cards so unlike the MiniDisc, you get access to the raw digital data without any compression or associated quality degradation.

My previous recordings were done using a DIY binaural microphone that used a roughly matched pair of electret condenser mic capsules mounted on a wire bail that held the capsules inside my ears.  Even though those mic capsules were pretty noisy, the recordings came out pretty good.  When you listen to them with headphones you get a real “you-are-there”, surround-sound experience that can be quite startling.  You can hear those recordings here: http://mark.rehorst.com/Binaural_Recordings/index.html   Soon, I’ll be starting a new binaural mic project to go with the new recorder, this time using much higher quality mic capsules.

In the meantime I was looking for a shock mount to use when making recordings using the built in mics.  The shock mount prevents low frequency noise from handling, bumping the table the recorder sits on, etc., from being coupled to the mics through the body of the recorder.  I did a web search and found only a couple unsatisfactory designs so I did what any maker would do- I made!

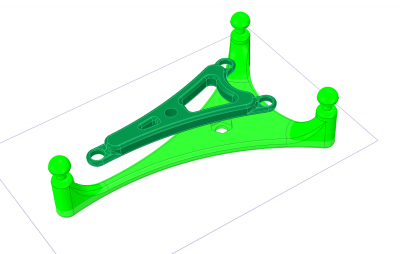
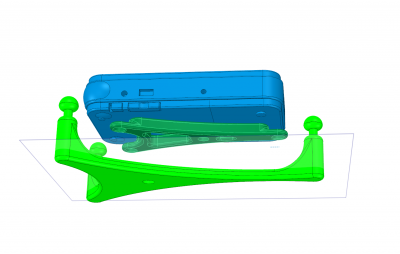
One of the flaws in the few designs I saw was that some of the numerous switches and I/O jacks on the recorder would not be accessible when it was bolted to the shock mount.  They also didn’t look very nice.  After a lot of sketching possible designs on a whiteboard and paring the thing down to a minimal implementation, and spending much too much time making a 3D model of the recorder, I came up with a printable 3-finger design that holds the recorder either on a tabletop or a tripod and keeps ALL the switches and I/Os available.  The only thing you can’t do while the recorder is mounted is swap batteries (but with 40 hours record time on a set of two AAs, that shouldn’t be a problem).

I used DesignSpark Mechanical to make the recorder model and design the shock mount.  DesignSpark makes rounding corners of complex 3D objects easy (nearly impossible in Sketchup), but I did run into some of its limitations that I hadn’t previously considered.  One huge limitation is that there is no way to put any form of text into a drawing without some special work-arounds (use Sketchup to make text, then import into DesignSpark).

CAD drawing of shock mount

CAD drawing of shock mount

PCM-M10 on shock mount- CAD

PCM-M10 on shock mount- CAD

This shock mount design is available here:  http://www.thingi

verse.com/thing:384567


I printed the shock mount on MegaMax using Coex3D Aqua ABS filament.


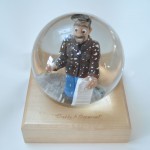
Custom Snow Globe


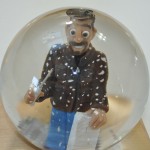
Well, I’ve been slaving away on creating a unique X-mas gift for my wife and two-year old daughter, and I think I got it right. They loved it!

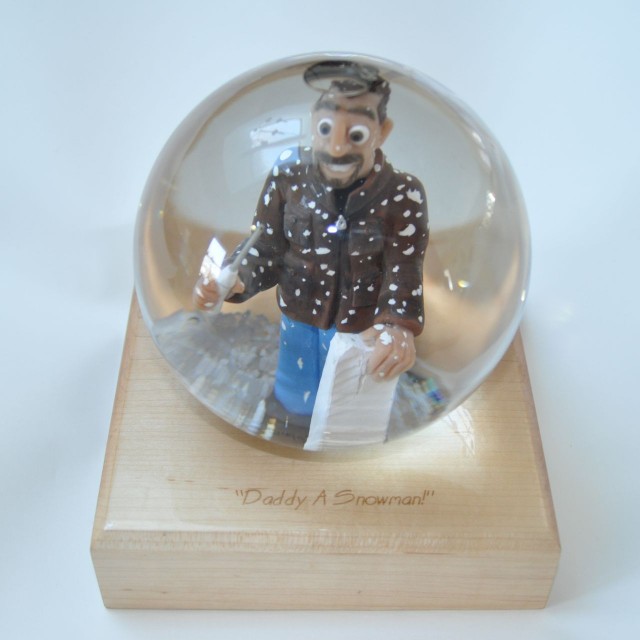
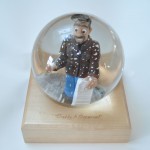
I’m talking about a Custom Snow Globe!

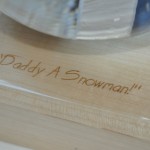
A while back, I was working in the driveway on a styrofoam project. Of course, that white stryrofoam dust gets static-charged and STICKS TO EVERYTHING. I also found that the best tool for cutting it was my wife’s kitchen electric carving knife. When I headed inside to take a break and warm up, I was COVERED with styrofoam. My two-year-old girl looked up at me and squeeled “Daddy a Snowman!”.

Indeed I was. I imagined myself inside a snow-globe with styrofoam swirling around me like a snowstorm. But could I actually BUILD a snowglobe that would match my imagination?

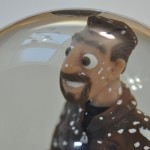
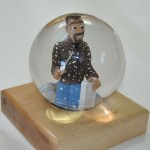
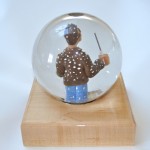
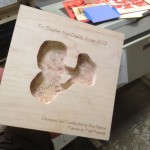
I started looking at every snow globe I could find and set to work building one. I looked around and found a glass dome, used for light fixtures. I got two of them, and gave one to my brother-in-law, who is a clay artist, among other things, and commissioned him to make a caricature of me. Since he had one globe, and I had the other, he could make a figure that would fit inside the globe, and I could do the woodworking on the base, and insure that the globe fit that.

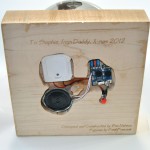
I headed to the local cabinet shop and talked to old high-school class-mate Steve about what wood to use for a base. He gave me a maple block, and I grabbed some scrap maple from the bin to practice cuts and routering on. At my Dad’s back-of-the-garage shop, I experimented with routing, until I could get it right, and routed a circle for the base of the glass globe, cut the wood base to length and cut a 45-degree bevel on the top edge, and routed a pocket in the bottom for the electronics.

I wanted to make a “singing” snow-globe, so I bought a singing greeting card at the Hallmark store, and then dissected it for parts. The electronics were then mounted on the bottom of the  wood base, along with a custom switch.

I headed to the Milwaukee Makerspace to use the laser-cutter.

Using the vector graphics program on the laser’s computer, I laid out an inscription for both the top and bottom of the snow globe base. I practiced on a piece of paper, and then when I actually focused the laser properly and had everything else figured out, I wood-burned the maple block, front and back.

I also used a solder station to add the momentary on switch to the greeting card electronics, so that the song would play whenever the globe was picked up to shake up the snow.

Next, was clear-coating the figure and the wood base. I used “Parks Super-Glaze”, a two-part epoxy clear coat used for bars, to completely seal and waterproof both the figure and the base, as well as to permanently attach the figure to the base.

Then, it was a matter to holding the globe upside down, filling it with water, filling the routed circular grove of the base with silicon glue, and flipping the figure and base, upside-down, into the dome of water. Once it was cured, the snow-globe can be flipped right-side-up, gift-wrapped, and put under the tree!

I’m glad to say that the project turned out just great! It was a bit of a stretch to my skill-set, so THANK YOU to the people who gave me a hand with it. Nothing quite like a project that runs the gamut from sculpture to wood-working, electronics, glass, water, laser-engraving, and more! But that’s how we grow… by stretching a little bit more every time!

Merry X-mas

From Ben the Snowman.

Roomba-Bot!

Today, I stopped in at the Makerspace with the plan to work on a small project for a Halloween party this Saturday.

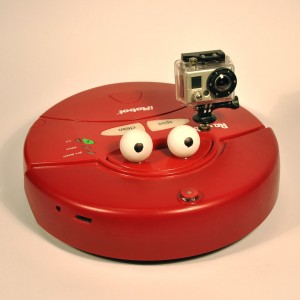
The plan was to take a “Roomba” robot vacuum cleaner that I got for $1.00 at a rummage sale, and covert it into the robot base for a giant spider or some other scary creature that could wander around at a Halloween party.

I started pulling screws out of the bottom to figure out how to remove the brushes and vacuum blower. It took some tinkering to figure out what I could and couldn’t remove and not cause a fault. In the end, it didn’t look like I could remove the blower motor and still have the thing run, so I simply removed the fan blades from the blower.

By that time, I was now thinking about video cameras and how easy it would be to run a 1/4-20 bolt right through the plastic. A bolt and two nuts quickly made a camera mount.

In the other room were some ping-pong balls, and I had a black sharpie. A little hot glue and Roomba-cam has some personality.

Look for Roomba-cam running around the Milwaukee Makerspace and please treat Roomba-cam nice – he is watching you and WILL upload to YouTube!

-Ben Nelson

Makerspace as video studio

A few days ago, I used the Makerspace as a video studio.

A while back, I made an instuctional video on building electric cars, but I have never really done enough promoting of it. I figured a good way to do it is simply to make a pitchman-style YouTube video.

I already had my seamless paper at the Makerspace for our movie night and the band at our opening. So, I set up the paper backdrop and a few of my lights. Instantly, the place went from looking like a metalshop to a video studio.

I WAS filming during the day, so there was a little noise from the neighboring business, but not too bad. It’s much quieter at nigh. There’s also a little echo there. For industrial videos, video blogging, and machine training this is no problem.

Here’s the video that I shot.

Just imagine the giant Makerspace logo right behind me.

-Ben